
Record an expense each time a vendor bills you. The expense is posted to the property's books, and can be paid now or later and passed through to tenants.
Recording expenses needs permission to create bills. The vendor needs an account at the property — if it doesn't have one, you can add it from the form (see Add a vendor while you record).
Open the form
Do one of the following:
- In Expenses, click Record expense. The form opens on the right.
- On a property's Expenses tab, click Record expense. The property is filled in and can't be changed. See The property Expenses tab.
- On a vendor's page, click ⋯ › Record expense, or Record expense on its Overview tab.
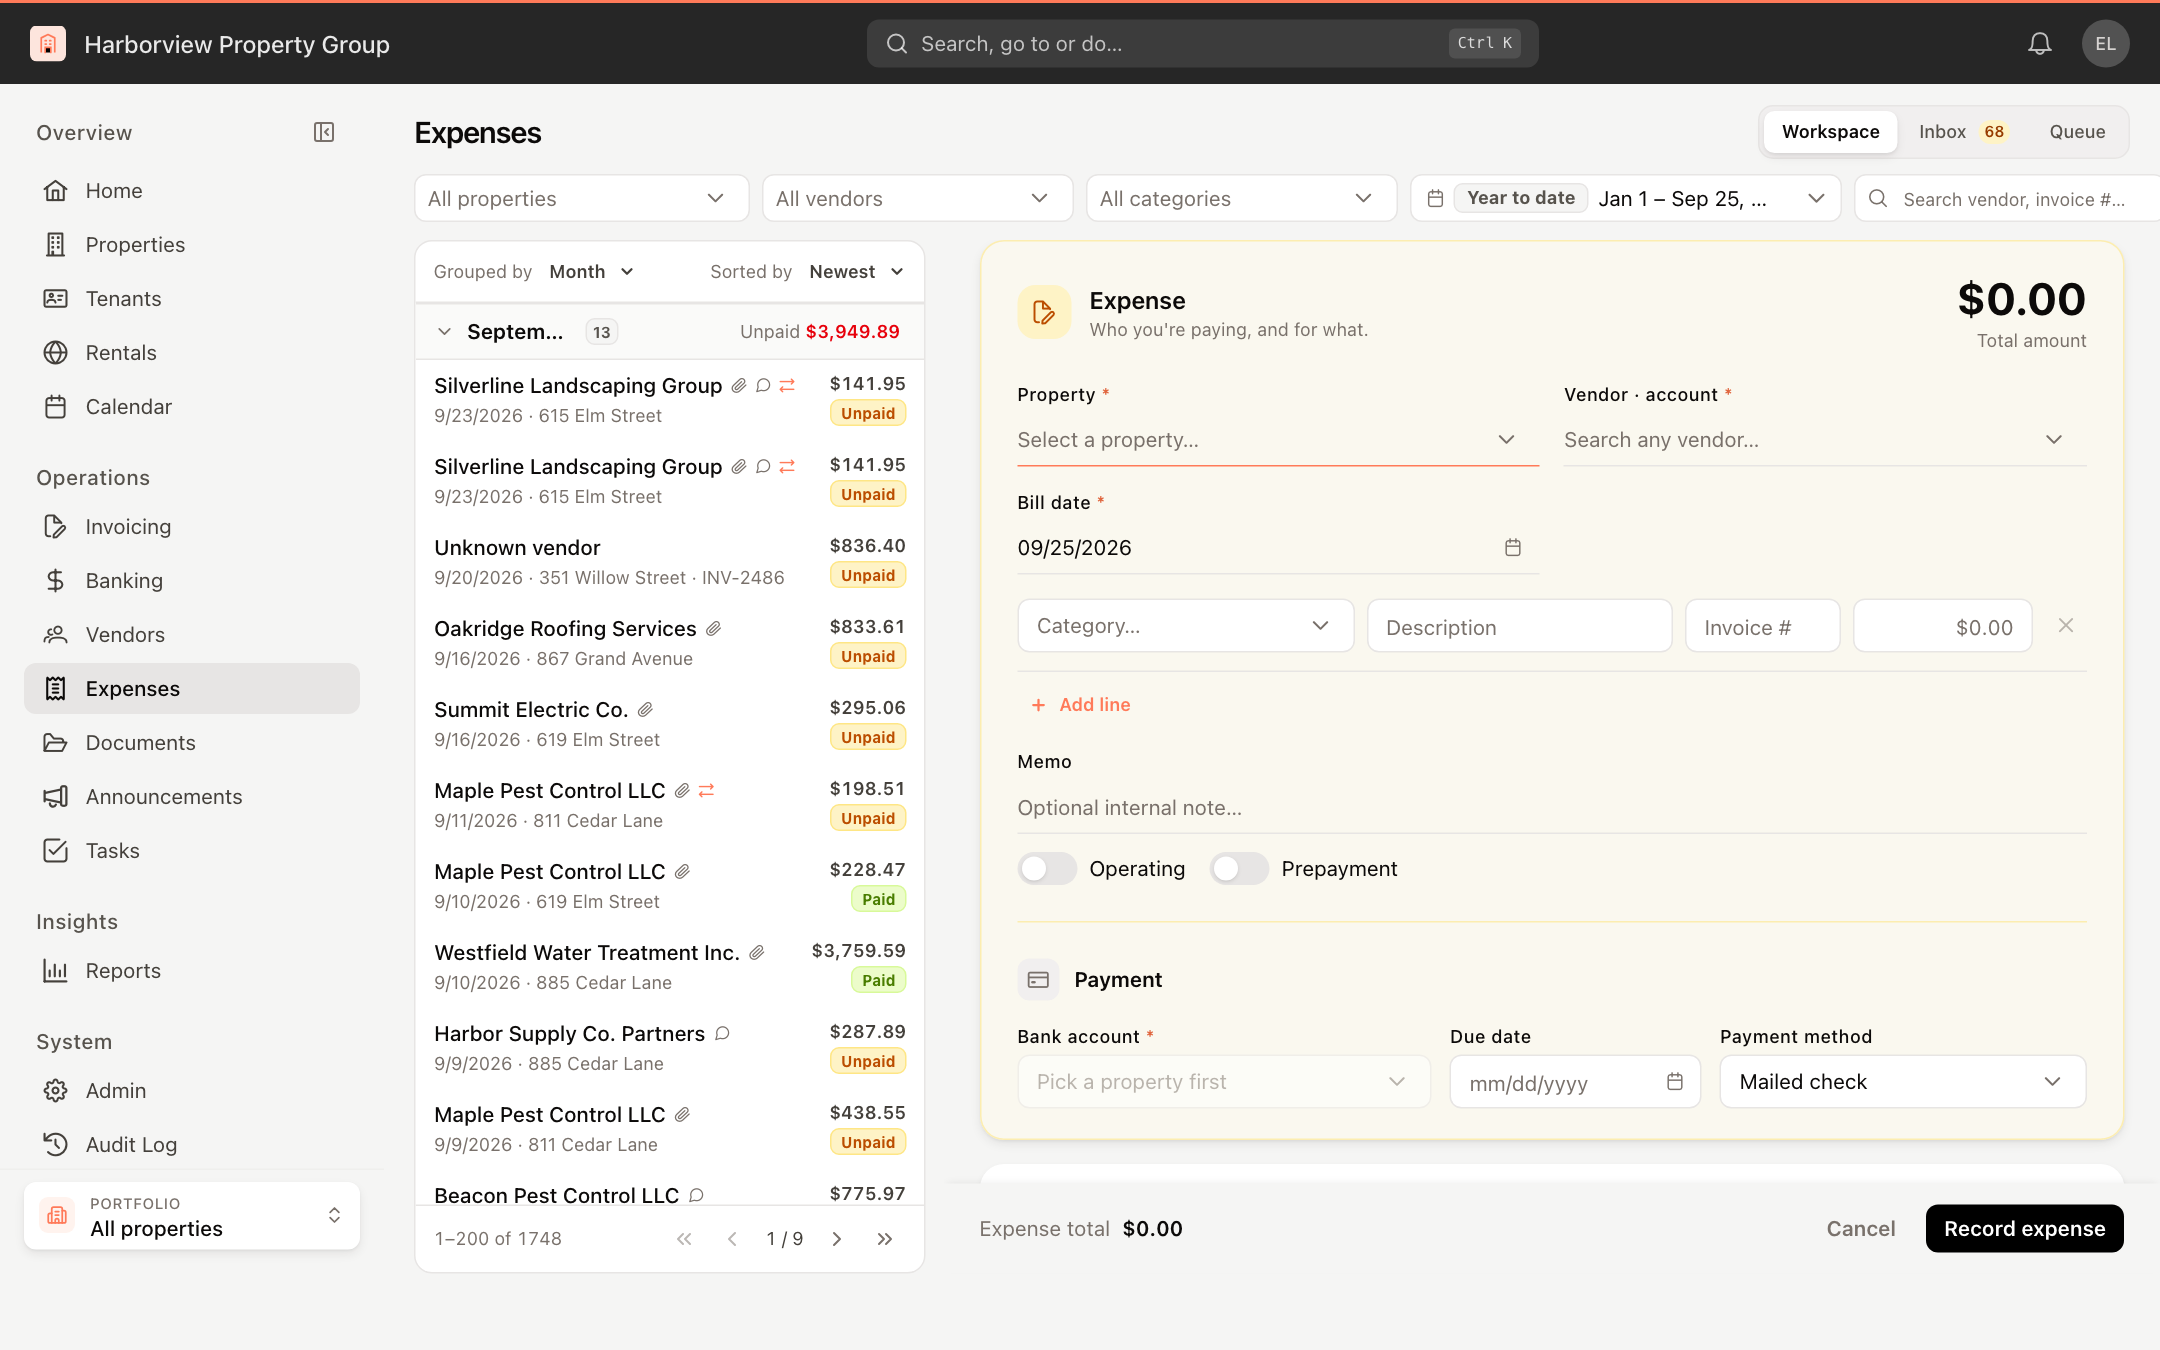
Fill in the expense
- Property — the property the bill belongs to.
- Vendor · account — start typing the vendor's name and pick the vendor account. The list shows each vendor with its account number. Picking an account fills in its bank account, its category and, for a single-line expense, the amount of the last expense on that account. Change any of them if they are wrong.
- Bill date — the date on the vendor's invoice. If the property's books are closed for that date, a hint tells you.
- The category line — choose a Category, and optionally enter a Description and the vendor's Invoice #. Enter the amount. To split the bill across several categories, click Add line; see Split an expense across categories.
- Memo — optional internal note.
- Set the flags if they apply:
- Operating — marks the expense as an operating expense. It is set from the category's default; the property Expenses tab can show operating expenses only, for example to prepare CAM reconciliation.
- Prepayment — for an expense that covers a period, such as an insurance premium. Enter Prepayment from and Prepayment to. CAM reconciliation uses this period, so a premium that covers part of two years is counted in each year appropriately.
The Total amount at the top and Expense total at the bottom update as you type.
Paid or unpaid
Under Payment, choose whether the bill has already been paid:
- Paid — enter the Bank account, the Check/ref #, the Due date and the Paid date. The paid date starts at today.
- Unpaid — enter the Bank account, the Due date and the Payment method you plan to use (Mailed check, ACH / bank transfer, Card or Auto-debit). You pay it later from the expense; see Pay an expense and print checks.
If an administrator has turned on Record and pay separately (Admin › Accounts payable), there is no Paid/Unpaid choice: every new expense is recorded unpaid and paid afterwards. See Accounts payable settings.
Attach the invoice
Under Attachments, click Upload or drop files onto the box. The files are saved with the expense when you record it. (Attaching needs permission to manage expense documents.)
Pass it through (optional)
To re-bill the expense to tenants, turn on Pass through to tenants. See Pass an expense through to tenants.
Save
Click Record expense (or Record & pay expense when Paid is selected). If a required field is missing, it is highlighted and Complete the highlighted fields appears next to the button.
When the expense is saved you can Open expense or Record another expense.
Add a vendor while you record
If the vendor or its account doesn't exist yet, you don't have to leave the form. Choose a property first, then open Vendor · account:
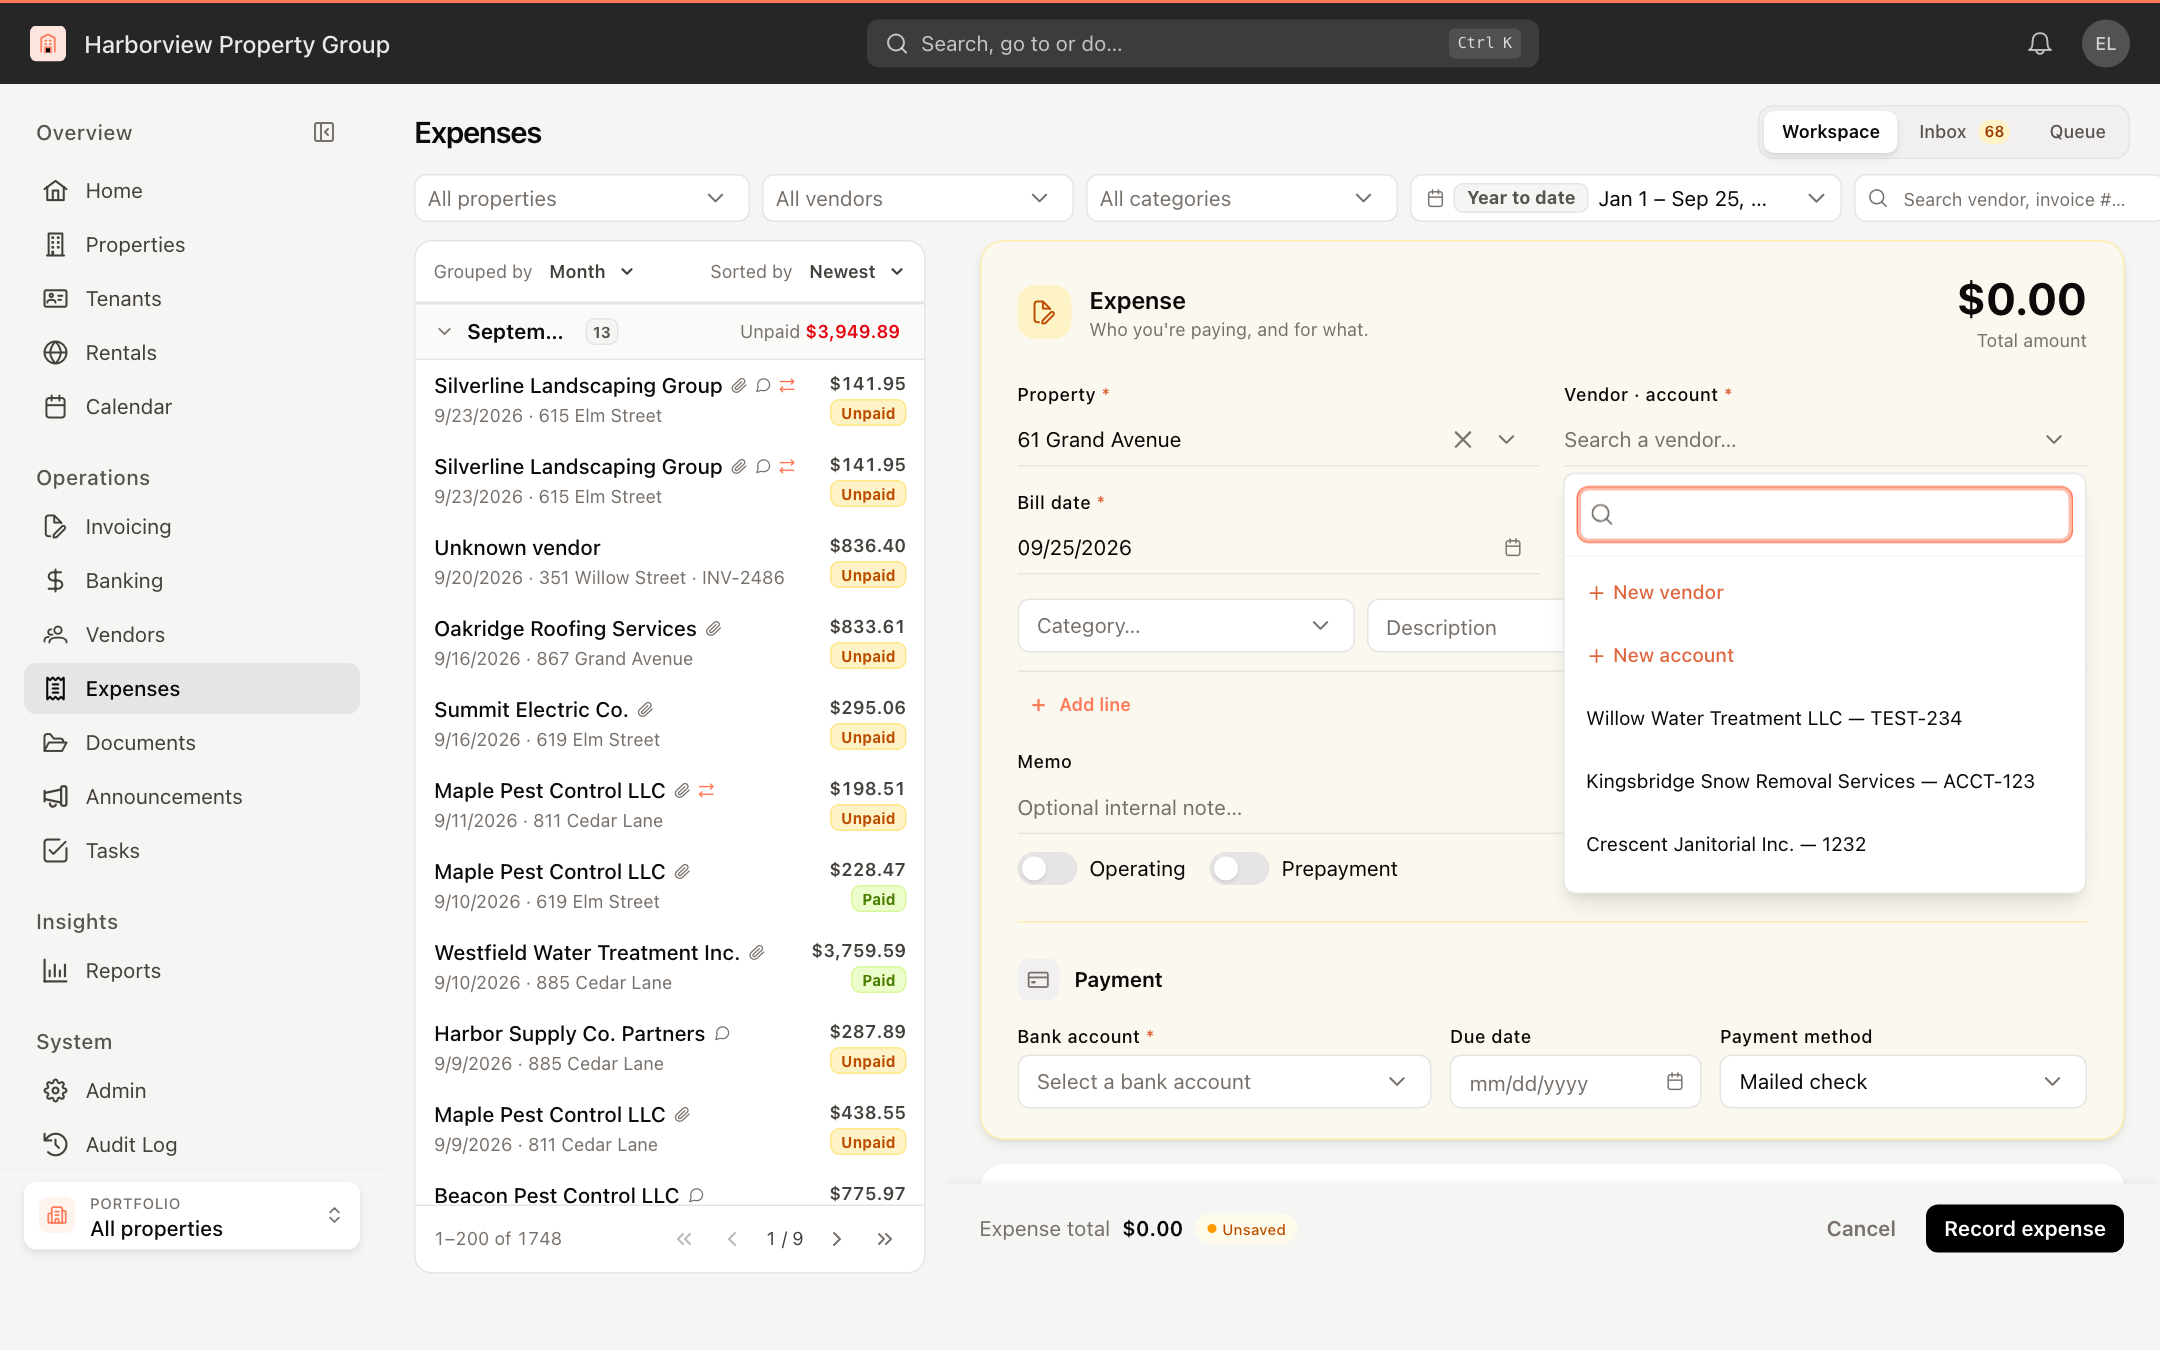
- New vendor — creates a vendor and its first account at this property. Enter the Vendor name, Vendor type and Default GL account, then the account settings (account number, bank account and so on). Click Create vendor.
- New account — adds an account at this property for an existing vendor. Pick the Vendor, fill in the account settings and click Add account.
The new account is selected in the form when you finish.