
The enhanced accounts payable (AP) workflow adds two views beside the Expenses workspace:
- Inbox — vendor invoices waiting to be recorded, from uploads or email.
- Queue — recorded expenses that are still owed, ordered by when they have to be paid.
Switch between Workspace, Inbox and Queue with the control at the top right of Expenses. The number next to Inbox is how many items need processing.
The Inbox and Queue appear only when the enhanced AP workflow is available for your company and an administrator has turned on Use enhanced AP workflow in Admin › Accounts payable (see Accounts payable settings). The Queue needs permission to view bills; the Inbox needs permission to create bills. If the feature isn't available, contact UnitConnect.
The Inbox
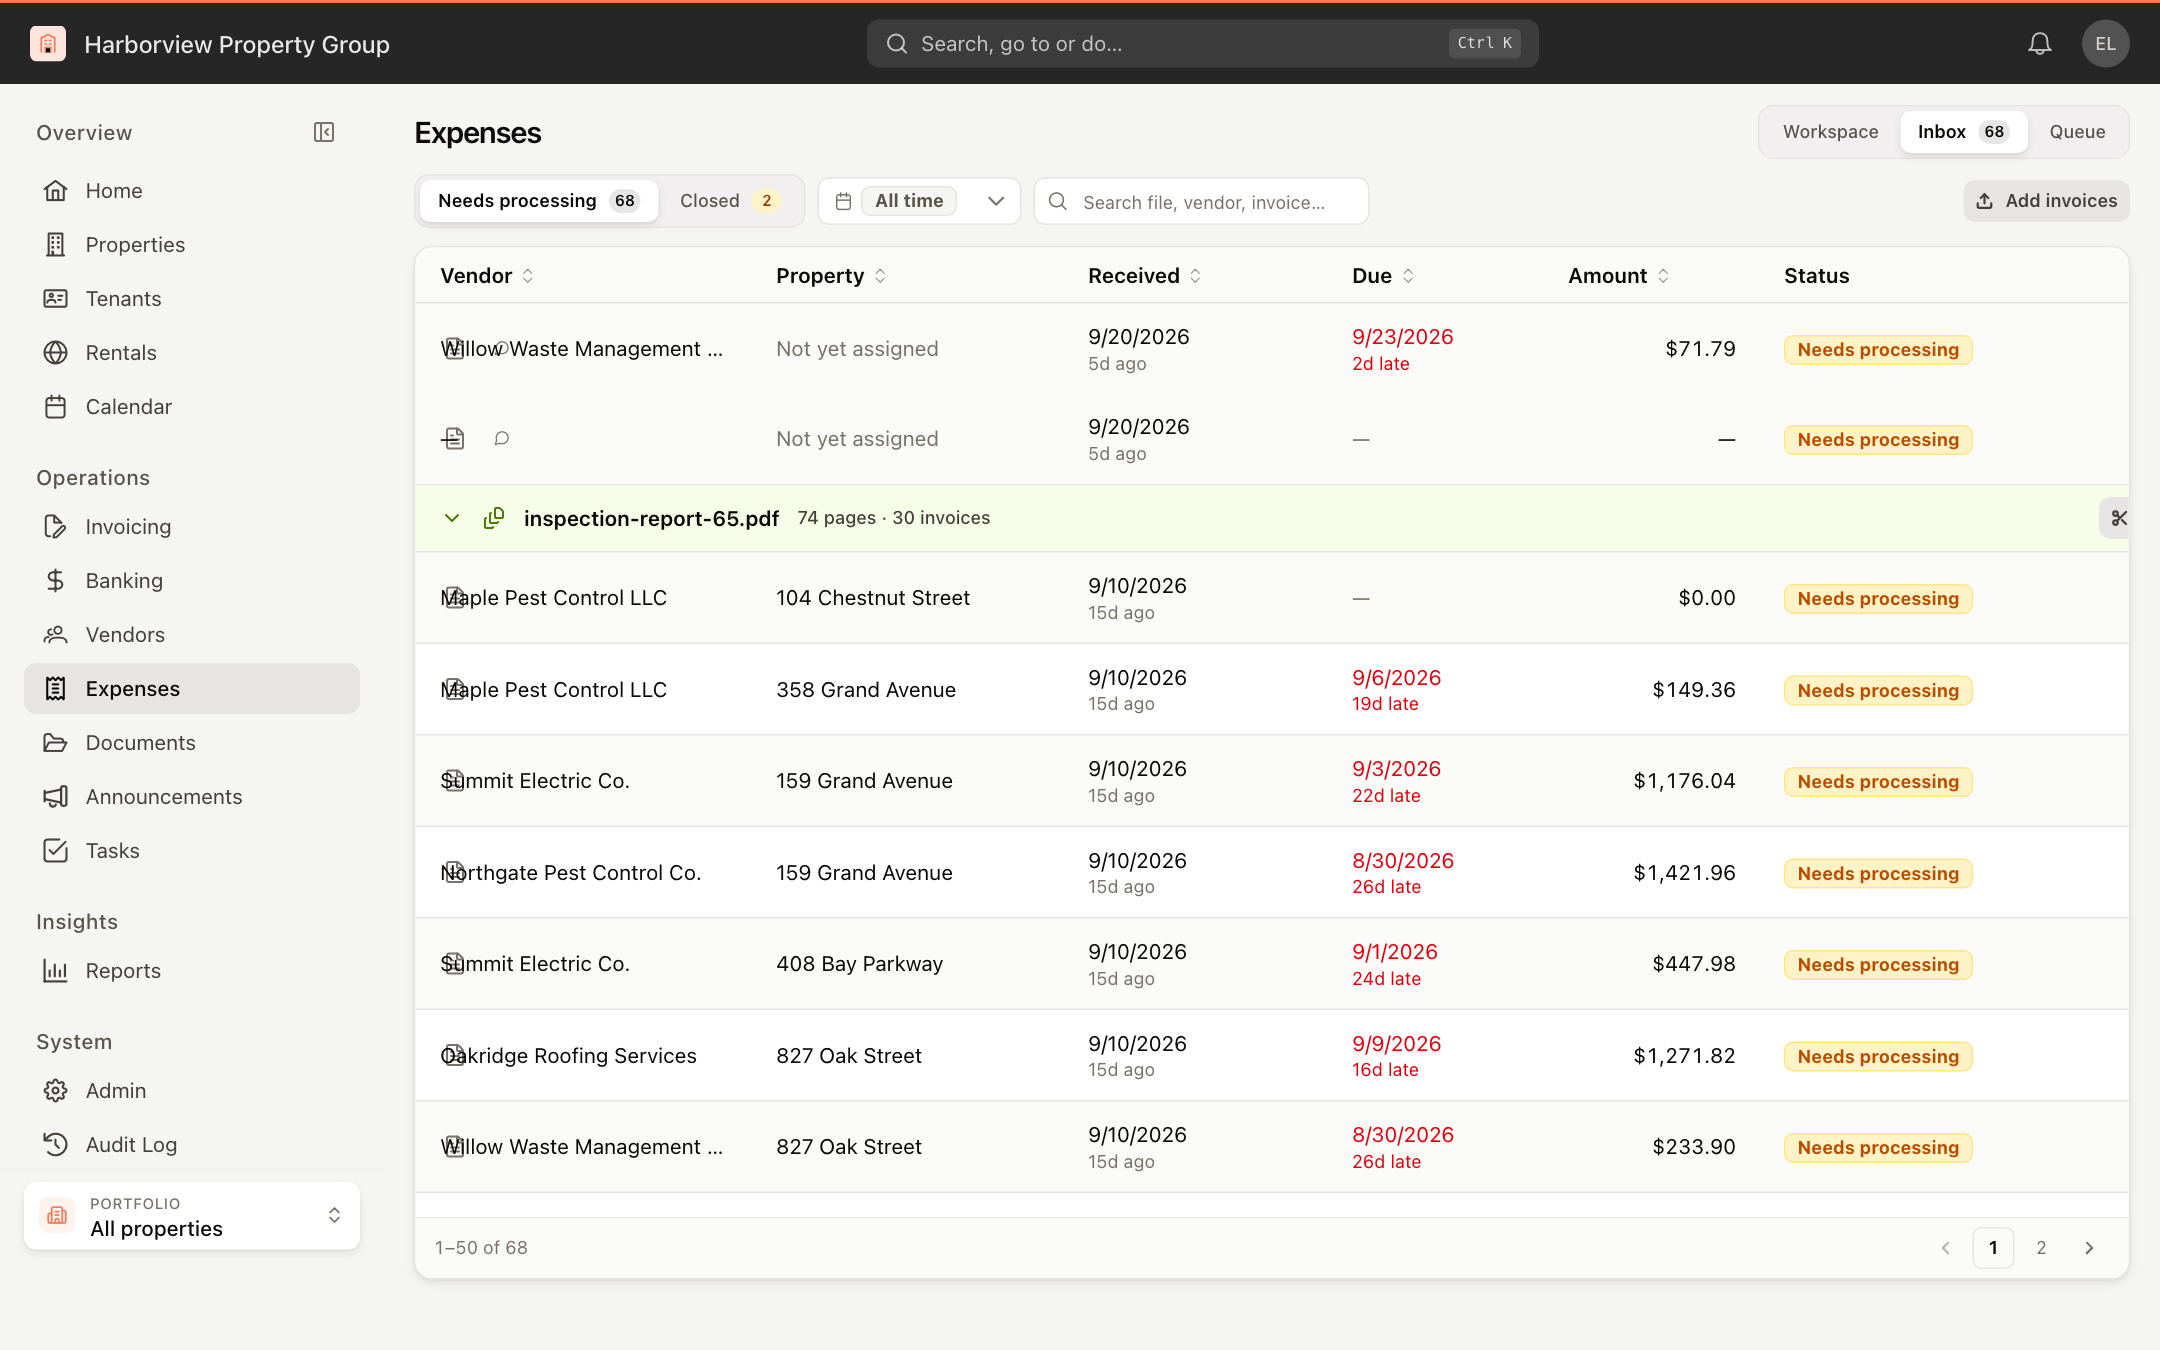
Needs processing lists invoices that haven't been dealt with; Closed lists ones that were dismissed. Filter by the date received, or search by file name, vendor or invoice number.
Add invoices
- Click Add invoices and choose one or more files — PDFs or images (PNG, JPEG, TIFF, HEIC, WebP, GIF).
- Or have vendors email invoices to your company's inbox address, set up in Accounts payable settings.
UnitConnect reads each invoice and fills in what it finds, such as the vendor, property, due date and amount. A multi-page scan with several invoices in it appears as a band over its invoices; click Change split on the band if the invoices start on the wrong pages.
Turn an invoice into an expense
- Click Review on the row.
- The invoice is shown beside the same form used to record an expense, filled in from the invoice. Check every field — especially the Vendor · account, property, categories and amount — and correct anything that is wrong.
- Click Create expense. The next invoice opens, so you can work through the inbox. Use the previous and next arrows at the top to move between invoices without saving.
The document can be moved to the other side of the form with the layout button at the top.
Dismiss an invoice
If the item isn't a bill you will pay, click the Not an invoice, or not one we are paying button at the top of the review screen. In Resolve this item, choose:
- Not an invoice — a statement, a notice, or junk in the scan.
- Reject — a bill you are not going to pay. A reason is required.
Click Resolve. The item moves to Closed. To bring it back, click Return to inbox on its row.
The Queue
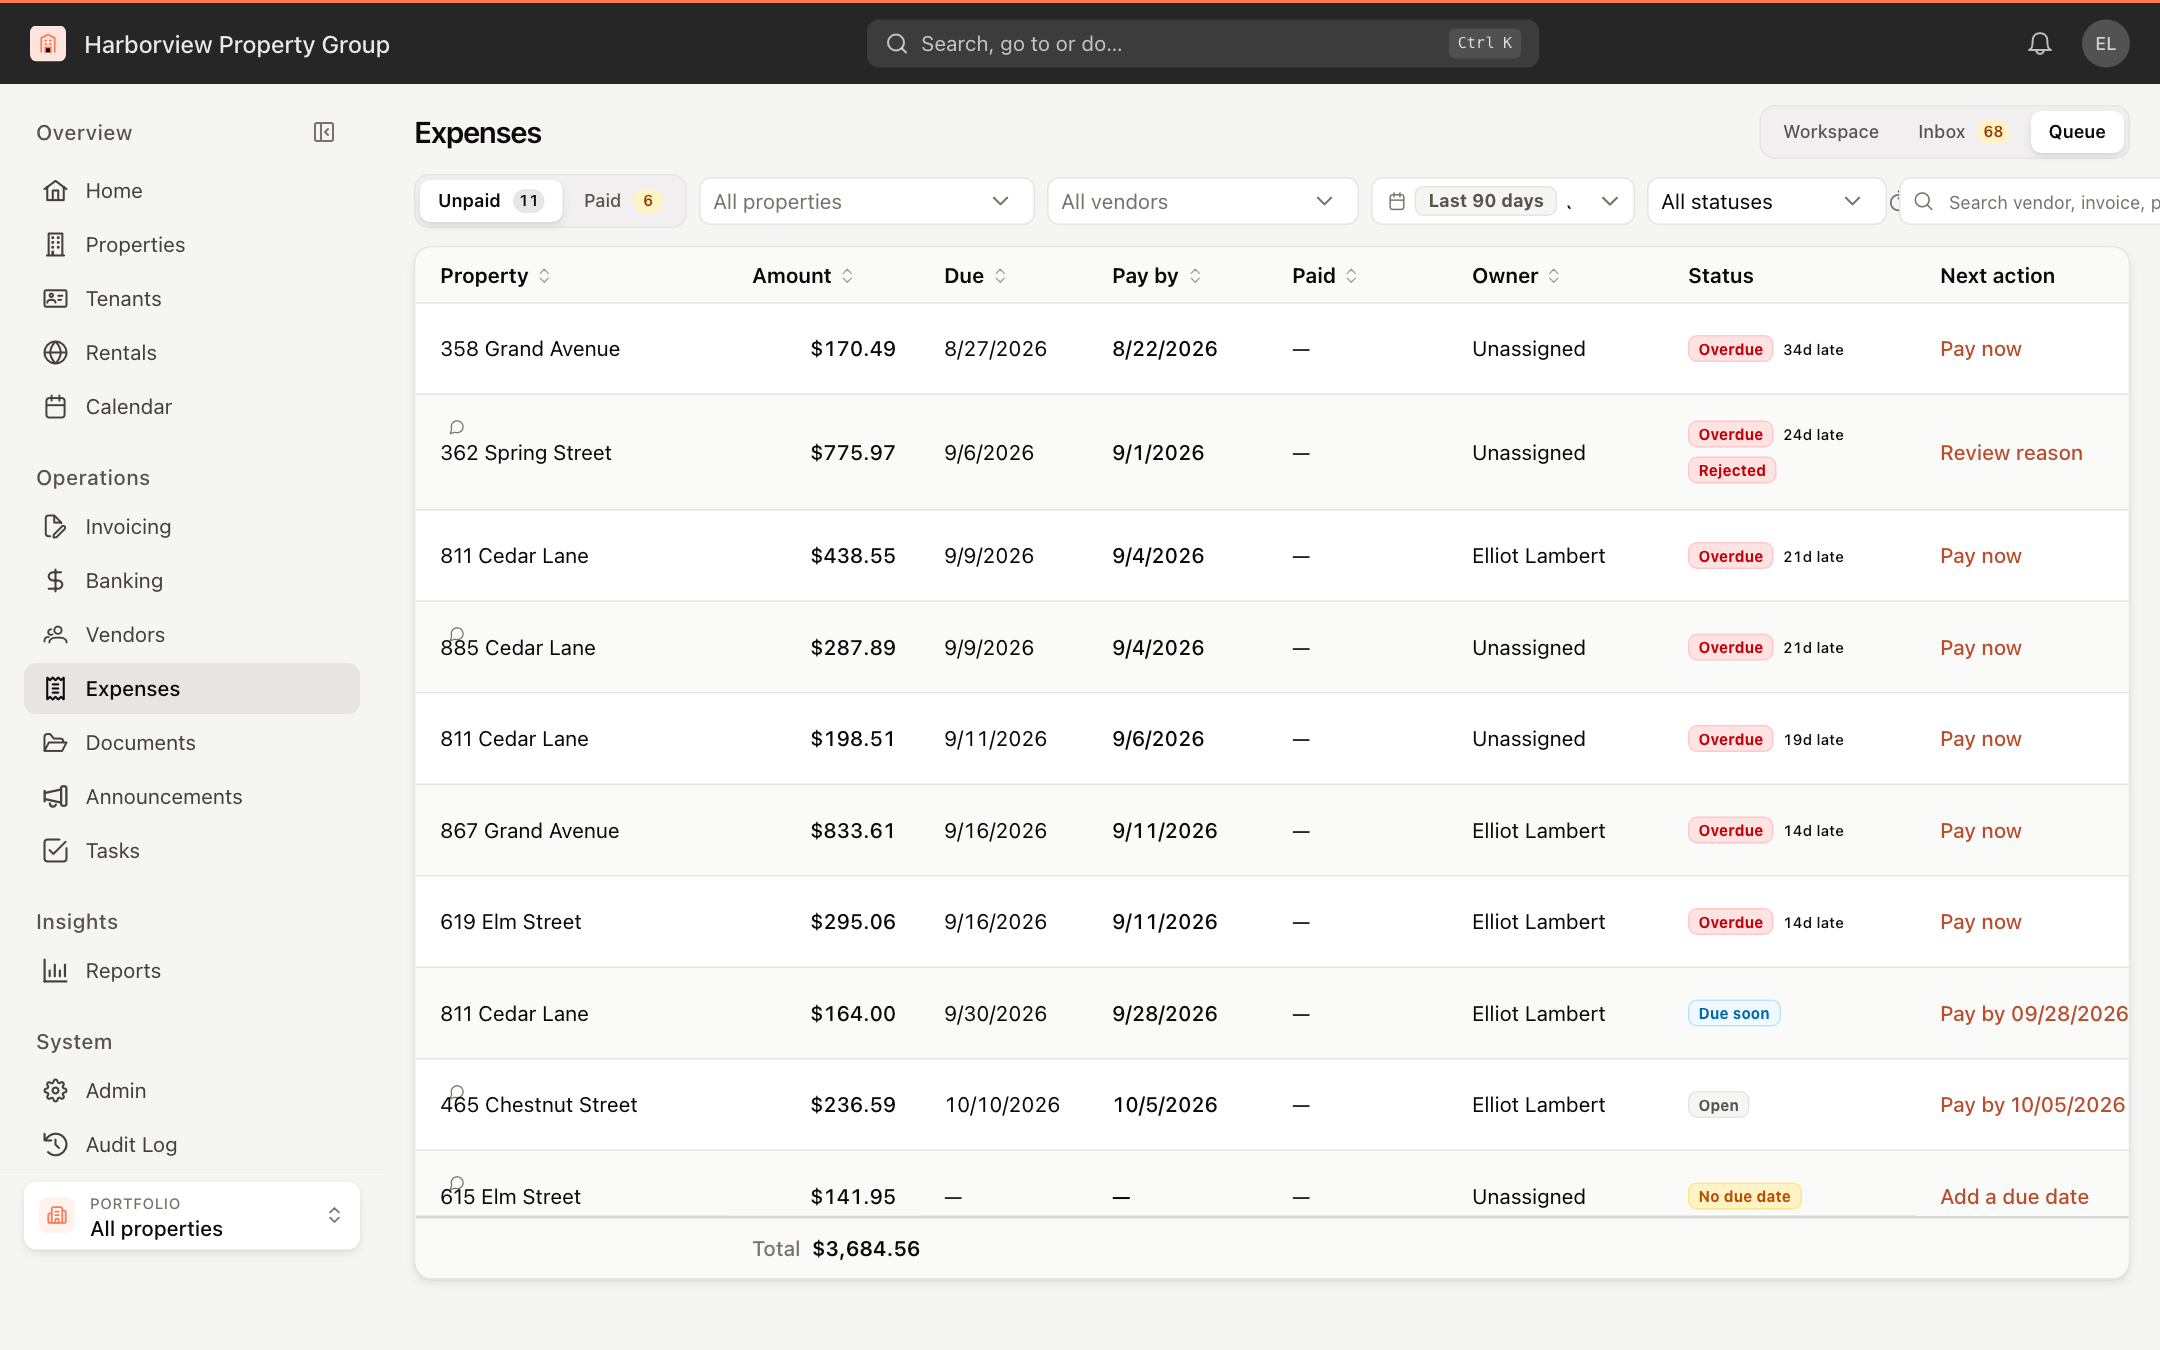
Unpaid lists everything still owed; Paid lists recent payments. Filter by property, vendor, date range and status, or search by vendor, invoice or property.
Each row shows the Amount, the vendor's Due date, the Pay by date (the due date moved earlier to allow for how the payment travels), the Owner, the Status and the Next action — for example Pay now, Pay by a date, Add a due date, Approve or Review reason. Click a row to act on it.
Click ⋮ on a row for:
- Open expense — open it in the workspace, where you can pay it.
- Set payment terms — in Payment terms, set the Vendor due date, the Payment method and, if needed, Override the pay-by date. Click Save payment terms.
- Approve and Return to review — when approval before paying is required and you may approve bills.
Paying from the queue works like paying any expense; see Pay an expense and print checks.