
Before you can record an expense, the company you pay has to exist as a vendor. Creating a vendor takes four short steps. Afterwards, you link the vendor to each property you pay it from (vendor accounts).
Creating vendors needs permission to edit vendors. If you don't see Add vendor, ask an administrator.
Start the wizard
- In the sidebar, click Vendors.
- At the top of the vendor list, click + (Add vendor).
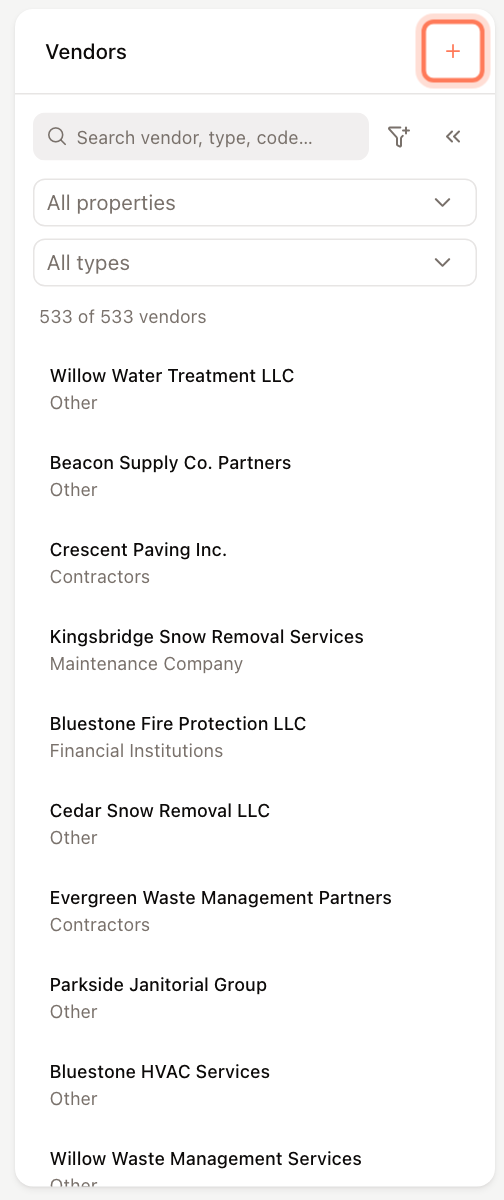
The Create a vendor wizard opens over the vendor workspace. The steps are listed on the left. You can go back to any step you have already visited by clicking it.
The wizard saves a draft in your browser as you type. If you close it and open it again, you're asked whether to Restore draft or Start fresh.
Step 1 — Basics
- Vendor name (required) — the company or person you pay, for example "Northside Elevator Co.".
- Type (required) — how you classify the vendor, such as a trade or service category.
- Vendor since — optional start date of the relationship.
- Description — optional note about what the vendor handles.
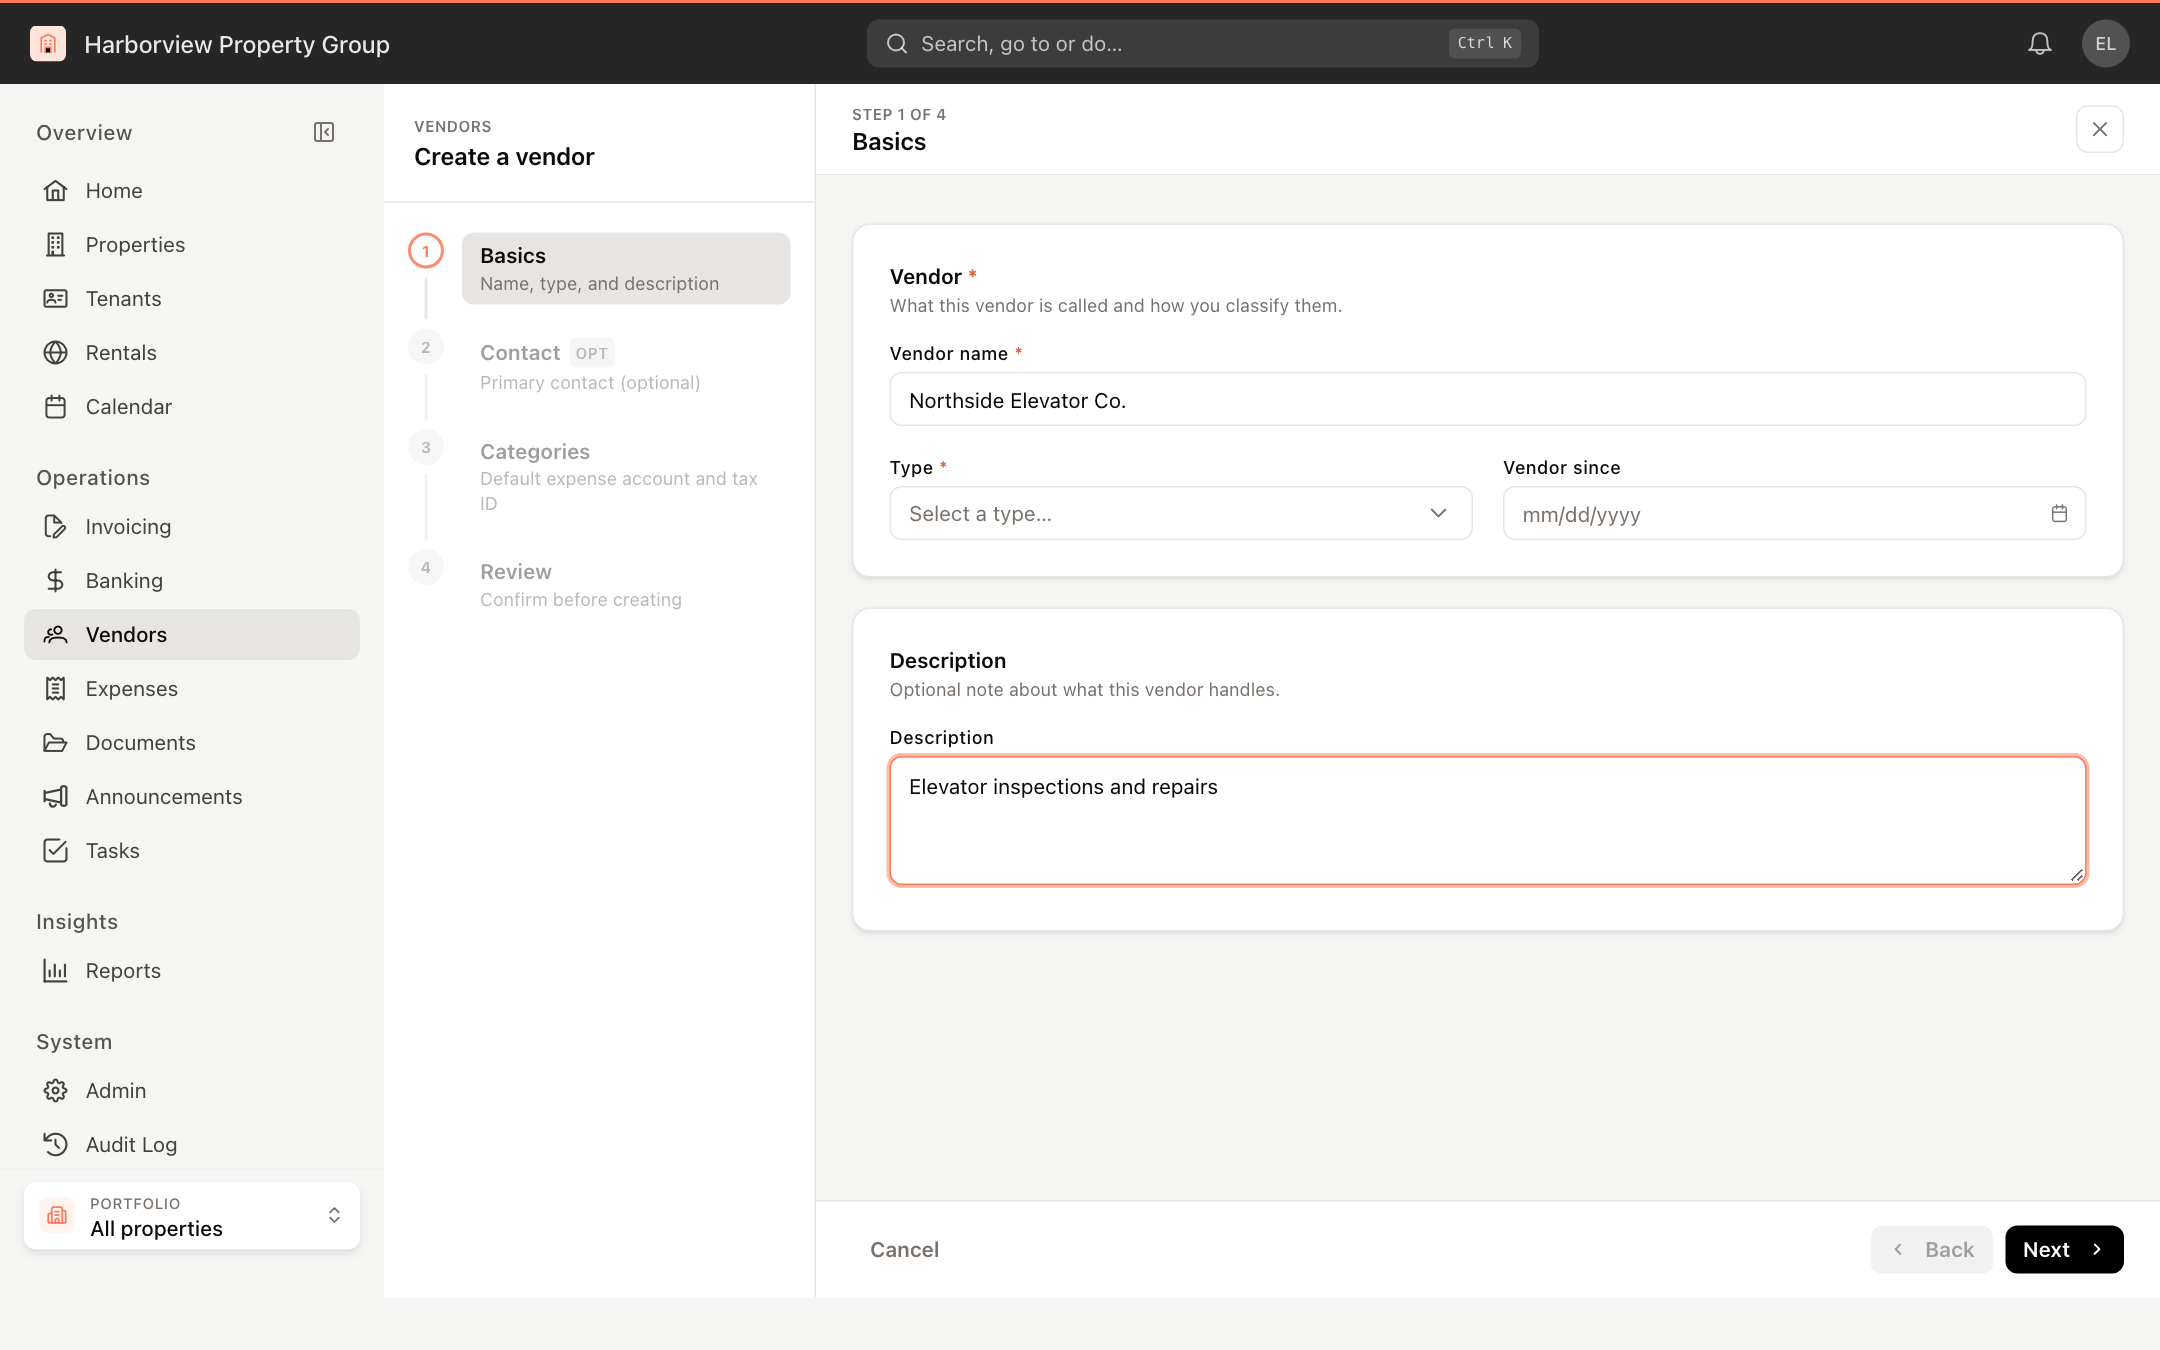
Click Next.
Step 2 — Contact (optional)
Add the person you deal with and where invoices and notices should go: Contact name, Email, Phone, and a mailing address (Street address, City, State, Zip). Skip the step by clicking Next if you don't have these yet. You can add more contacts later.
Step 3 — Categories
- Default expense account (required) — the GL account expenses from this vendor post to by default. You can override it for each property account later.
- Tax ID / EIN — optional. It is stored as a custom field named "Tax Id" on the vendor.
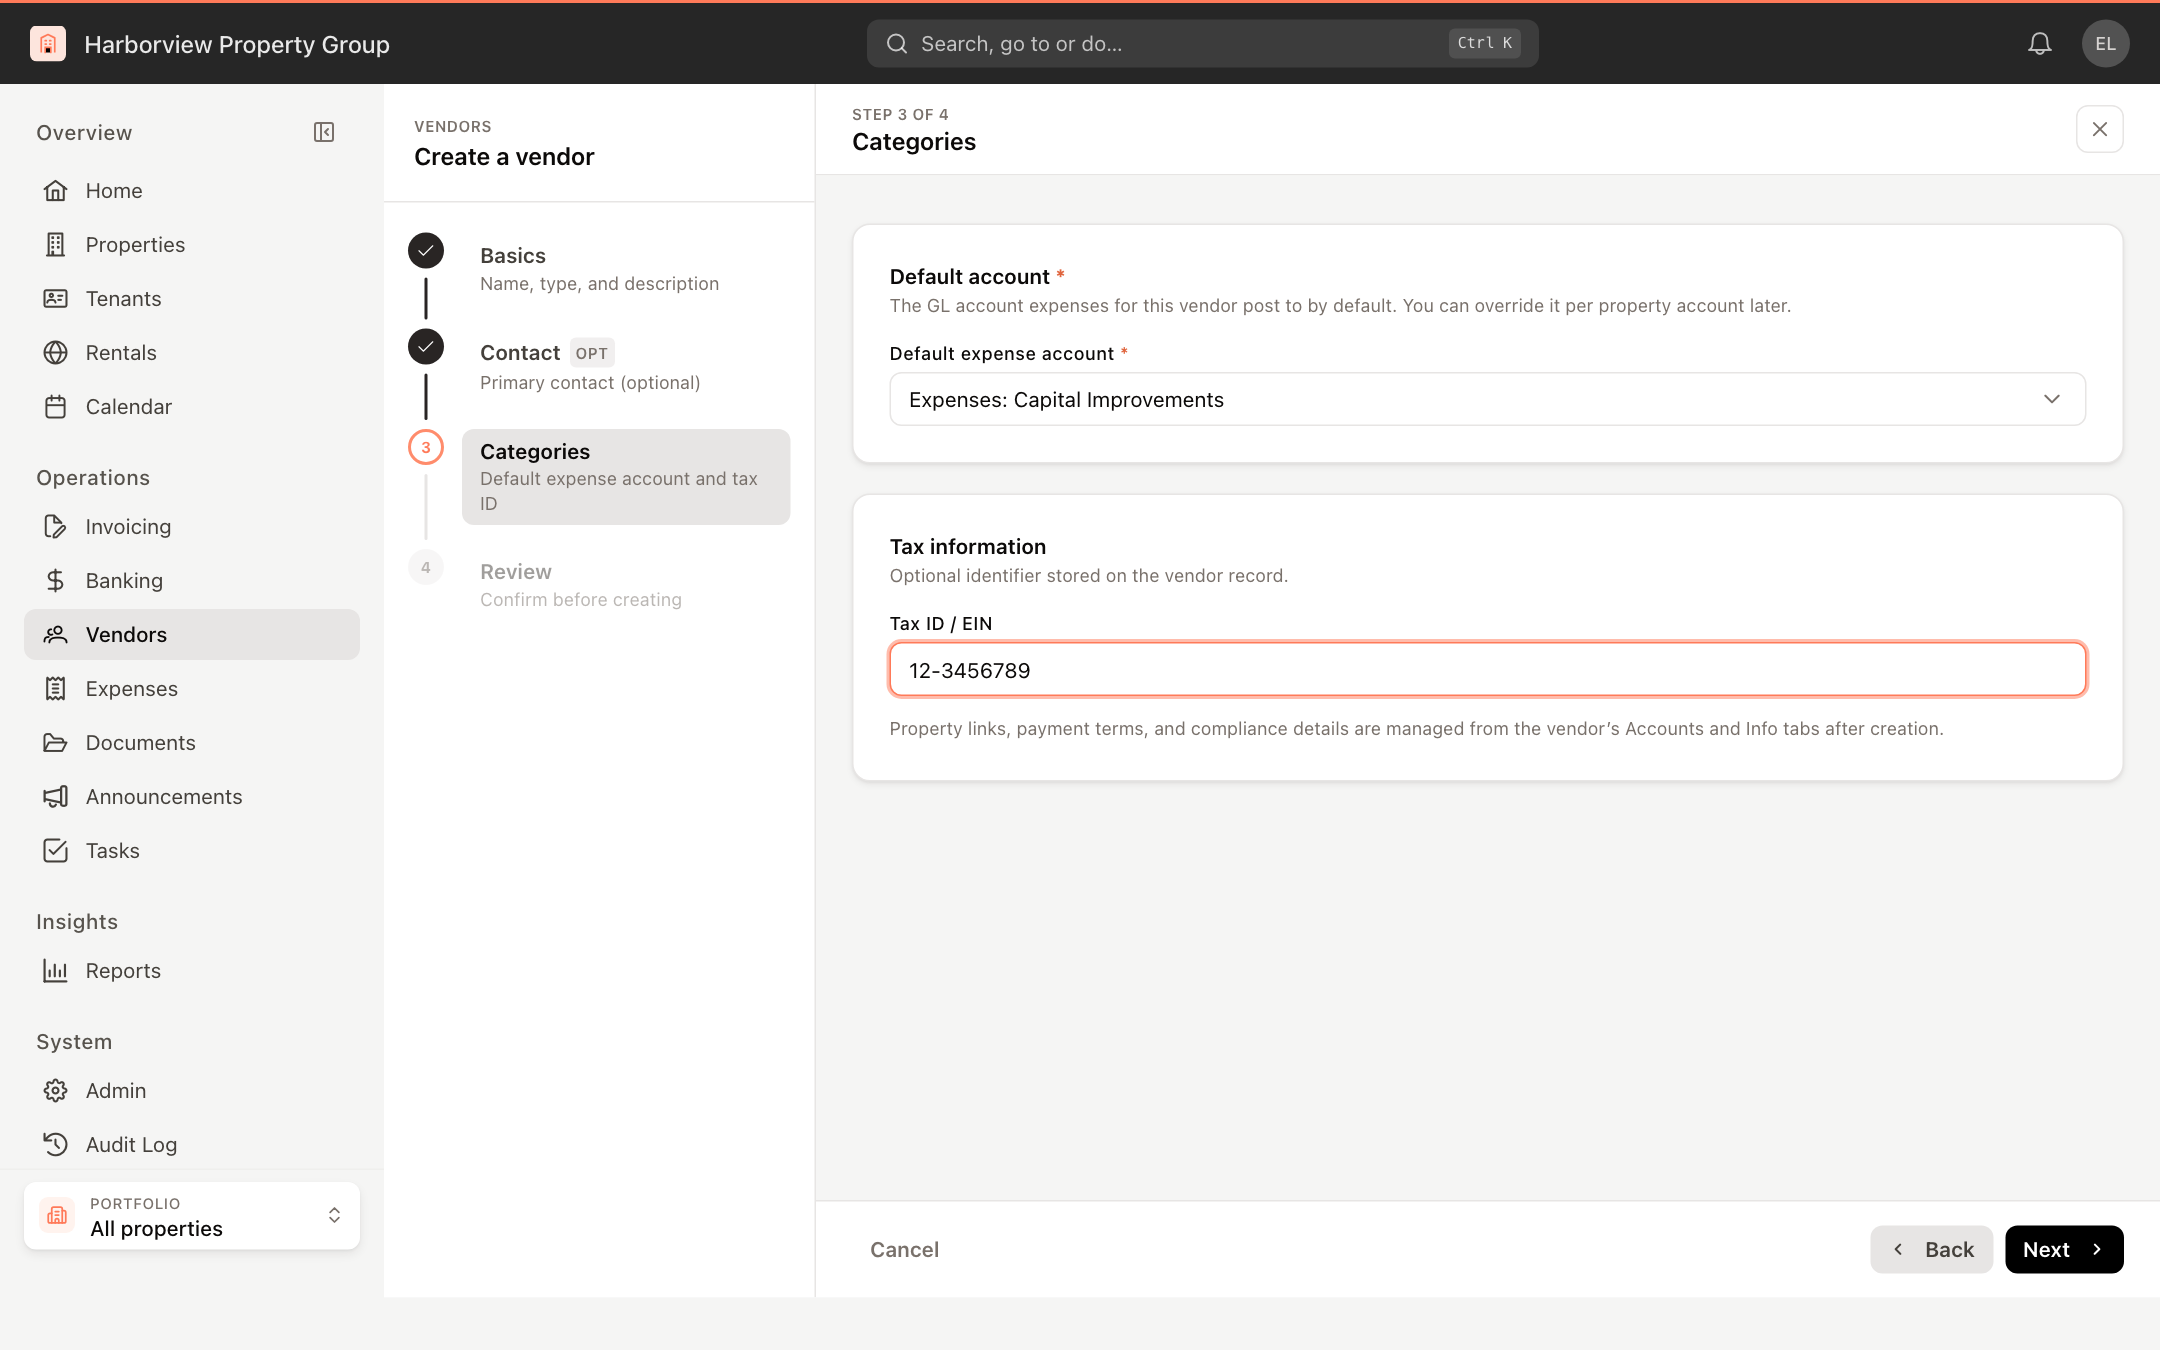
Click Next.
Step 4 — Review and create
Check the summary. Click Change next to any section to go back and fix it. When everything is right, click Create vendor.
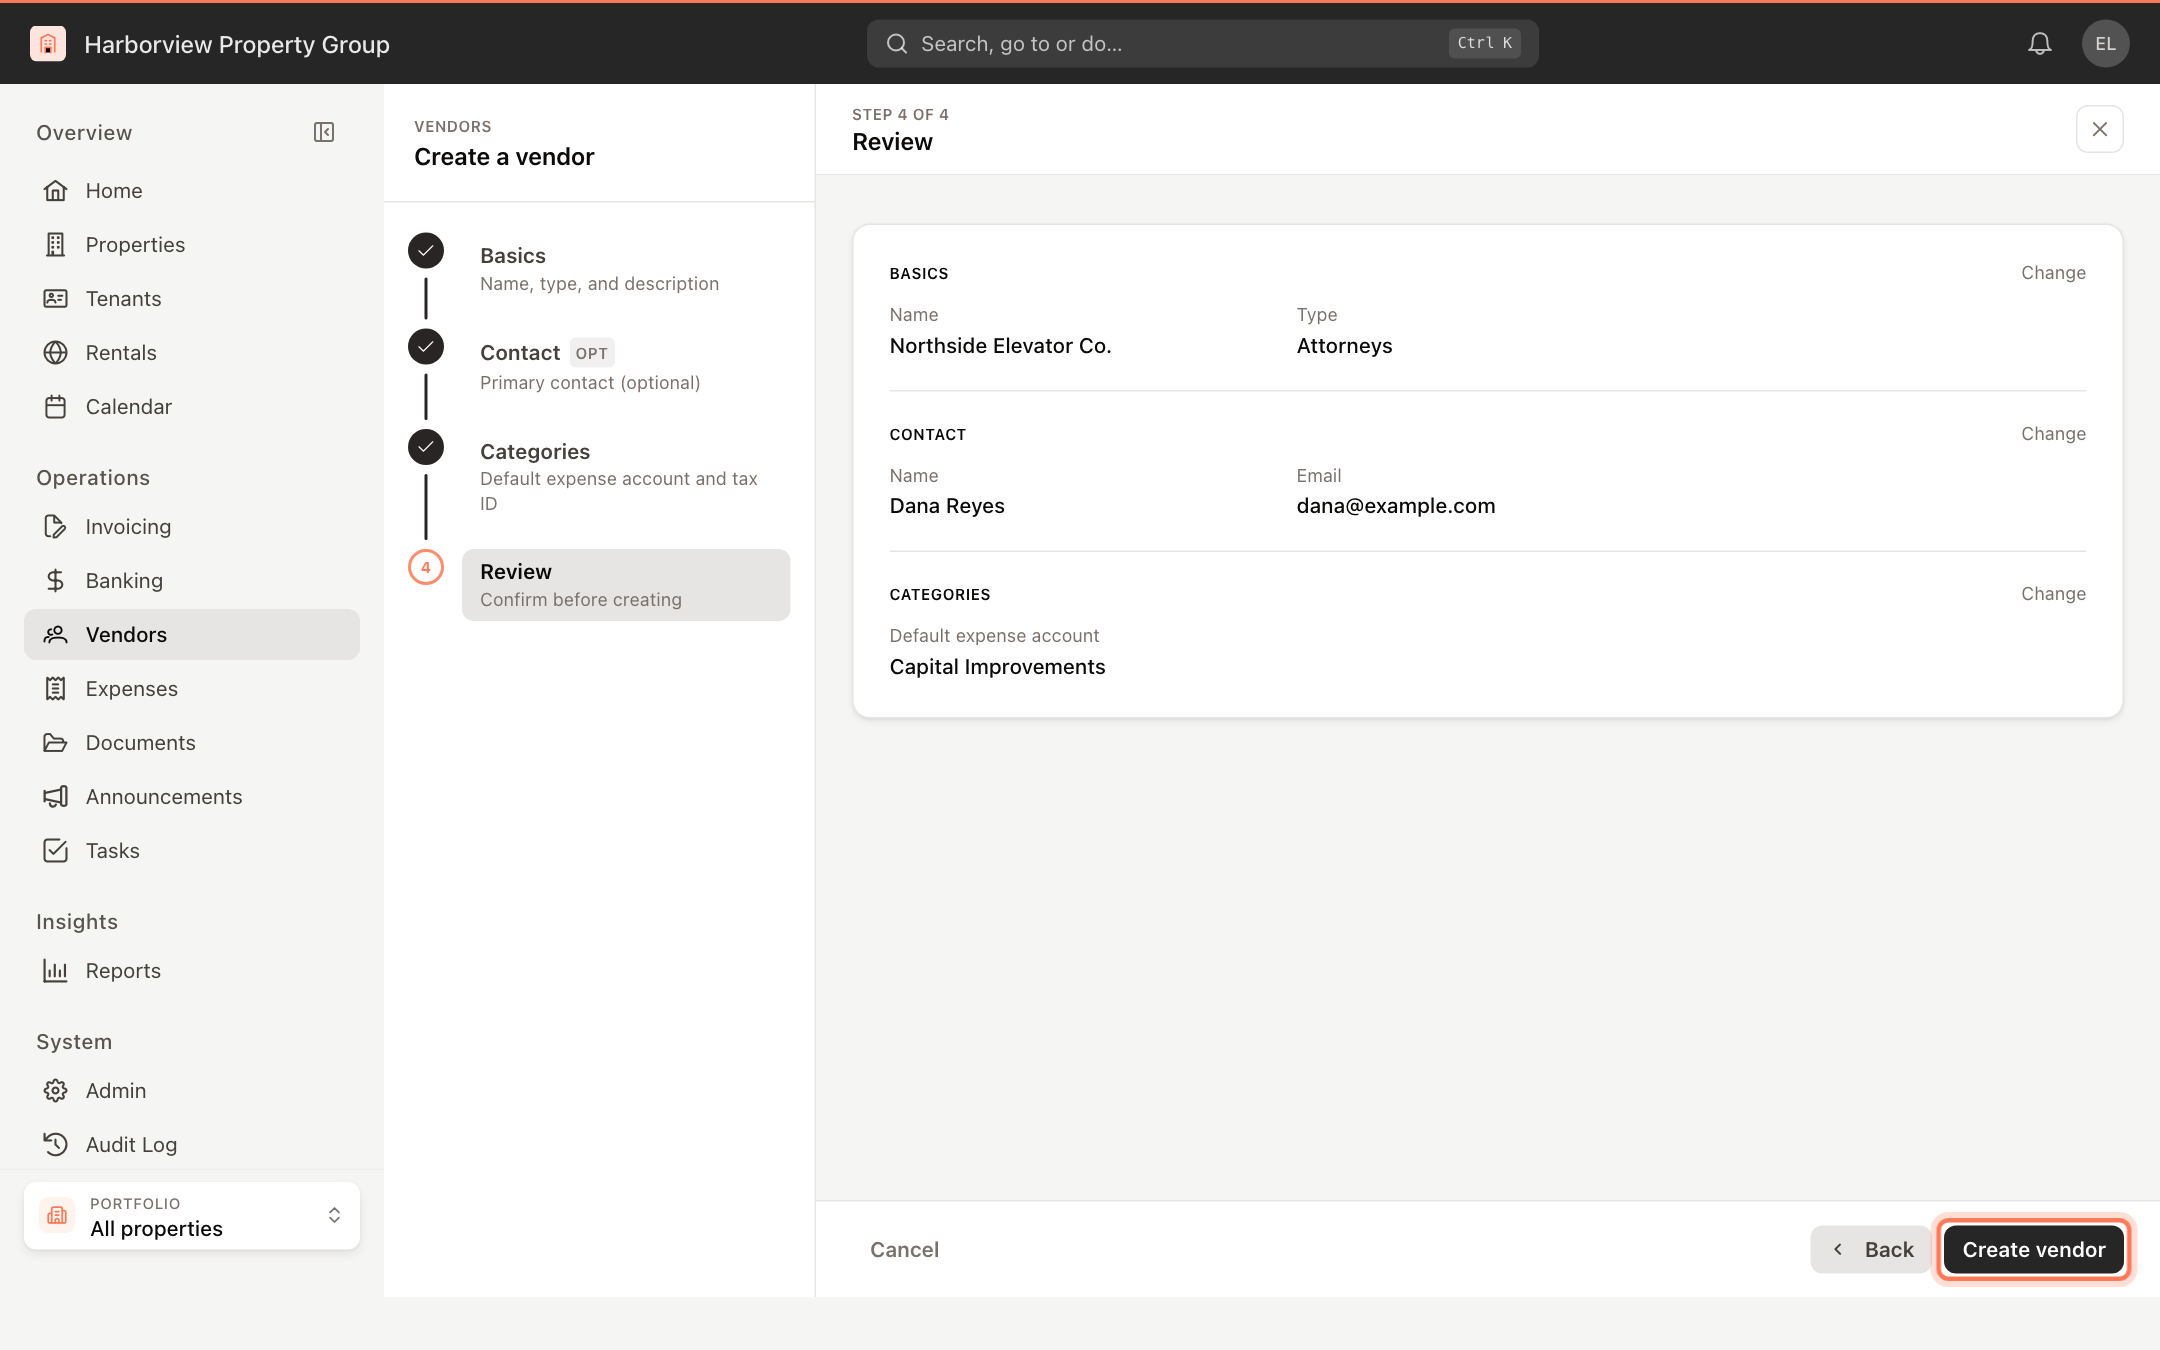
When the vendor is created you can:
- Open vendor profile — go to the new vendor's page.
- Link a property account — set up the account at a property (bank, units and passthrough). See Link a vendor to a property.
- Contacts — add or edit people for this vendor.
- Add another vendor — start the wizard again.
A new vendor isn't linked to any property. You can't record an expense for it until it has an account at the property. You can also create the vendor and its first account from the expense form itself; see Record an expense.