
A vendor is shared across your whole company. What ties it to a property is a vendor account: the account number you have with the vendor at that property, plus the defaults UnitConnect uses when you record an expense against it. One vendor can have many accounts — one per property, or several at the same property (for example, one per utility meter).
When you pick a vendor account on an expense, UnitConnect fills in its bank account and category and, if units are linked, sets up the passthrough to tenants for you.
Adding and changing accounts needs permission to edit vendors.
See a vendor's accounts
- In the sidebar, click Vendors and select the vendor.
- Click the Accounts tab.
Each row shows the Property, Account #, Bank account, Categories and Status. Use the search box to find a property or account number. The filter button next to it narrows the list by Status, Bank account or Category.
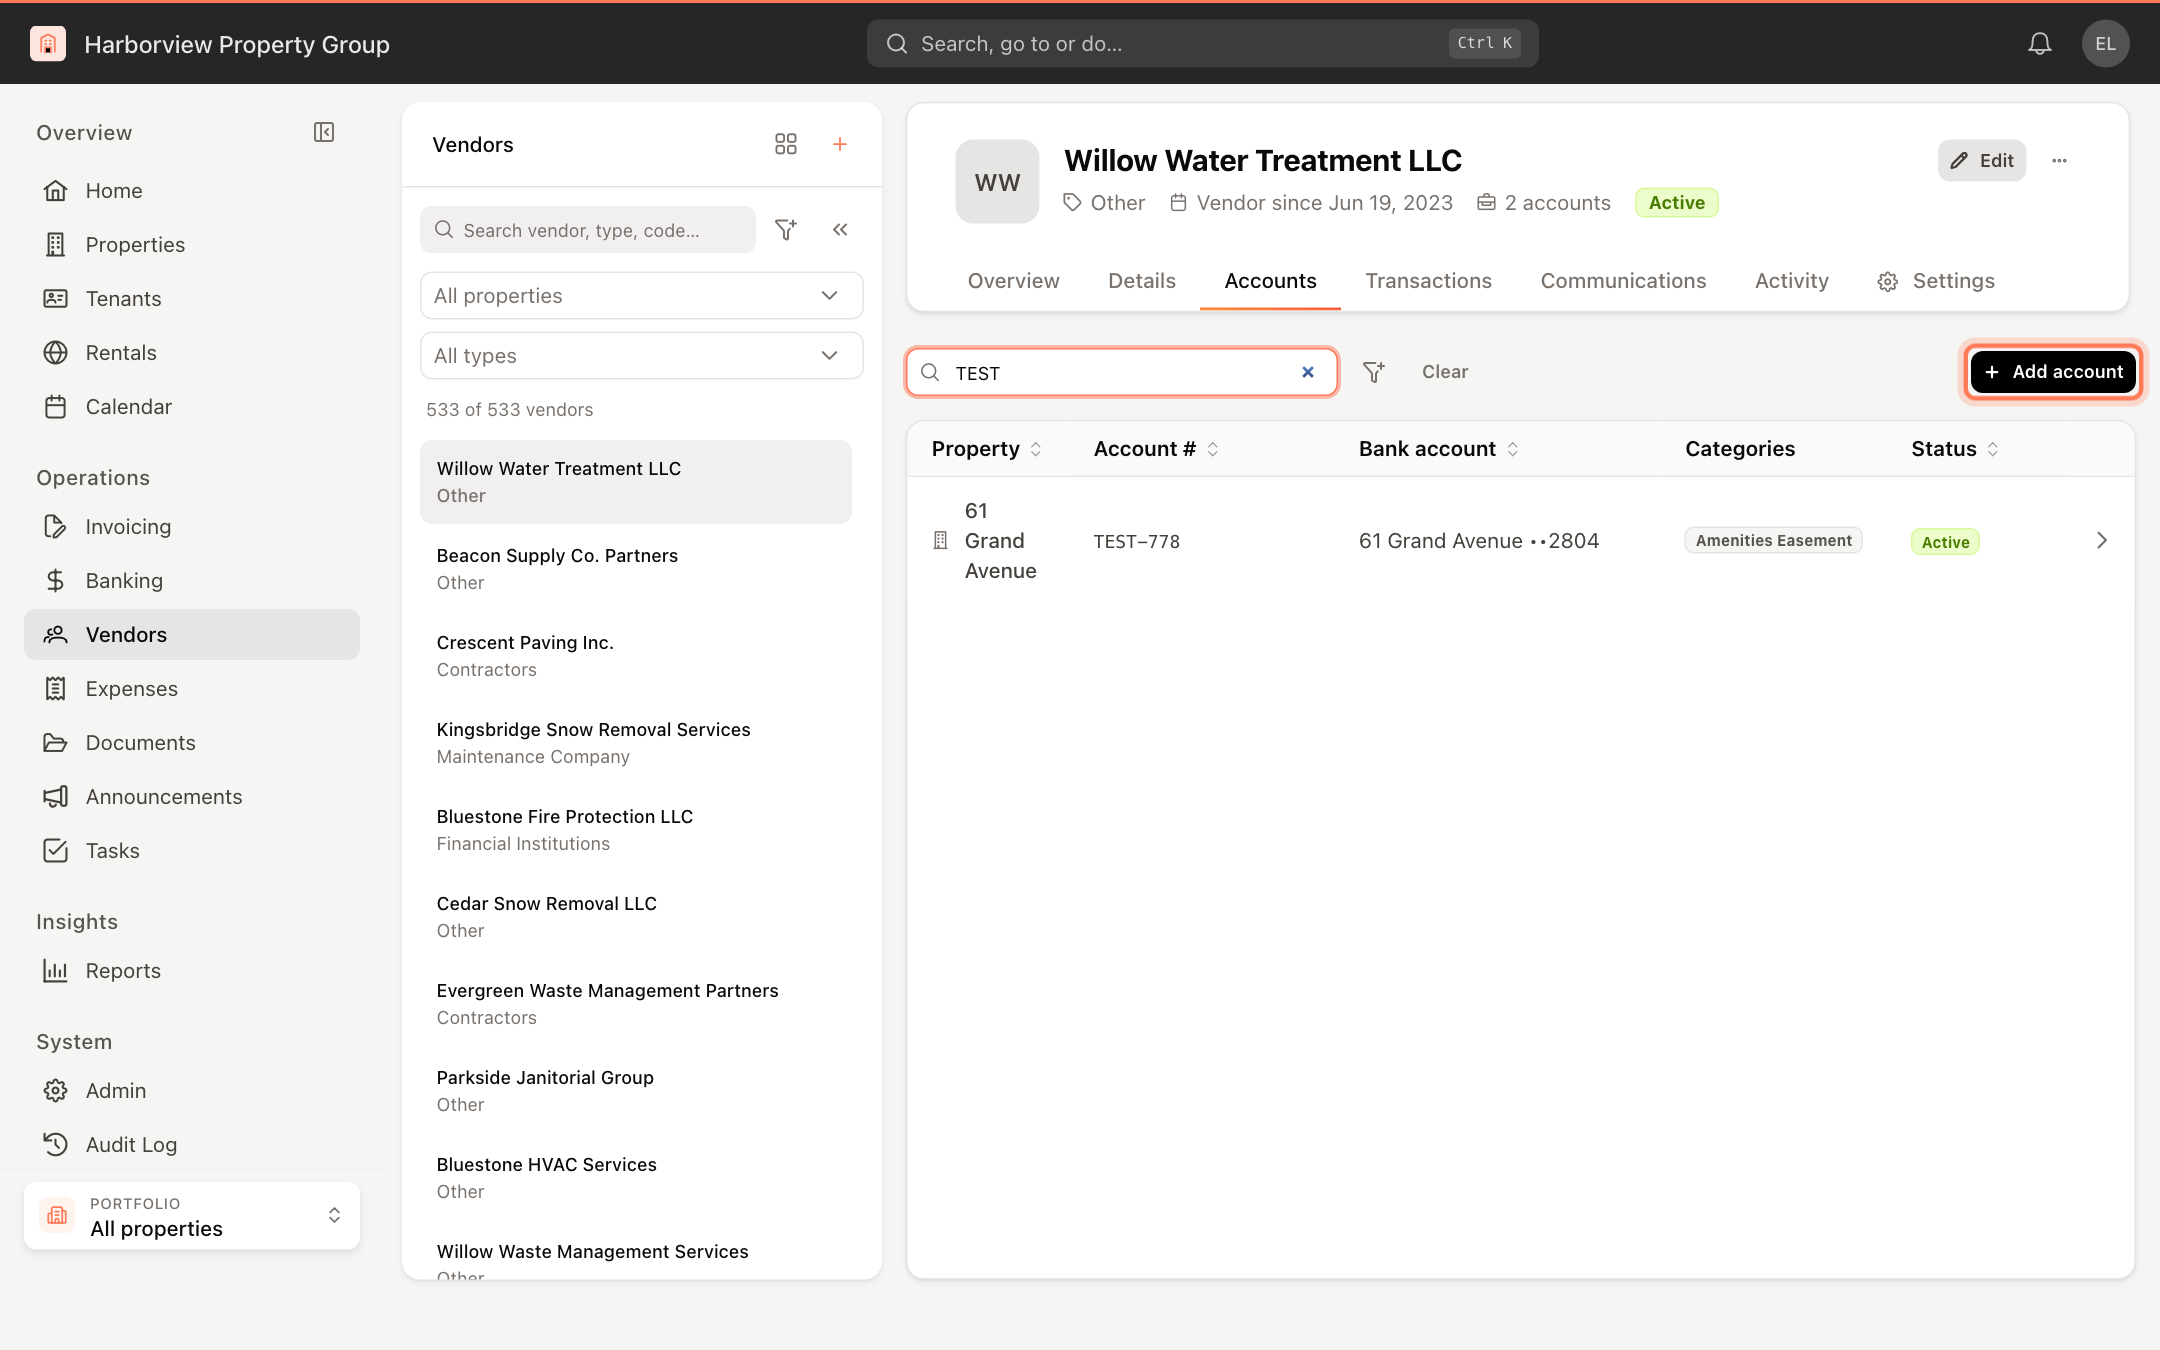
If you pick a property in the property filter above the vendor list, the vendor's tabs show only that property's accounts and activity.
Link the vendor to a property
- On the Accounts tab, click Add account. (From the vendor's Overview tab, Link account does the same.)
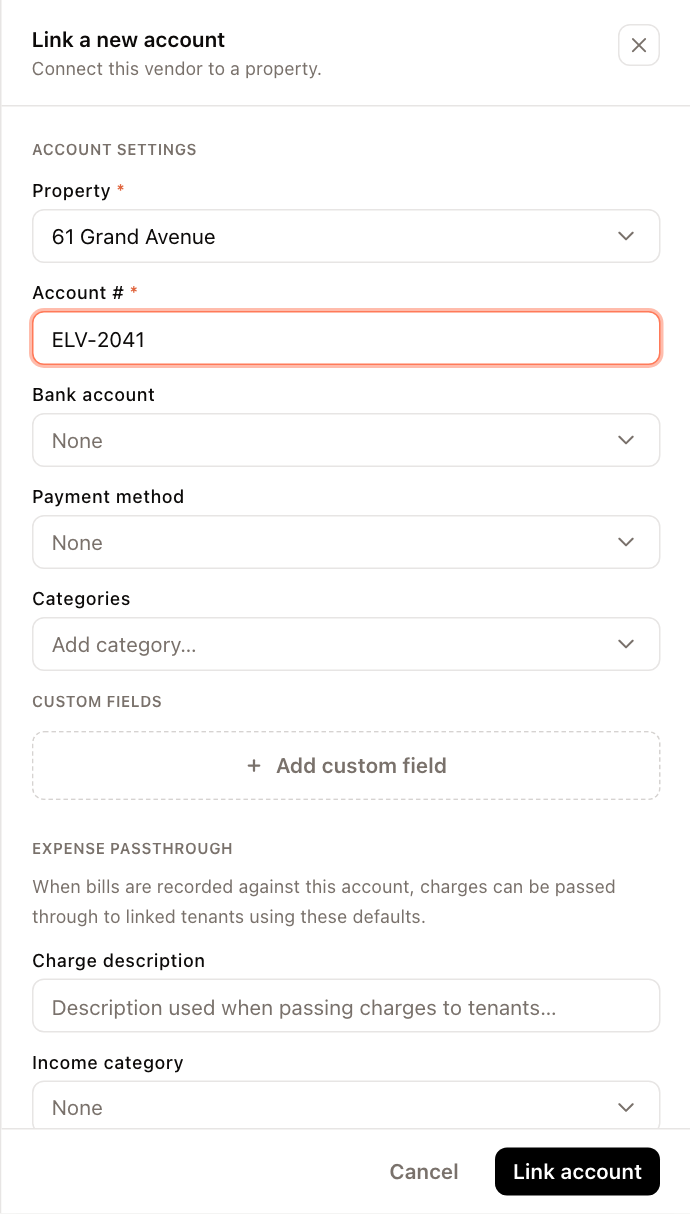
- In the Link a new account panel, fill in the account settings:
- Property (required) — the property this account belongs to.
- Account # (required) — your account or reference number with the vendor. If the vendor doesn't give you one, use something that identifies the property.
- Bank account — the property bank account this vendor is normally paid from.
- Payment method — how you usually pay this account. Pick one from the list, or choose Create new… at the bottom of the list to add your own method.
- Categories — the expense categories used for this account. When you record an expense, the account's category is filled in for you.
- Custom fields — click Add custom field to store extra details, such as "AutoPay: Yes".
- Under Expense passthrough, set the defaults used when expenses on this account are passed
through to tenants:
- Charge description — the text tenants see on their invoice.
- Income category — the income category the tenant charge is posted to.
- Under Linked units & tenants, tick the units this account's expenses should be charged to. Each unit's Share % starts at its pro-rata share; type a different figure if needed, or click Split equally. The total at the top turns green when the shares add up to 100%.
- Click Link account.
View or change an account
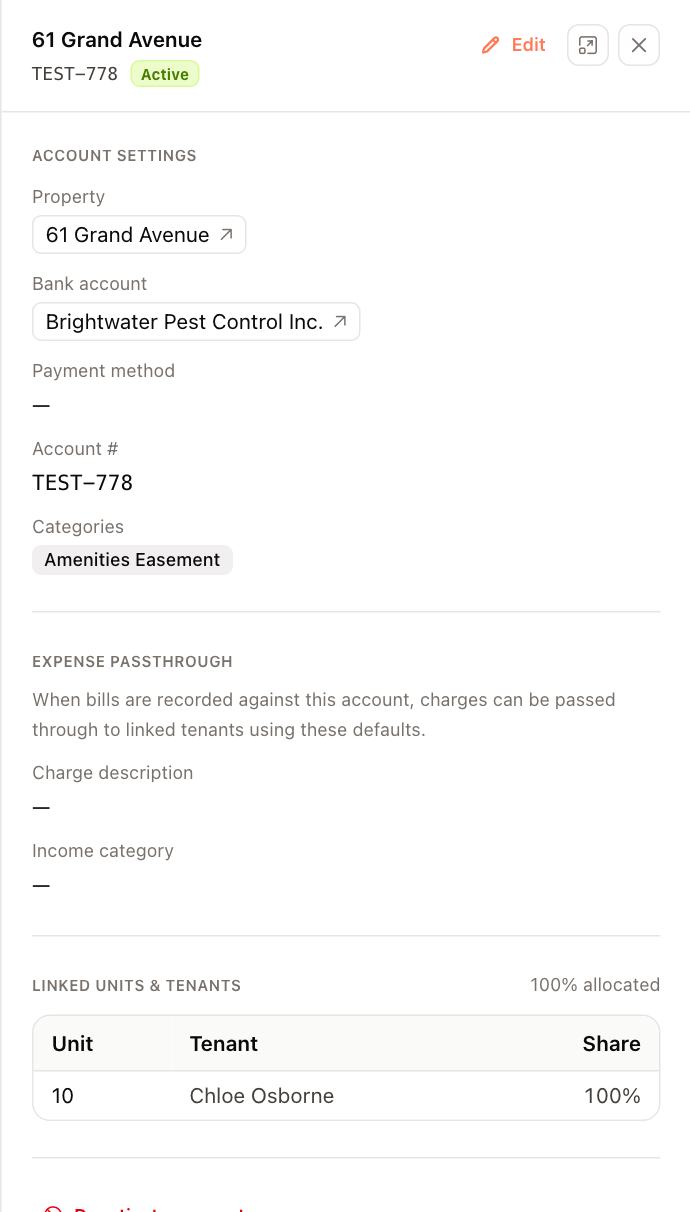
Click a row on the Accounts tab. A panel opens with the account's settings, passthrough defaults and linked units. From there:
- Click Edit to change the bank account, payment method, account number, categories, custom fields, passthrough defaults or linked units, then click Save changes.
- Click the property or bank account to open it.
Deactivate or reactivate an account
An account you no longer use — a closed utility meter, for example — can be deactivated. It stays on record for history but can't be used on new expenses.
- Open the account from the Accounts tab.
- At the bottom of the panel, click Deactivate account.
- Optionally enter a reason, then click Deactivate.
To bring it back, open the account and click Reactivate account.