
A vendor's Details tab holds everything about the vendor itself: its contacts, documents, notes, custom fields and the Vendor Info card (name, type, vendor since, status, rating and description).
To open it, click Vendors in the sidebar, select the vendor, and click the Details tab.
Changing vendor details needs permission to edit vendors. Uploading documents needs permission to manage vendor documents.
Edit the vendor's info
- Click Edit in the vendor header, or the pencil on the Vendor Info card.
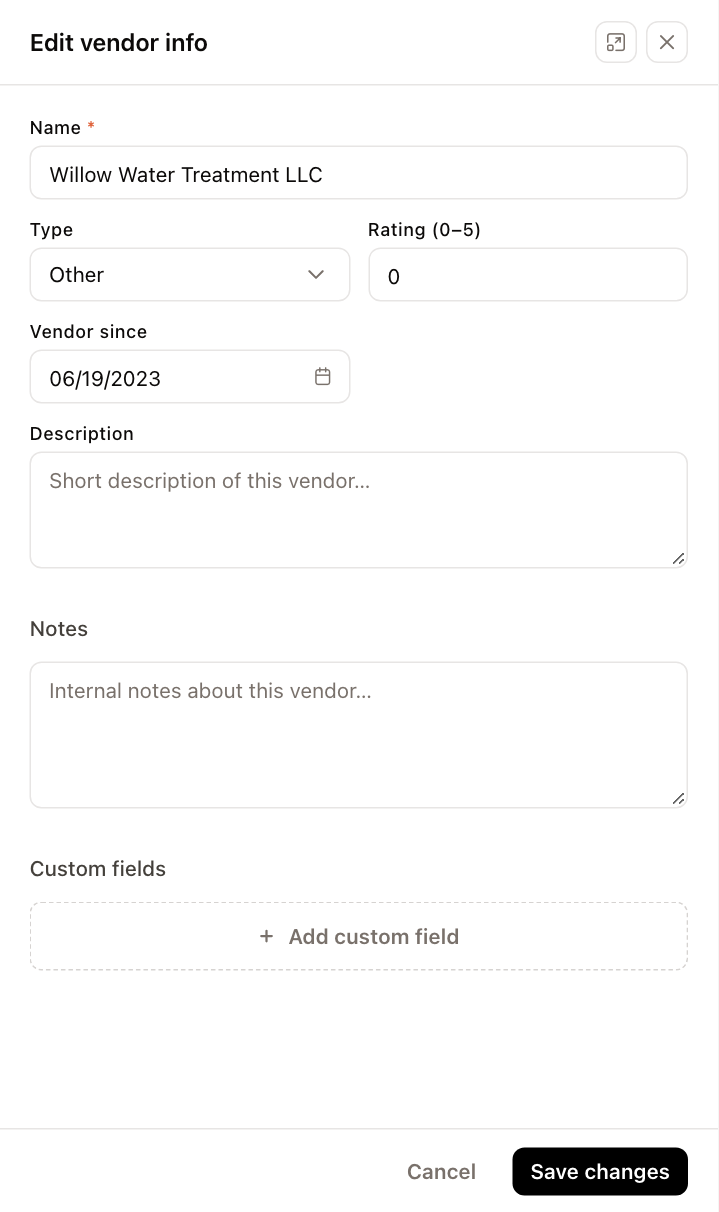
- In Edit vendor info, change any of:
- Name (required), Type, Rating (0–5) and Vendor since.
- Description — a short description of the vendor.
- Notes — internal notes about the vendor.
- Custom fields — up to five label/value pairs, such as a tax ID or license number. Click Add custom field (or Add field) to add one and × to remove one.
- Click Save changes.
Manage contacts
The Contacts card lists the people and addresses for the vendor's mail and payments. The Primary contact is shown in the vendor header.
- Add a contact: click + in the Contacts card header (or Add contact when the list is empty). Enter a First name (required), and optionally Last name, Phone, Email, Fax and an address (Street, Suite / Floor, City, State, ZIP). Turn on Primary contact to show this contact in the vendor header. Click Add contact.
- Edit, make primary or remove: click ⋮ on the contact's row and choose Edit, Set as primary or Remove.
Keep documents with the vendor
Use the Documents card for W-9s, insurance certificates and signed agreements. Click the upload button in the card header, choose the file, and save it. Each document can be previewed, downloaded or deleted from its row.
Notes and custom fields
- Notes: click the pencil on the Notes card, type, and click Save.
- Custom fields: click the pencil on the Custom Fields card. This opens Edit vendor info, where the fields are edited.