
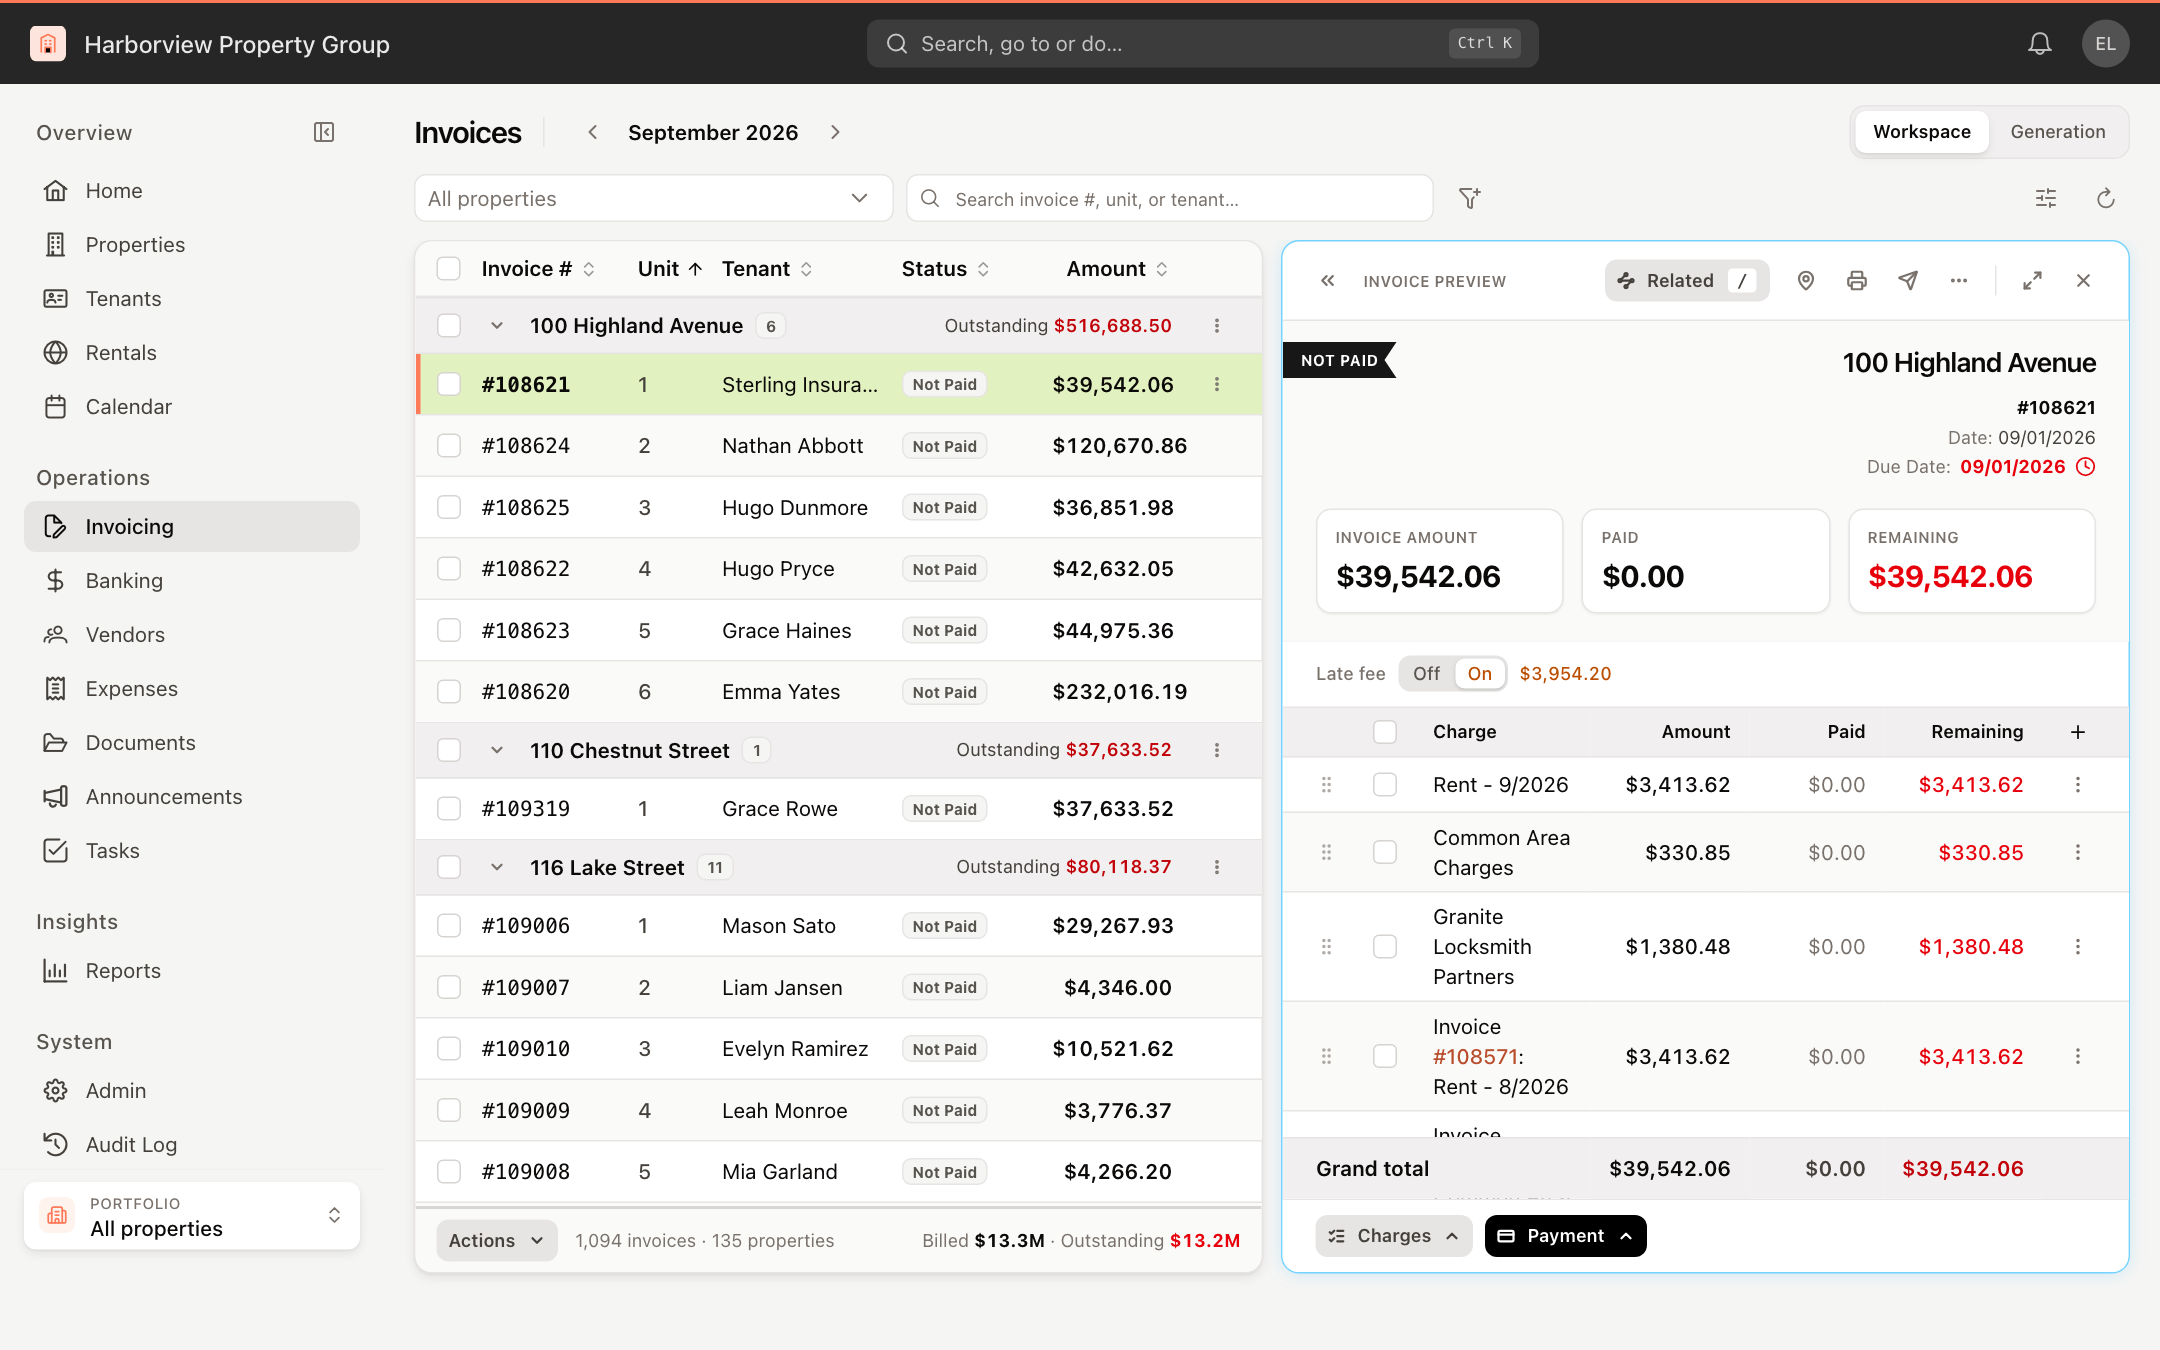
Invoicing is where you review the invoices your tenants owe for a billing cycle, collect payments, add charges, and send invoices out. Invoices are grouped by property, and clicking one opens it in a preview panel beside the list.
To open it, click Invoicing in the sidebar, or press G then I.
You need permission to view invoicing to open this page. Paying invoices and editing charges, notes and late fees need their own invoicing permissions. If a button is missing or greyed out, ask your administrator.
Workspace and Generation
The switch at the top right of the page has two sections:
- Workspace — the invoice list described in this article.
- Generation — a property-by-property view of which billing cycles have been created, where you create new invoices and set up automation. See Generate invoices.
Choose the billing cycle
The month next to the Invoices title is the billing cycle. Everything on the page — the list, the totals and the summary figures — shows that cycle only.
- Click the ‹ and › arrows to move one month back or forward.
- Click the month name to open a month grid and jump straight to any month and year.
- When you're looking at a month other than the current one, click Back to current month to return.
Filter and search the list
- All properties — pick one or more properties to show. Each property is its own group in the list.
- Search invoice #, unit, or tenant… — type part of an invoice number, a unit or a tenant name.
- More filters (the funnel icon) — filter by Status: Not Paid, Partial, Paid, Overdue or Carried Over. Active filters appear as chips under the toolbar; click the × on a chip to remove it, or click Clear to remove them all.
- Refresh (the circular arrow) reloads the list.
Read the invoice list
Each property has a header row showing the property name, the number of invoices, and either the amount still Outstanding or Paid in full. Click the chevron to collapse or expand a property.
Each invoice row shows the Invoice #, Unit, Tenant, Status and Amount. On wider screens you also see Paid, Remaining and Available Credit. Click a column heading to sort the invoices within each property.
Small icons next to an invoice number tell you more:
- an envelope — the invoice has been emailed (hover to see the date),
- a paper clip — the invoice has attachments,
- a sync icon — a payment on the invoice is still being processed.
The bar at the bottom of the list shows how many invoices and properties are listed, and the total Billed and Outstanding for what you've filtered.
Open an invoice
Click any row to open the invoice in the preview panel. The address bar updates with the invoice, so you can bookmark or share the link. With the list hidden, use the up and down arrows in the panel's toolbar to move to the previous or next invoice.
For everything you can do in the panel, see Work with a single invoice.
Act on one invoice, one property, or a selection
One invoice. Hover over a row and click ⋮ (or right-click the row) for Pay invoice, View payments, Print invoice, Email invoice, Copy invoice link, Go to the tenant or property, and Delete invoice.
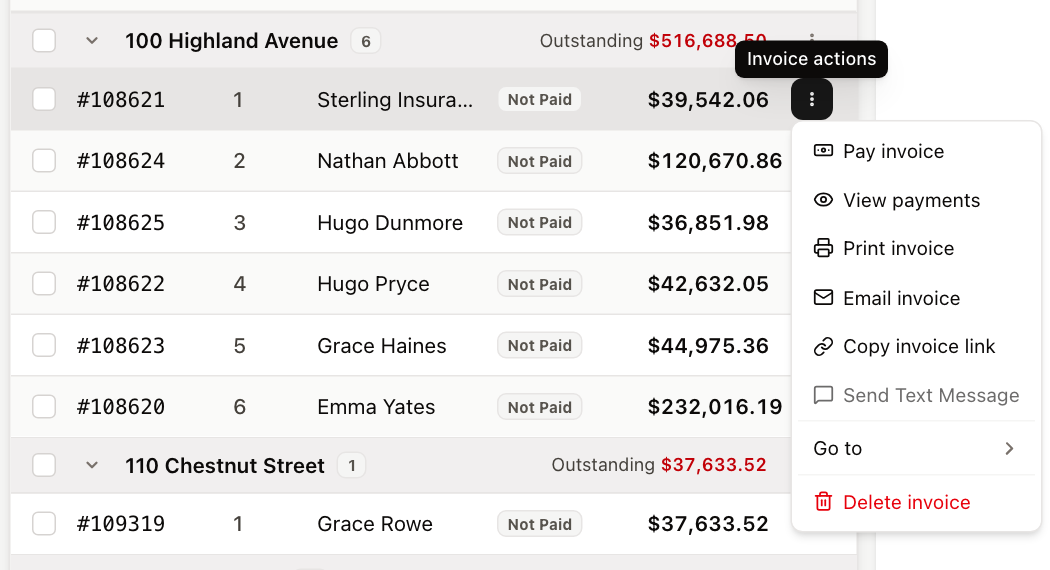
Copy invoice link copies the link your tenant uses to view the invoice online, so you can paste it into a message.
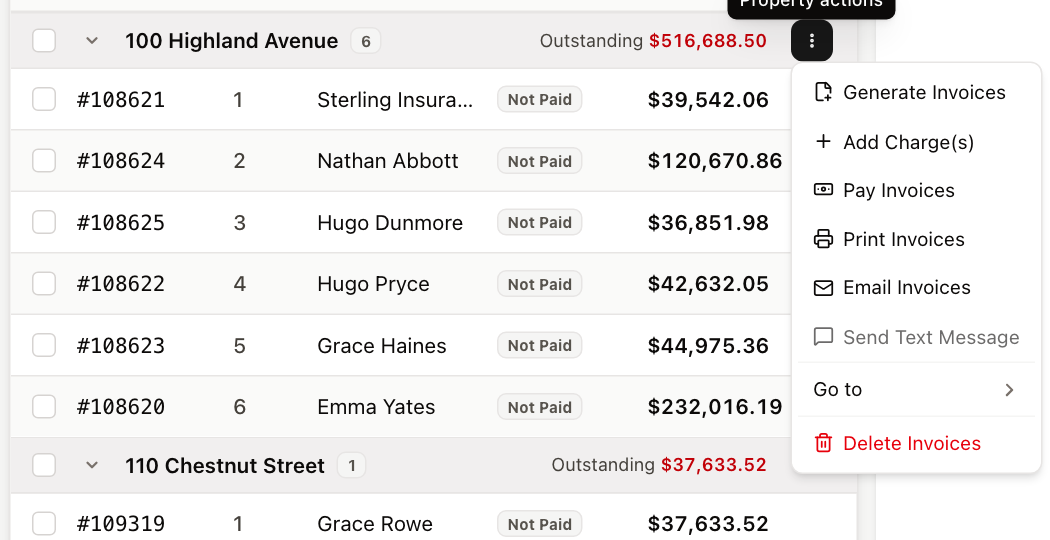
A whole property. Click ⋮ on a property header for Generate Invoices, Add Charge(s), Pay Invoices, Print Invoices, Email Invoices, Go to the property, and Delete Invoices.
A selection. Tick the checkboxes next to the invoices you want (the checkbox on a property header selects all of its invoices), then click Actions at the bottom of the list. You can Pay, Email, Print, Upload attachments or Delete the selected invoices. If nothing is ticked, Actions works on the invoice open in the preview panel.
Change how the page is laid out
Click Display settings (the sliders icon at the right of the toolbar) to choose:
- View — List (the list only), Split (list and preview side by side) or Preview (the preview takes most of the space).
- Summary — Show adds a summary strip above the list with Billed this cycle, Collected, Outstanding and Overdue for the cycle.
In Split view you can drag the divider between the list and the preview to resize them, and double-click it to reset. The Expand button in the preview's toolbar hides the page header and filters so the invoice fills the screen.
UnitConnect remembers these choices in your browser.