
Commercial tenants use the same Create a tenant wizard as residential ones. The difference is how much of step 2 you fill in: commercial leases usually have a rent escalation schedule, renewal options, a pro-rata share of the property and NNN passthroughs. This article covers those parts. For the steps every tenant shares, see Create a residential tenant.
Before you start
Have these lease terms ready:
- Lease start and end, rent commencement and possession dates
- The starting monthly rent and how it escalates (for example, 3% every year)
- The number and length of renewal options
- Security deposit, pro-rata share and premise use
- Which operating costs the tenant pays (real estate tax, CAM, insurance) and on what basis
Step 1 — Tenant Info
- In the sidebar, click Tenants, then click + (Add tenant).
- Pick the vacant unit, then enter the Tenant name — usually the business name, for example Northwind Coffee Co.
- Check the Tenant address and Owner address, add any contacts, and click Next.
Step 2 — Lease & Rent
Lease term and rent
- Enter Lease start, Lease end, Rent commencement and, optionally, Possession date.
- Enter the Base monthly rent and the Rent due day (1–28).
Escalation schedule
- Under Rent escalation, click Generate escalation schedule.
- Enter Increase rent by (a percentage) and every (the number of years between increases). The schedule starts at the base rent on the rent commencement date and runs through the lease end.
- Check the preview, then click Apply schedule.
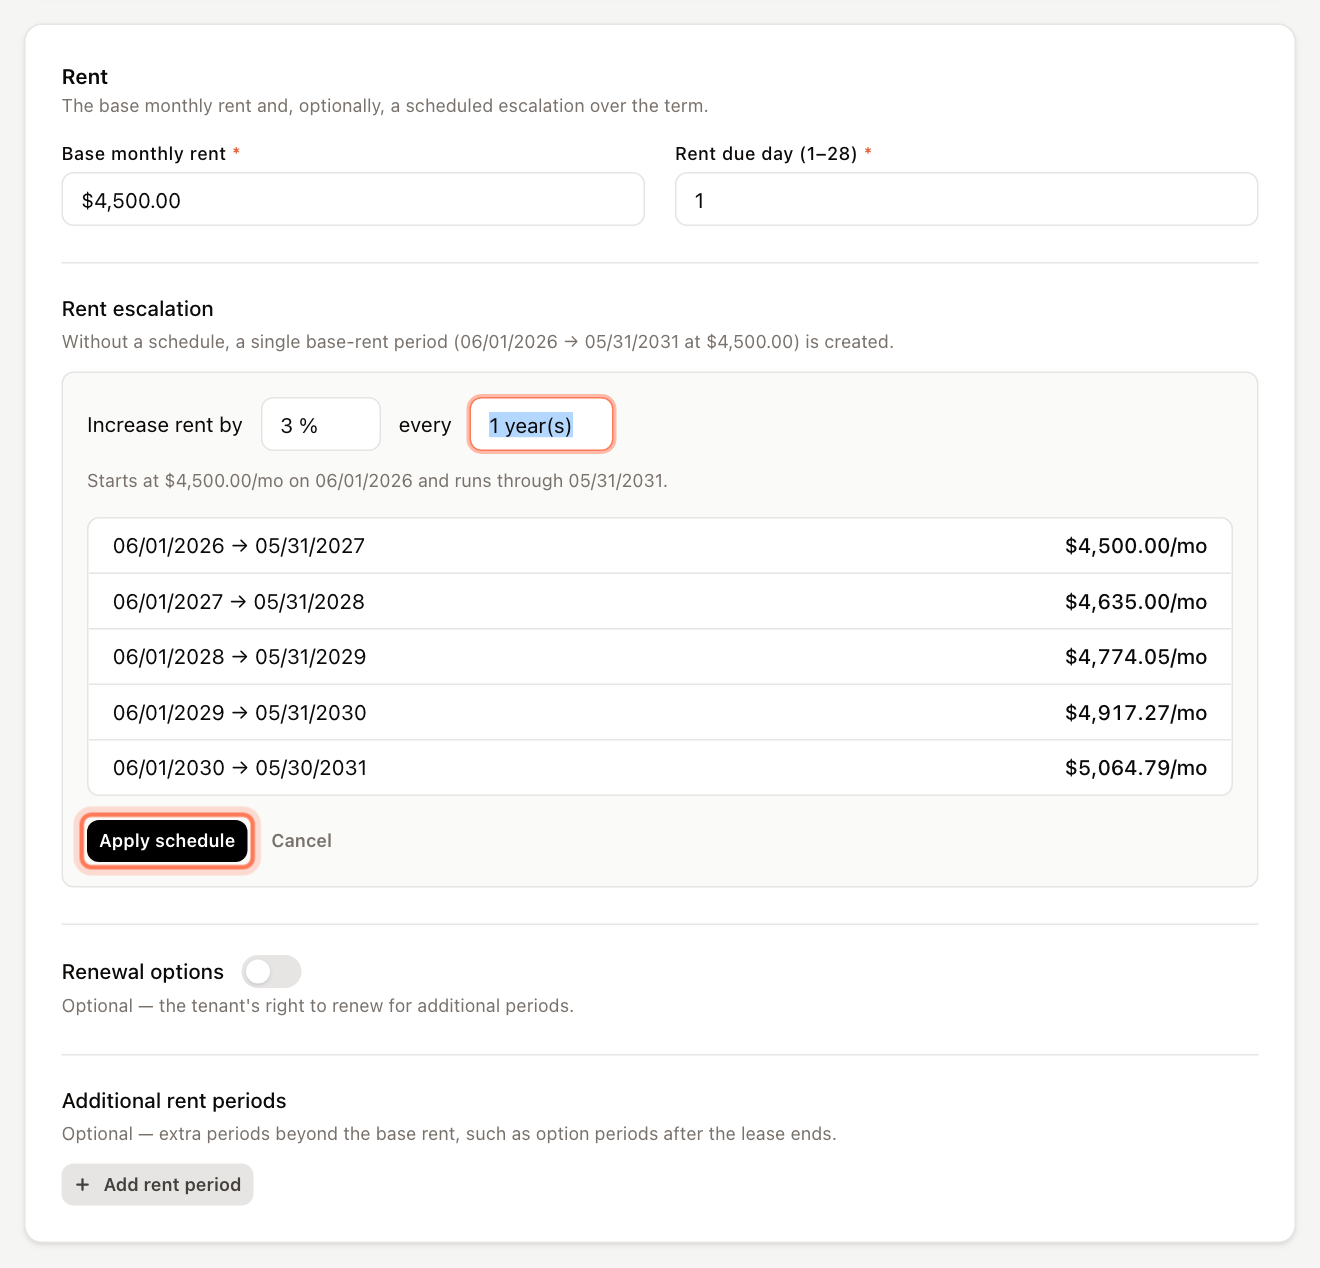
The applied schedule replaces the single base-rent period. Click Clear schedule to remove it.
If the lease term is shorter than one escalation period, the wizard says so. Lengthen the lease or reduce the years between increases.
Renewal options and extra rent periods
- Turn on Renewal options and enter the Number of options and Years per option (for example, 2 options of 5 years). These appear as the tenant's Options on the Lease tab.
- Under Additional rent periods, click Add rent period to add periods beyond the schedule, each with a Start, End and Monthly amount.
Rent periods added in the wizard are saved as base rent. To mark a period as an option period, with an option number and a notice window, edit it on the Lease tab after the tenant is created. See Renewal option periods.
Additional lease terms
This section is open by default; click Hide to collapse it.
- Security deposit, and whether the deposit is adjustable (Deposit adjustable).
- Pro-rata share — the tenant's share of the property. It is prefilled from the unit; change it if the lease says otherwise.
- Premise use, for example Restaurant. It appears next to the tenant's name.
- Insurance expiration and Liability insurance (whether the lease requires the tenant to carry it).
- Pass-throughs & taxes — for Real estate tax, CAM and Insurance, choose Off, Base year, Pro rata or Flat rate. Base year and Flat rate need an amount in the Amount / Rate column. See NNN passthroughs.
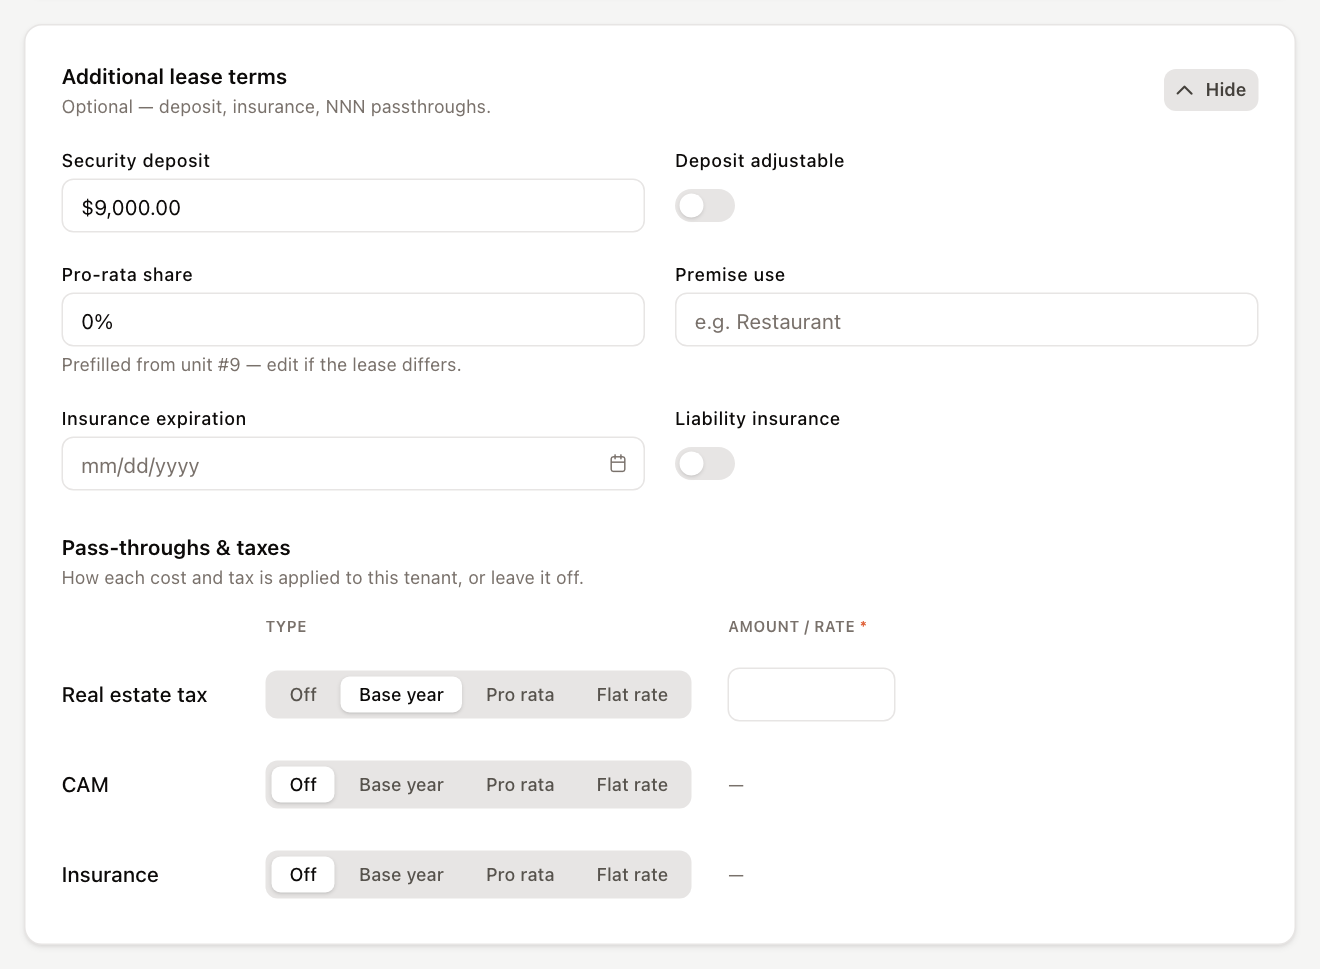
A Sales tax row appears under Pass-throughs & taxes only when the property is subject to sales tax. See Charge sales tax on rent.
Click Next.
Step 3 — Charges
Add recurring charges that aren't part of the base rent, for example a monthly parking fee or an estimated CAM escrow you bill as a fixed amount. Click Add charge and fill in Description, Amount, Occurrence, Category, Start and, if the charge stops, End (blank = open-ended).
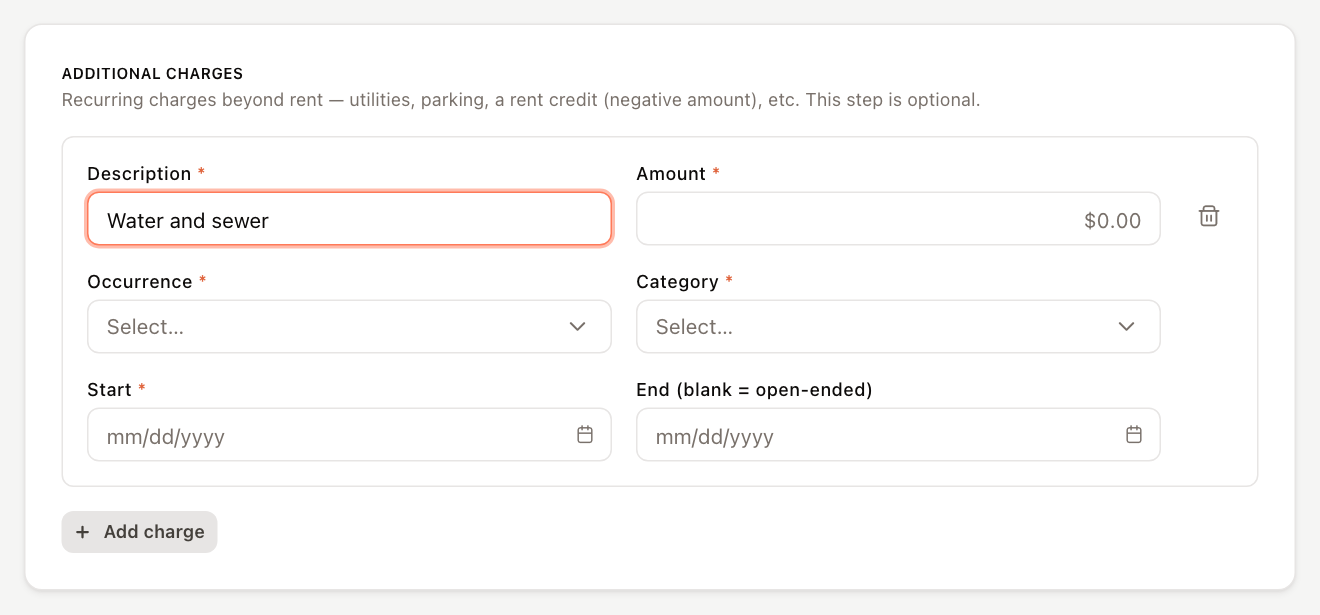
A negative amount is a recurring credit, such as a rent concession. It is added to the tenant's credit balance instead of appearing as a negative line on the invoice.
Steps 4 and 5 — Notifications, portal and review
Turn on the reminders the tenant should get — commercial tenants often use Insurance Expiration and Exercise of Option — and set their portal access. Then review and click Create tenant.
After you create the tenant
Everything you entered can be changed later on the tenant's Lease tab:
- Rent schedules and escalations
- Edit lease terms, deposit and fees — late fees and admin fees are set here, not in the wizard
- NNN passthroughs