
The Create a tenant wizard puts a tenant into a vacant unit and sets up everything billing needs: the lease term, the rent, any recurring charges, reminders and tenant portal access. It takes five steps. Only the first two are required.
Before you start
- The property and the unit must already exist, and the unit must be vacant. See Add and manage units.
- Have the lease at hand: start and end dates, the date rent begins, the monthly rent and the day it is due.
Open the wizard
Use either of these:
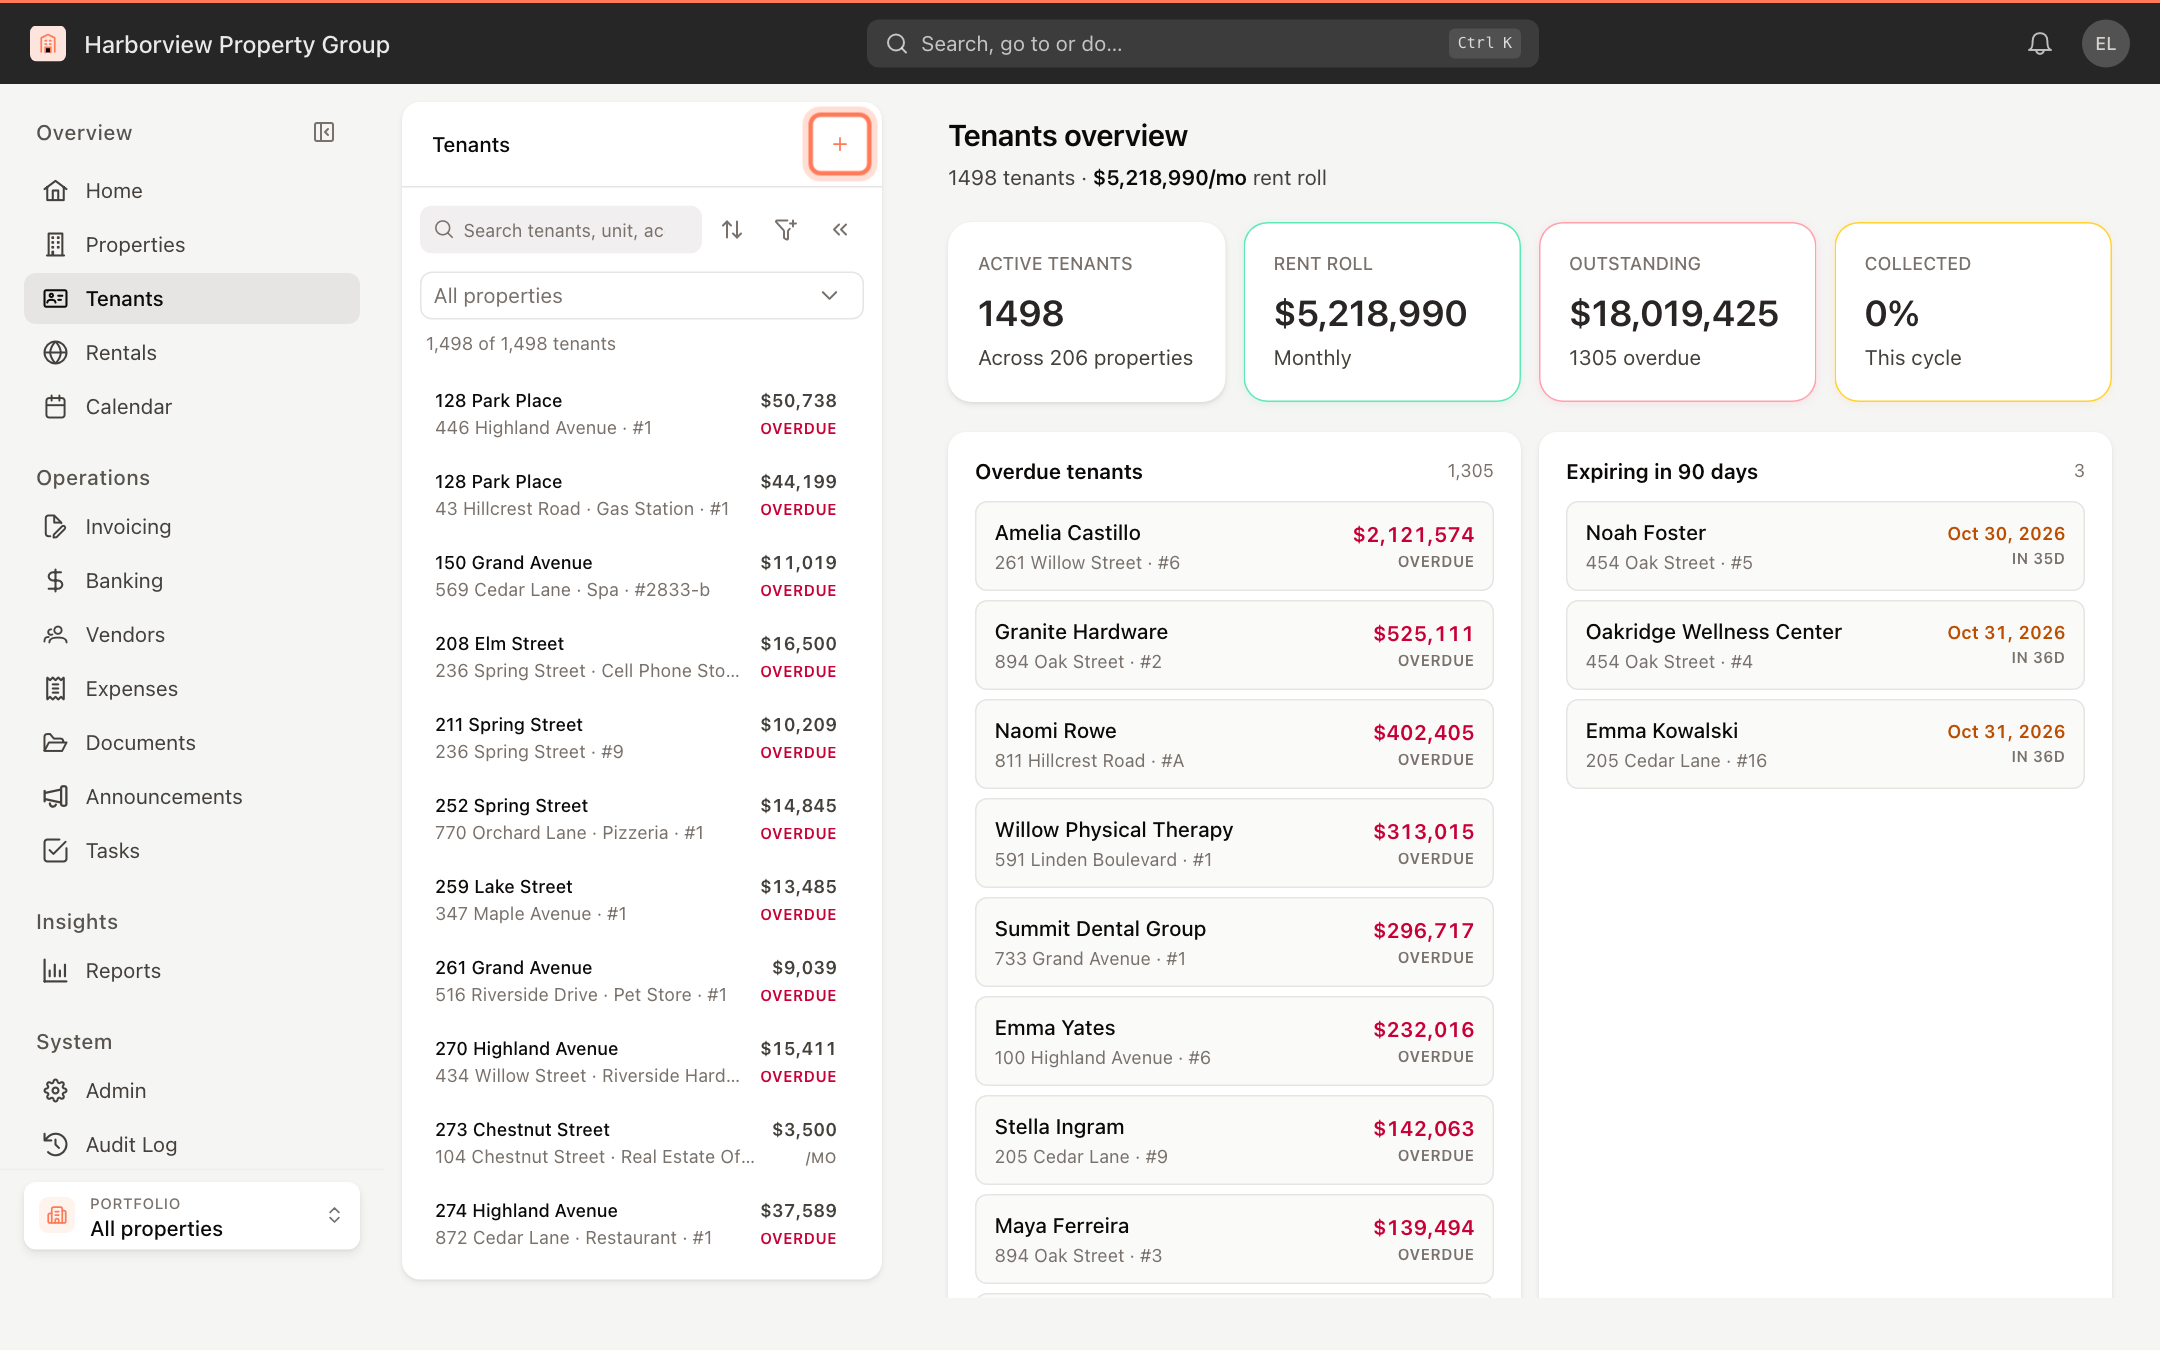
- In the sidebar, click Tenants, then click + (Add tenant) at the top of the tenant list.
- On a property's units list, open a vacant unit's menu and choose Assign Tenant. The wizard opens with that unit already picked, and Cancel takes you back to the property.
Step 1 — Tenant Info
- Under Unit, pick a property on the left, then pick the vacant unit on the right. You can also type in Search vacant units by unit, property, or building… to find a unit directly. Click Change to pick a different unit.
- Under Tenant name, enter the name exactly as it should appear on invoices and documents, for example Jordan Ellis.
- Under Primary addresses, check the two addresses UnitConnect will use:
- Tenant address is where bills and notices are mailed. It is the unit's address.
- Owner address is the remittance address the tenant sends payments to. Choose the Management or Owner address.
- Optional: under Contacts, click Add contact to add another person, such as a guarantor or a roommate. Enter their name, Role / title, phone numbers, email and address, then click the check mark to keep the contact. The unit's own contact is listed automatically.
- Optional: under Notes & custom fields, click Add to enter Internal notes and up to five custom fields (a Label and a Value), which appear on the tenant's record.
- Click Next.
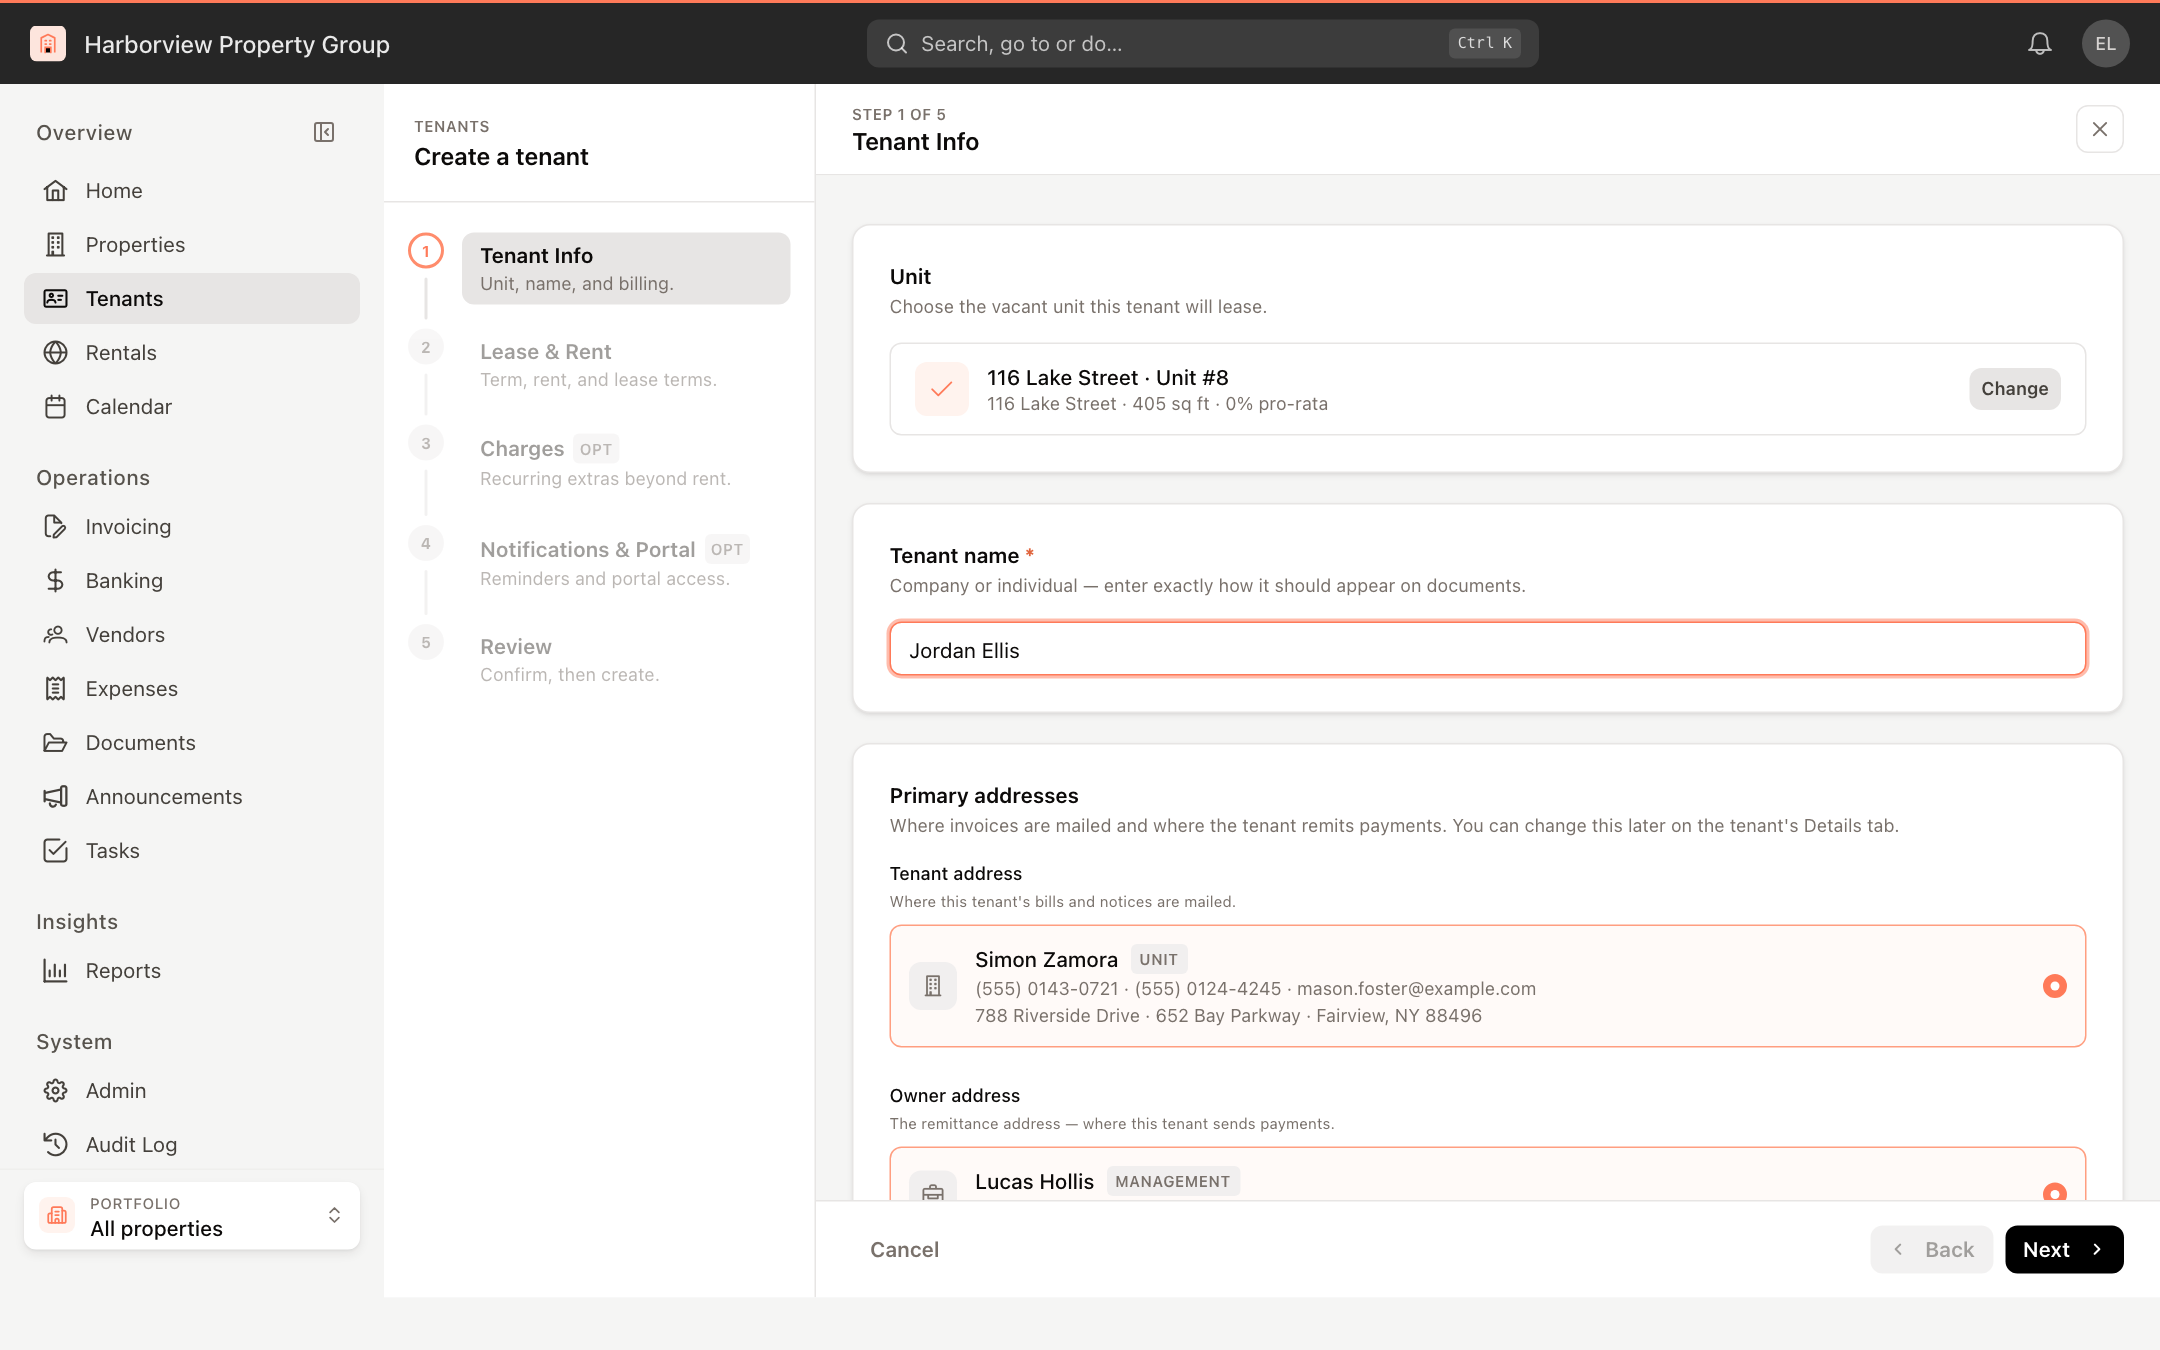
If you press Next with something missing, the wizard highlights the fields to fix and shows Complete the highlighted fields next to the buttons.
Step 2 — Lease & Rent
- Under Lease term, enter Lease start, Lease end and Rent commencement (the date rent starts being billed). Possession date is optional.
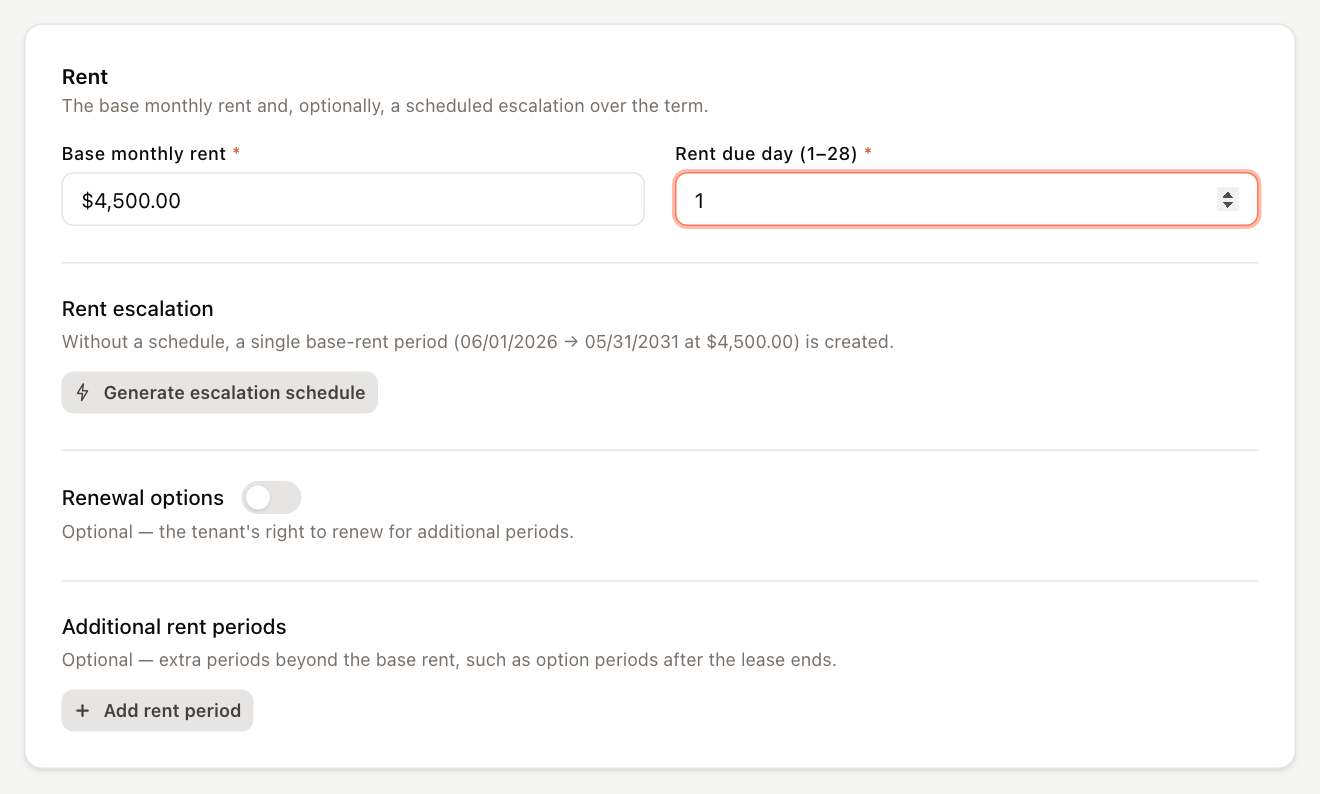
- Under Rent, enter the Base monthly rent and the Rent due day (1–28).
- Without an escalation schedule, UnitConnect creates one rent period from the rent commencement date to the lease end at the base rent. If the rent goes up during the lease, click Generate escalation schedule — see Rent schedules and escalations.
- The remaining sections are optional. Most residential leases can skip Renewal options and Additional lease terms, but you can record a Security deposit there.
- Click Next.
Step 3 — Charges (optional)
Add recurring charges on top of rent, such as parking, a pet fee or utilities. Click Add charge for each one. See Recurring and additional charges for what each field does. Click Next when you're done, or straight away to skip the step.
Step 4 — Notifications & Portal (optional)
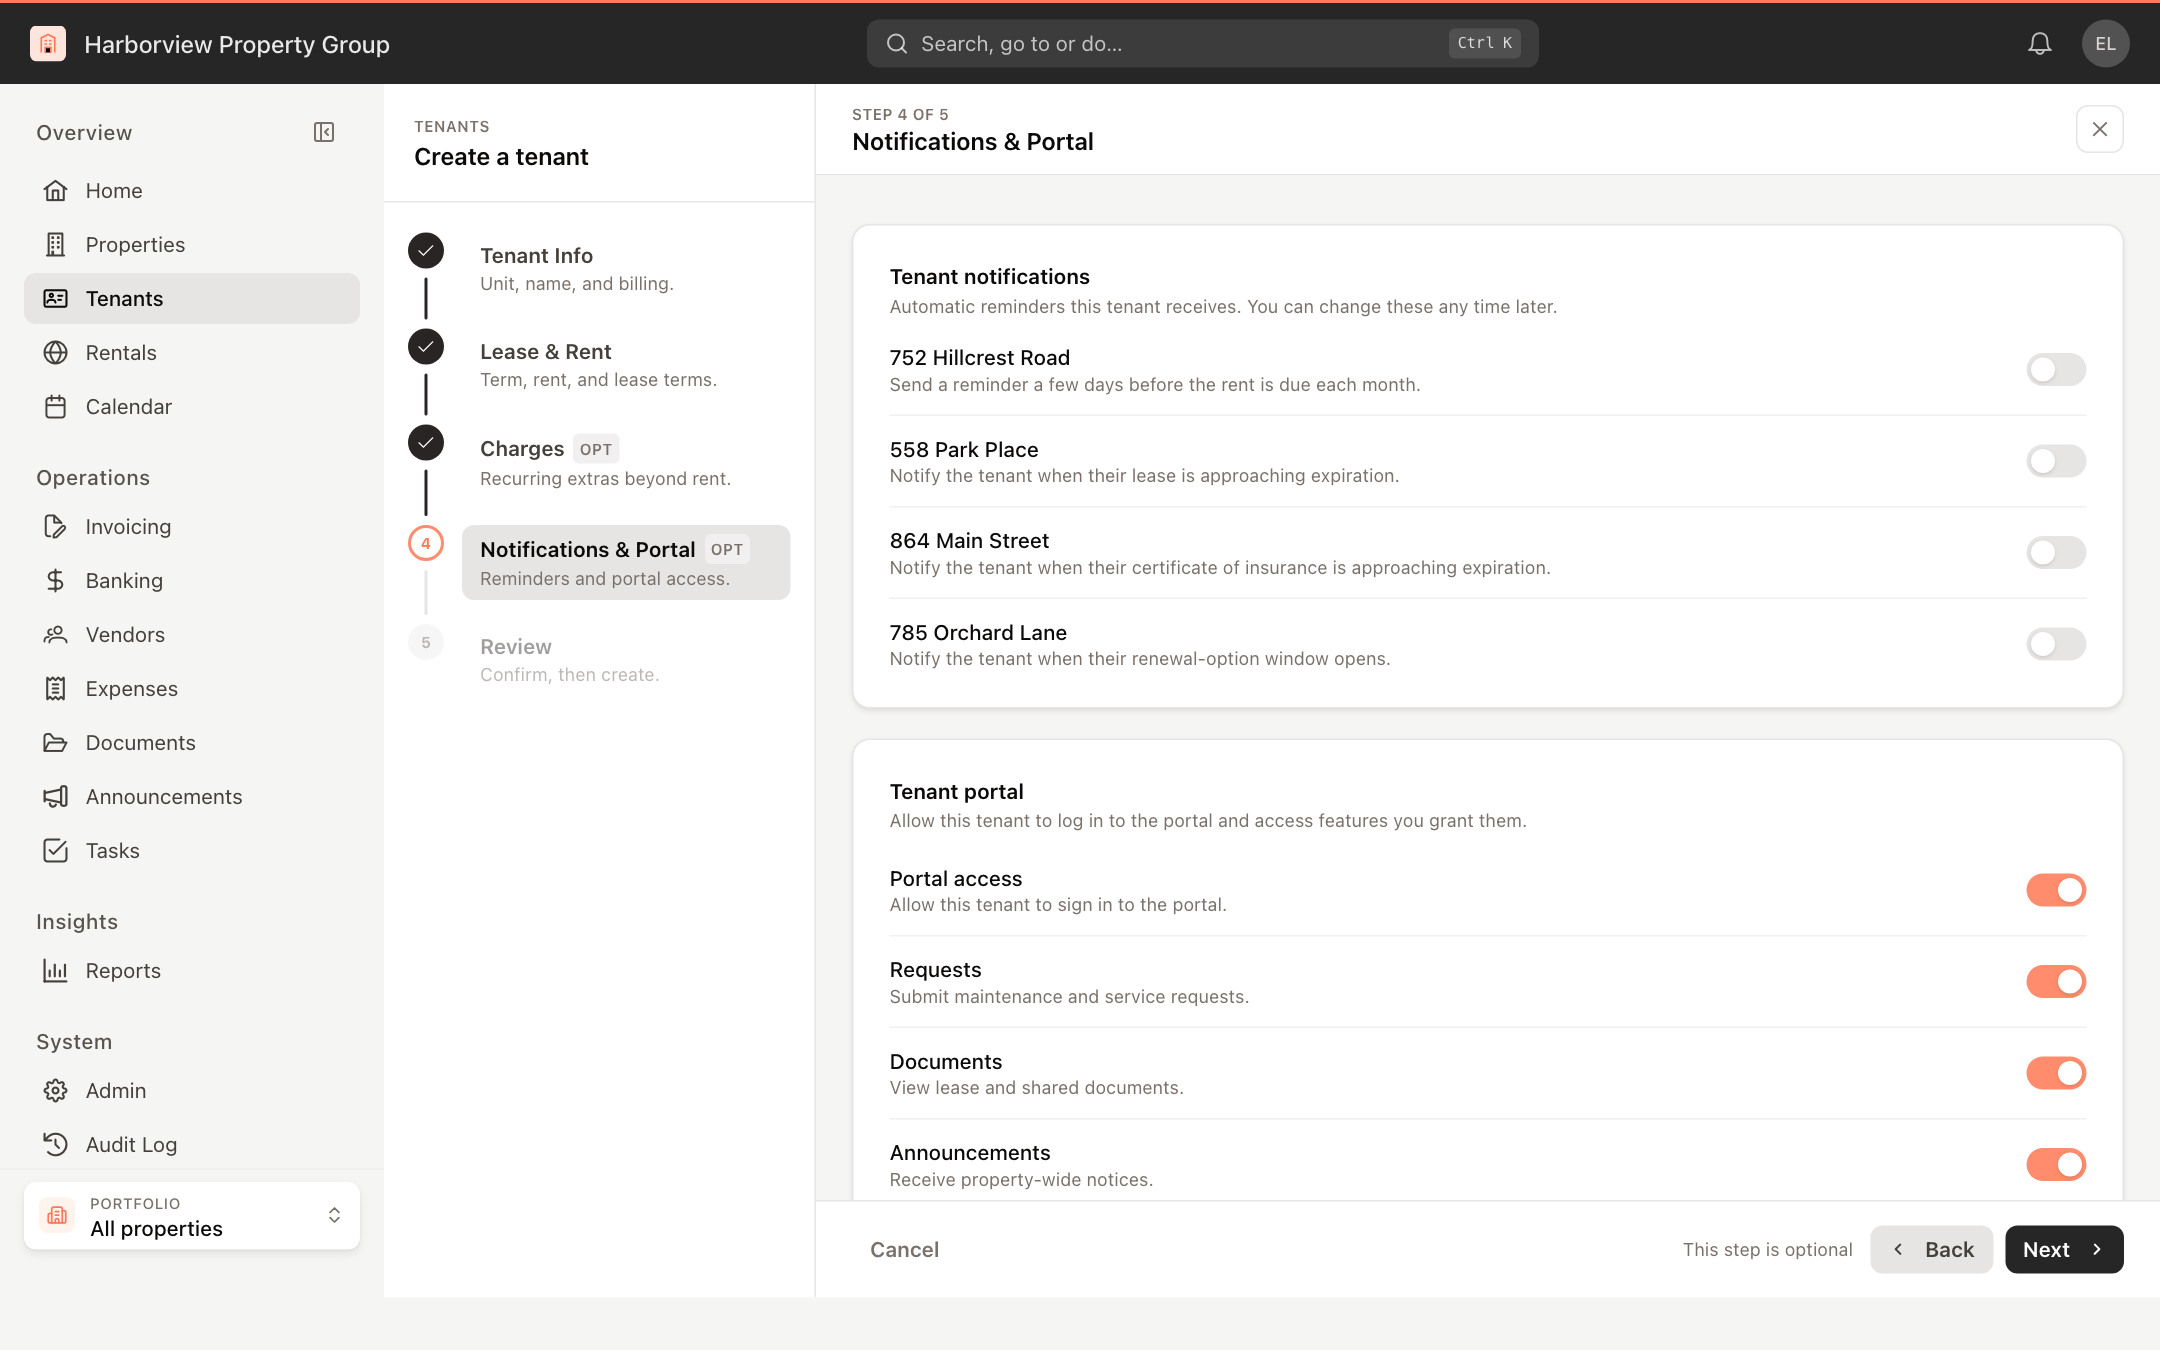
- Under Tenant notifications, turn on the automatic reminders this tenant should receive, such as Rent Due or Lease Expiration.
- Under Tenant portal, Portal access is on by default. Turn individual features such as Requests, Documents and Announcements on or off.
- Turn on Invite to the portal to email the tenant an invitation as soon as the tenant is created. The invitation goes to the email of the tenant's billing contact.
Step 5 — Review and create
The Review step summarizes everything you entered. Click the pencil on a section to jump back and change it; you can also click any step you've already visited in the list on the left. When everything is right, click Create tenant.
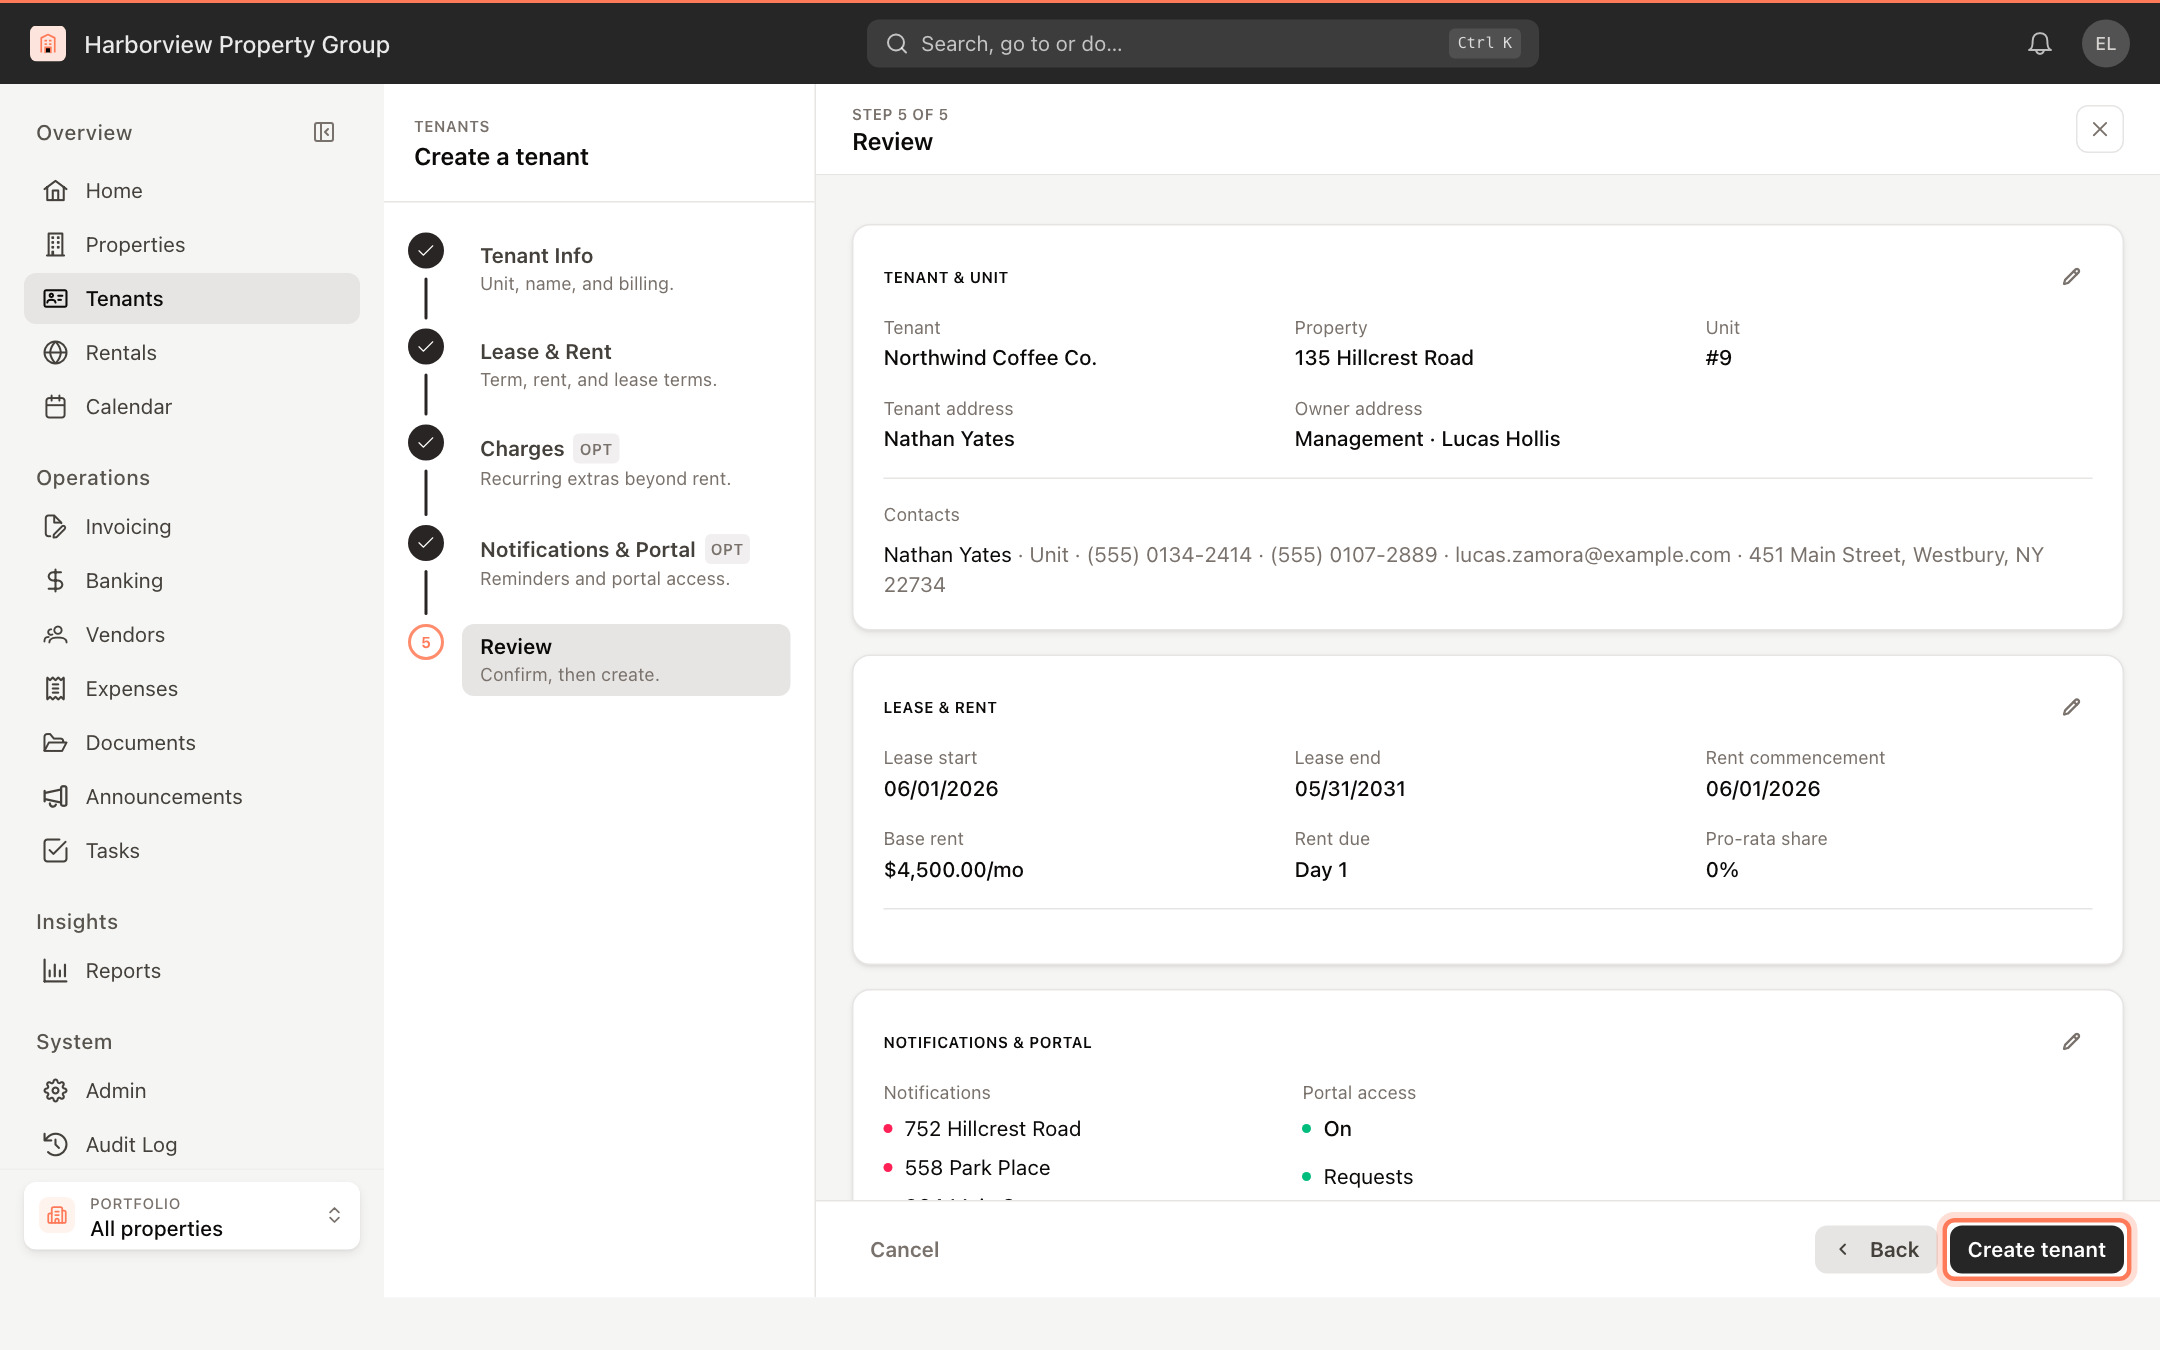
The tenant, lease, rent schedule, charges, notes and portal settings are all saved together. The confirmation screen shows the new account number and offers:
- Open tenant profile — go to the tenant's Overview.
- View lease & rent — go to the Lease tab.
- Settings & portal — go to the tenant's notifications and portal settings.
- Add another tenant — start the wizard again.
Your progress is saved as you go
The wizard keeps an unfinished tenant as a draft in your browser. If you close the wizard, reload the page or sign out, the next time you open the wizard it asks Resume your draft? Click Resume to pick up where you left off, or Start fresh to discard the draft.
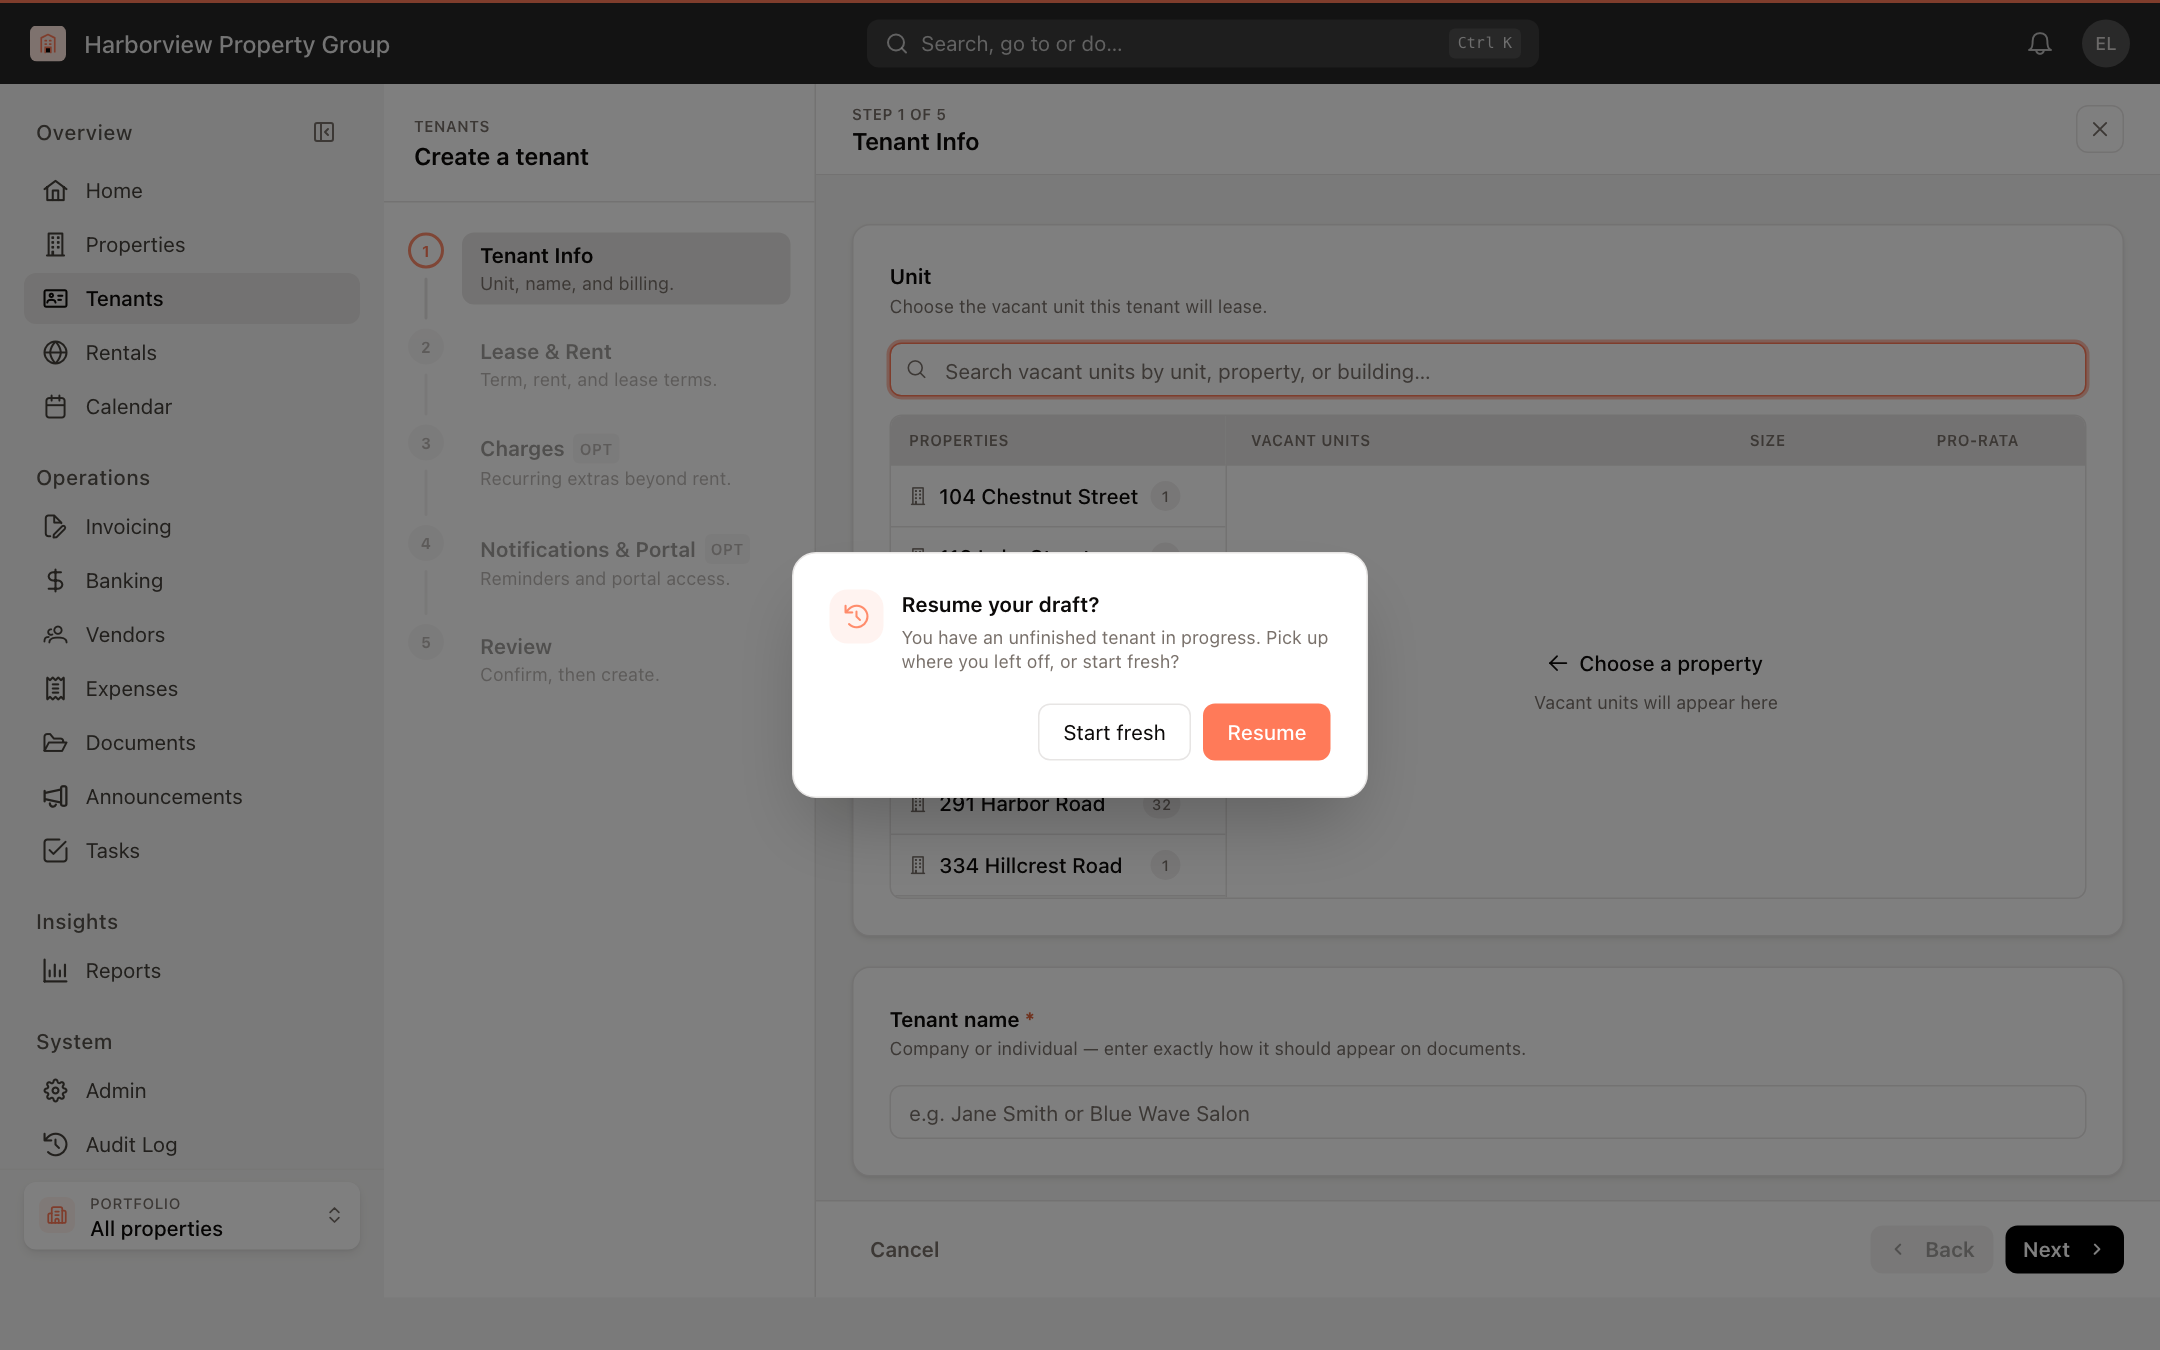
The draft is stored only in the browser you were using. If the unit in a resumed draft has been leased in the meantime, the wizard asks you to pick another unit.