
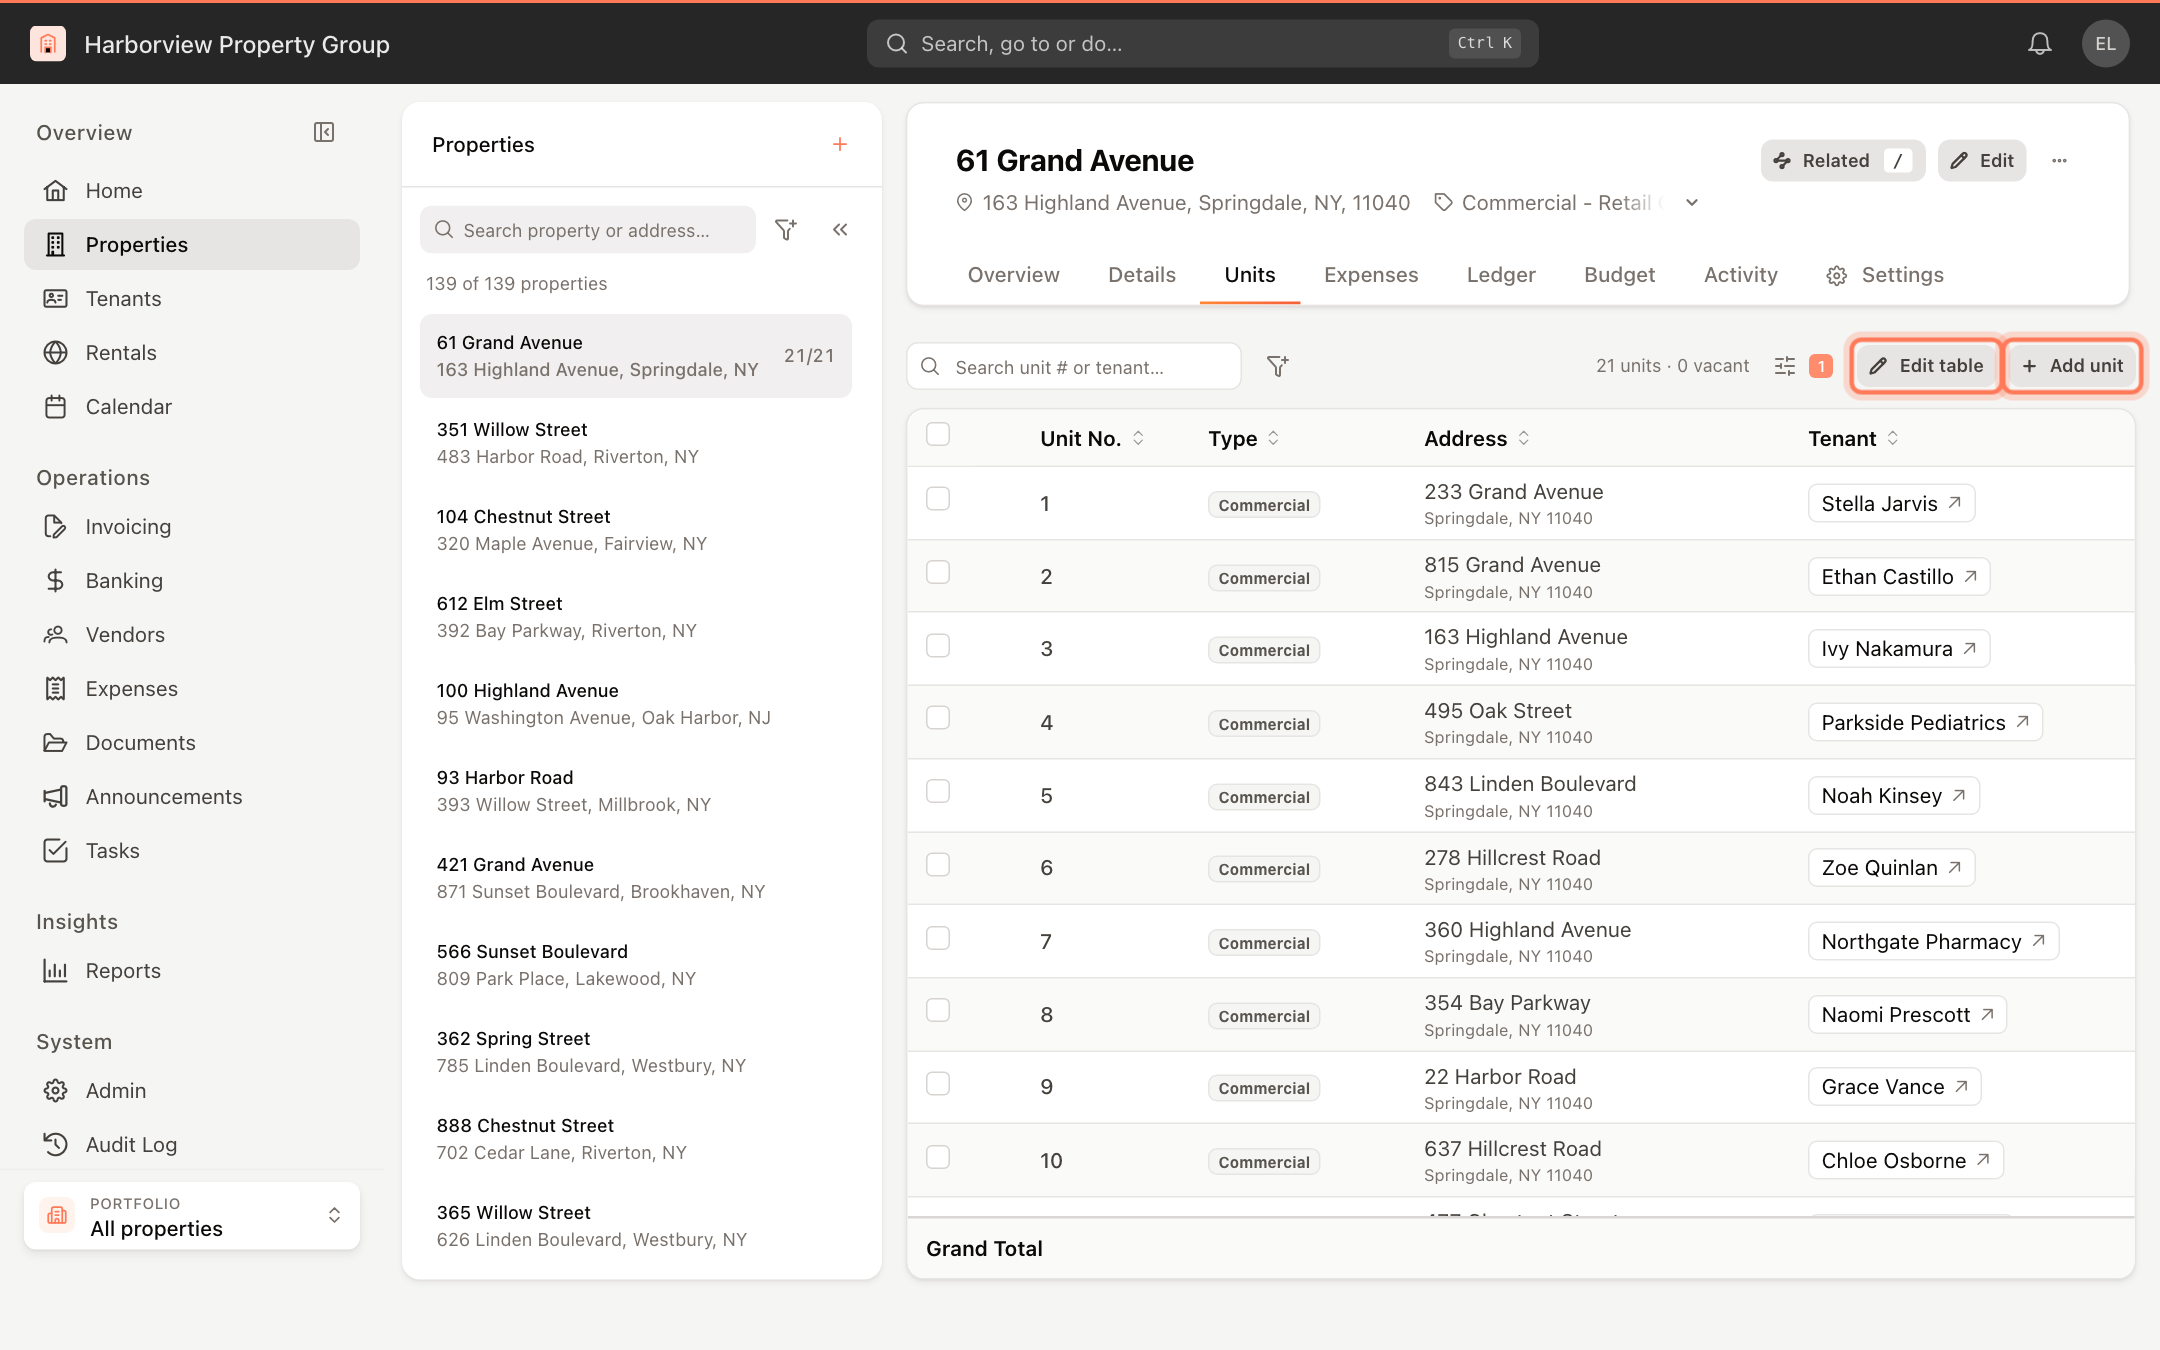
A property's Units tab is its unit roster: every unit with its type, address, tenant, size and pro-rata share. From here you add units, correct their details, and move from a unit to its tenant.
To open it, click Properties in the sidebar, select the property, and click the Units tab.
Read the roster
- Each row shows Unit No., Type, Address, Tenant, Size and Pro-rata. Click a column header to sort by it.
- The line above the table shows the total number of units, linked units and vacant units.
- The Grand Total row adds up the size and pro-rata share of every unit.
- Click a tenant name to open that tenant.
- Use Search unit # or tenant… to find a unit. The filter button next to it narrows the list by Type / Sub-type and Occupancy (All, Vacant or Occupied). Click Clear to remove the filters.
- The Display settings button lets you show or hide the Sub-type column.
Keep each unit's size and pro-rata share accurate. Pro-rata shares drive how CAM, tax and insurance charges and assessments are split between tenants, and they appear on the rent roll and vacancy reports.
Add a unit
- Click Add unit.
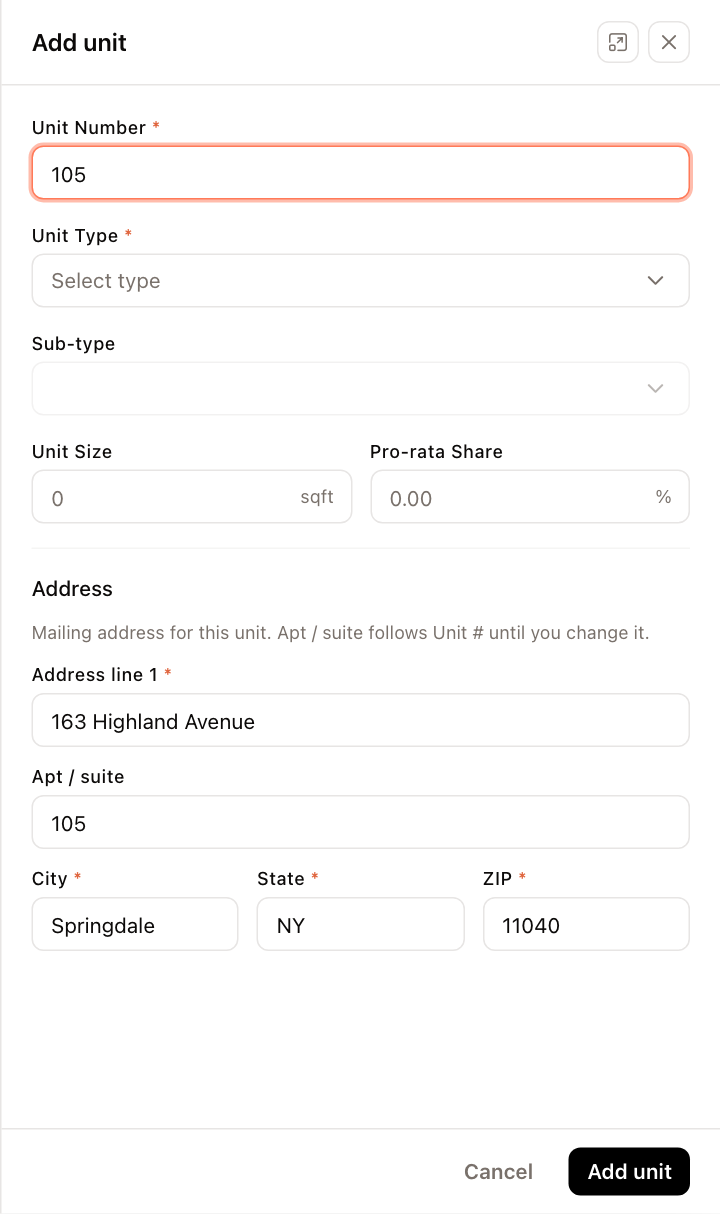
- Enter the Unit Number and choose the Unit Type. Sub-type is optional.
- Enter the Unit Size (square feet) and Pro-rata Share (percent).
- Check the Address. Address line 1, City, State and ZIP are required; Apt / suite is optional.
- Click Add unit.
Open a unit's record
Click a row to open the unit's record panel beside the roster. It shows the unit's Details, Linked units, and Tenancy. Use the up and down arrows at the top of the panel to move to the previous or next unit.
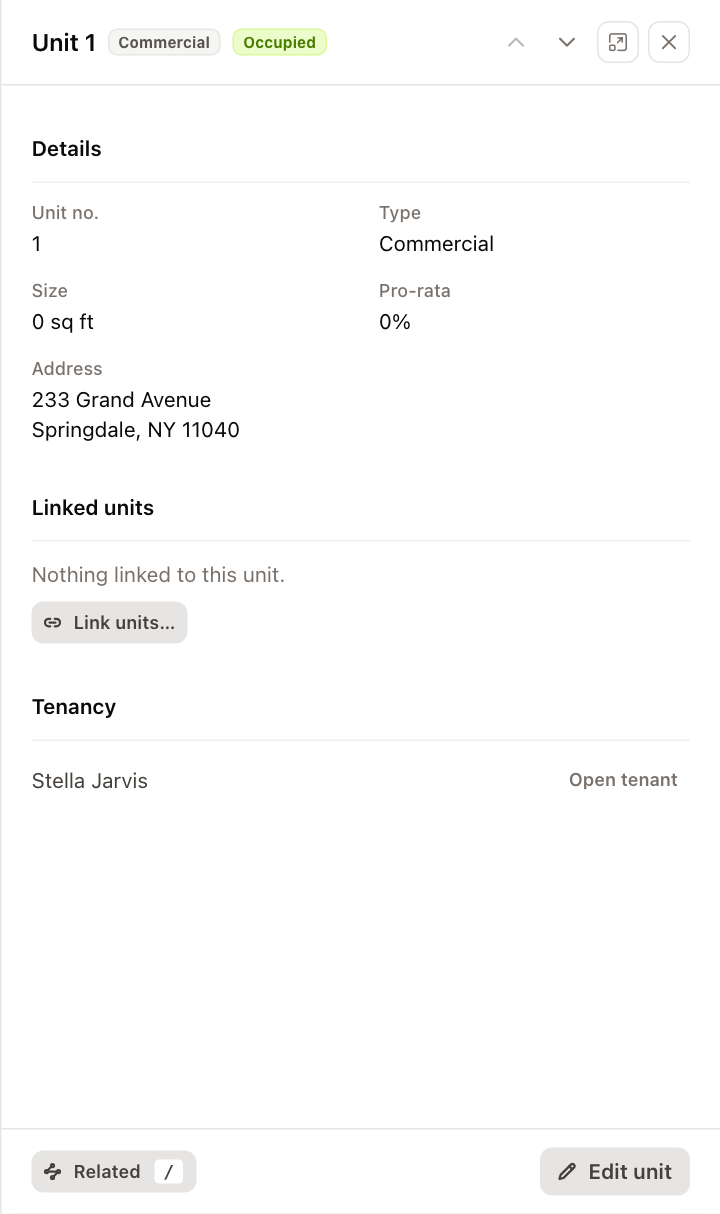
To change the unit, click Edit unit, update the fields, and click Save changes. From the Tenancy section, click Open tenant to go to the unit's tenant, or Assign tenant on a vacant unit to start a new tenant for it.
Each row also has an options menu (⋮), or you can right-click the row. Depending on the unit, the menu offers Open Tenant, Assign Tenant, Open record, Link units…, Link to a unit…, Unlink from a unit, and Remove.
Edit several units at once
To correct many units in one go, for example to fix pro-rata shares across the building:
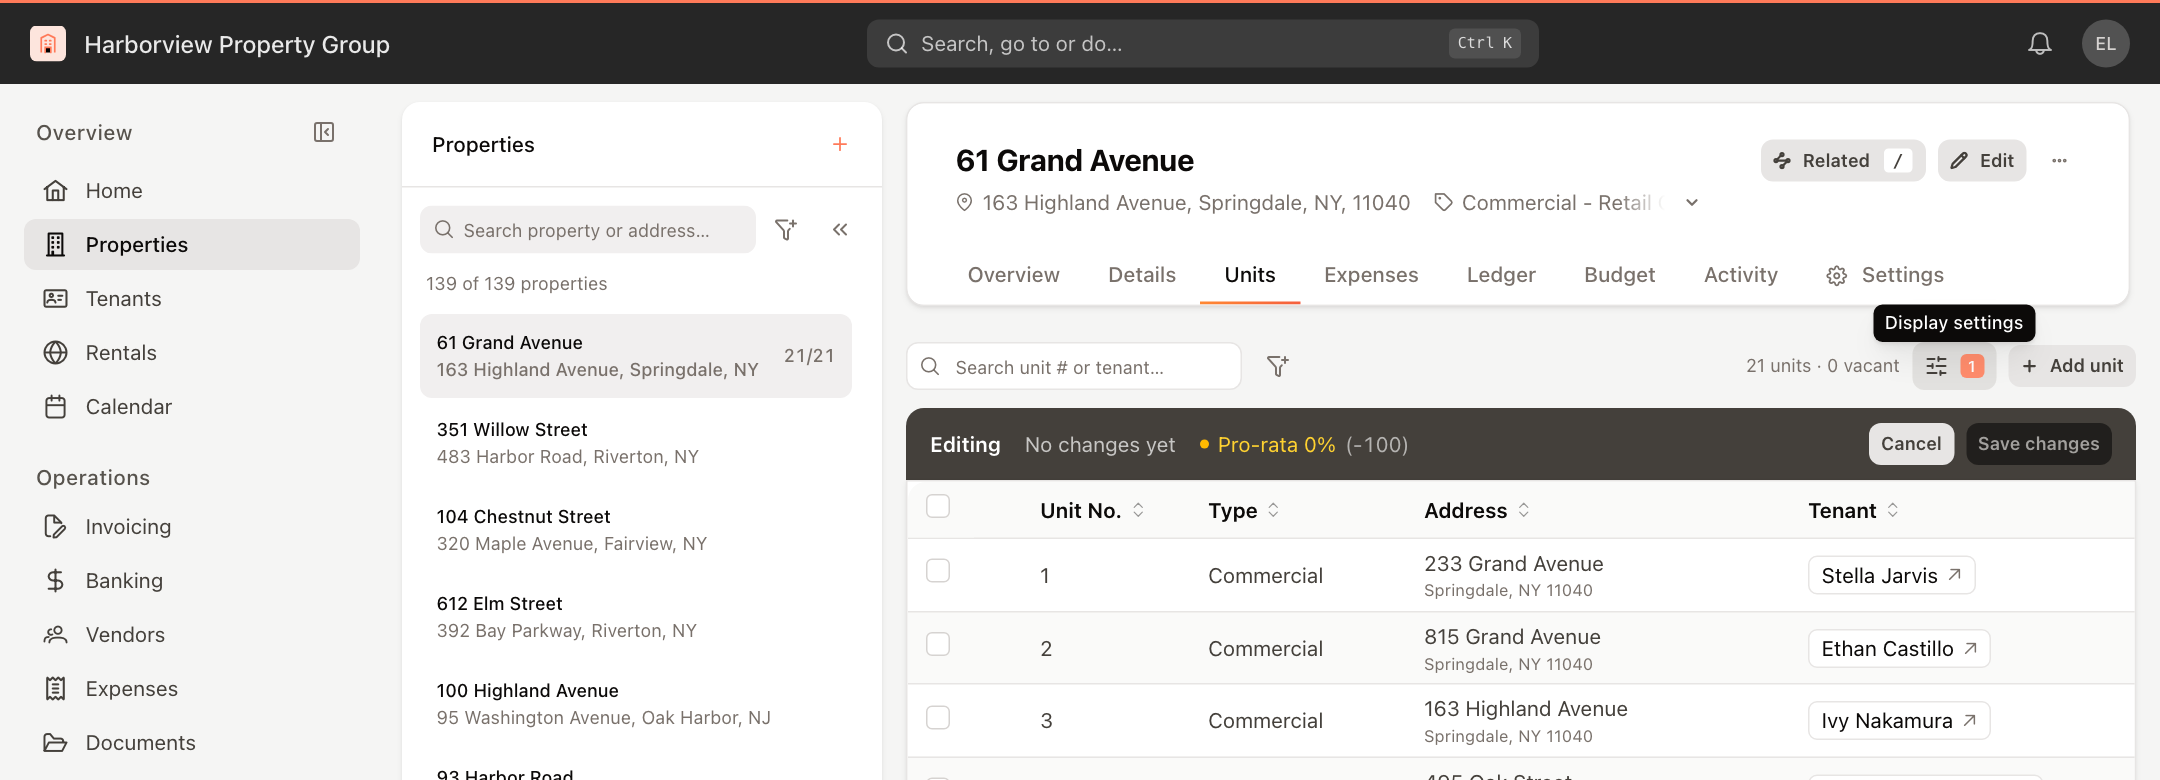
- Click Edit table. An Editing bar appears above the table and the cells become editable.
- Change the unit number, type, sub-type, address, size or pro-rata share directly in the table.
- Watch the Pro-rata figure in the bar. It shows the total for the whole property, not just the rows you can see, and turns green at 100%.
- Click Save changes, or Cancel to discard your edits.
If the shares don't total 100% when you save, UnitConnect warns you, because anything split by pro-rata share would be calculated against the wrong total. Click Keep editing to fix the shares, or Save anyway.
Link parking and storage units
A linked unit, such as a parking space or storage room, is attached to the main unit its occupant uses. The main unit's pro-rata share then includes the linked unit's share.
- To attach units to a main unit, choose Link units… from the main unit's menu or record panel, select the units, choose an Effective from date, and click Link unit.
- To attach a vacant unit to another unit, choose Link to a unit…, pick the unit in Attach to unit, and confirm.
- To detach it, choose Unlink from the main unit, or click Unlink in the record panel.
Linked units appear under their main unit in the roster. Click the arrow on the main unit's row to show them.
Unit linking is available only when it is turned on for your company and your role has permission to link units.
Remove units
Choose Remove from a unit's menu and confirm. To remove several units, select their checkboxes and click Remove in the bar that appears at the bottom of the table. Removing a unit can't be undone.
Edit table, Add unit, linking and Remove each depend on your role's unit permissions. If a button is missing, ask your administrator.