
The Create a property wizard sets up a new property in one pass: its name, address and building type, its units, the people involved with it, and the bank account its rent is deposited into. Nothing is saved until you click Create Property on the last step.
Before you start
- Have the property's street address and building type ready.
- Decide how many units it has. You can also add units later from the property's Units tab.
- The property needs at least one operating bank account. You can add a new one in the wizard or pick an account that already exists in UnitConnect.
Open the wizard
- In the sidebar, click Properties.
- At the top of the property list, click + (New property).
If there are no properties yet, click Add property in the middle of the page instead.
The wizard has five steps, listed on the left: Property Info, Distribute Units, Contacts & Owners, Operating Accounts and Review. Steps marked OPT are optional. Click Next to move forward and Back to return to an earlier step.
Step 1: Property Info
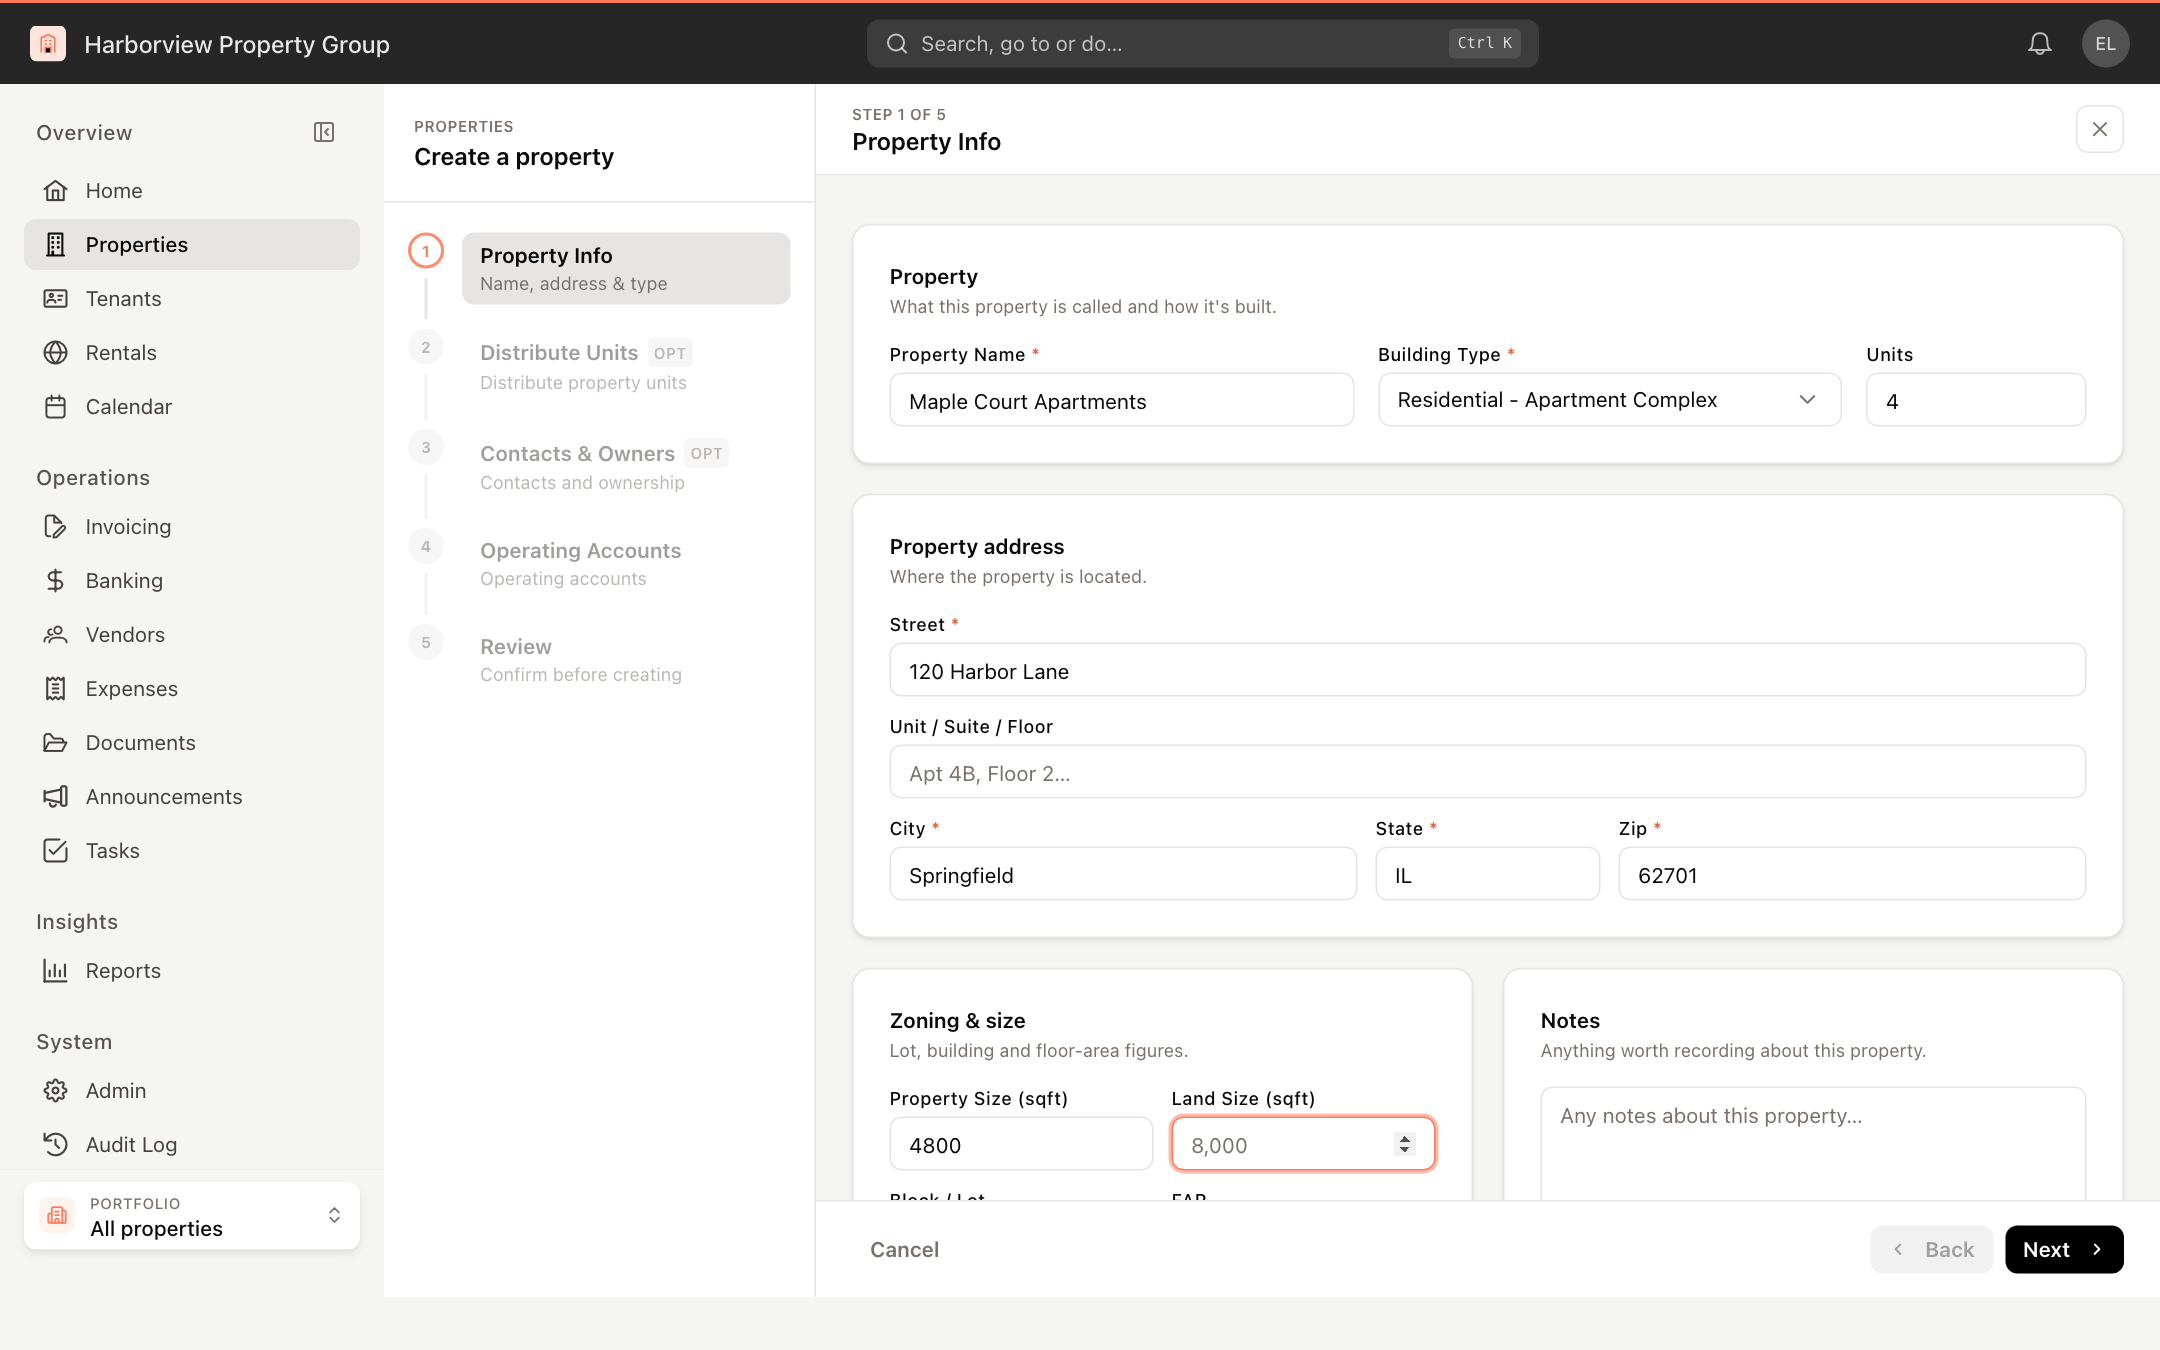
- Enter the Property Name. This is how the property appears throughout UnitConnect.
- Choose the Building Type.
- In Units, enter how many units the property has. The next step uses this number to create a starting list of units.
- Under Property address, fill in Street, City, State (two letters) and Zip. Unit / Suite / Floor is optional.
- Optionally, fill in Zoning & size (Property Size (sqft), Land Size (sqft), Block / Lot, FAR) and Notes.
- If your company uses portfolios, add the property to one or more under Portfolios. The portfolio you are currently working in is selected for you.
- Click Next.
Enter the Property Size (sqft) before you continue. The next step splits it evenly across the units so each unit starts with a size.
Step 2: Distribute Units
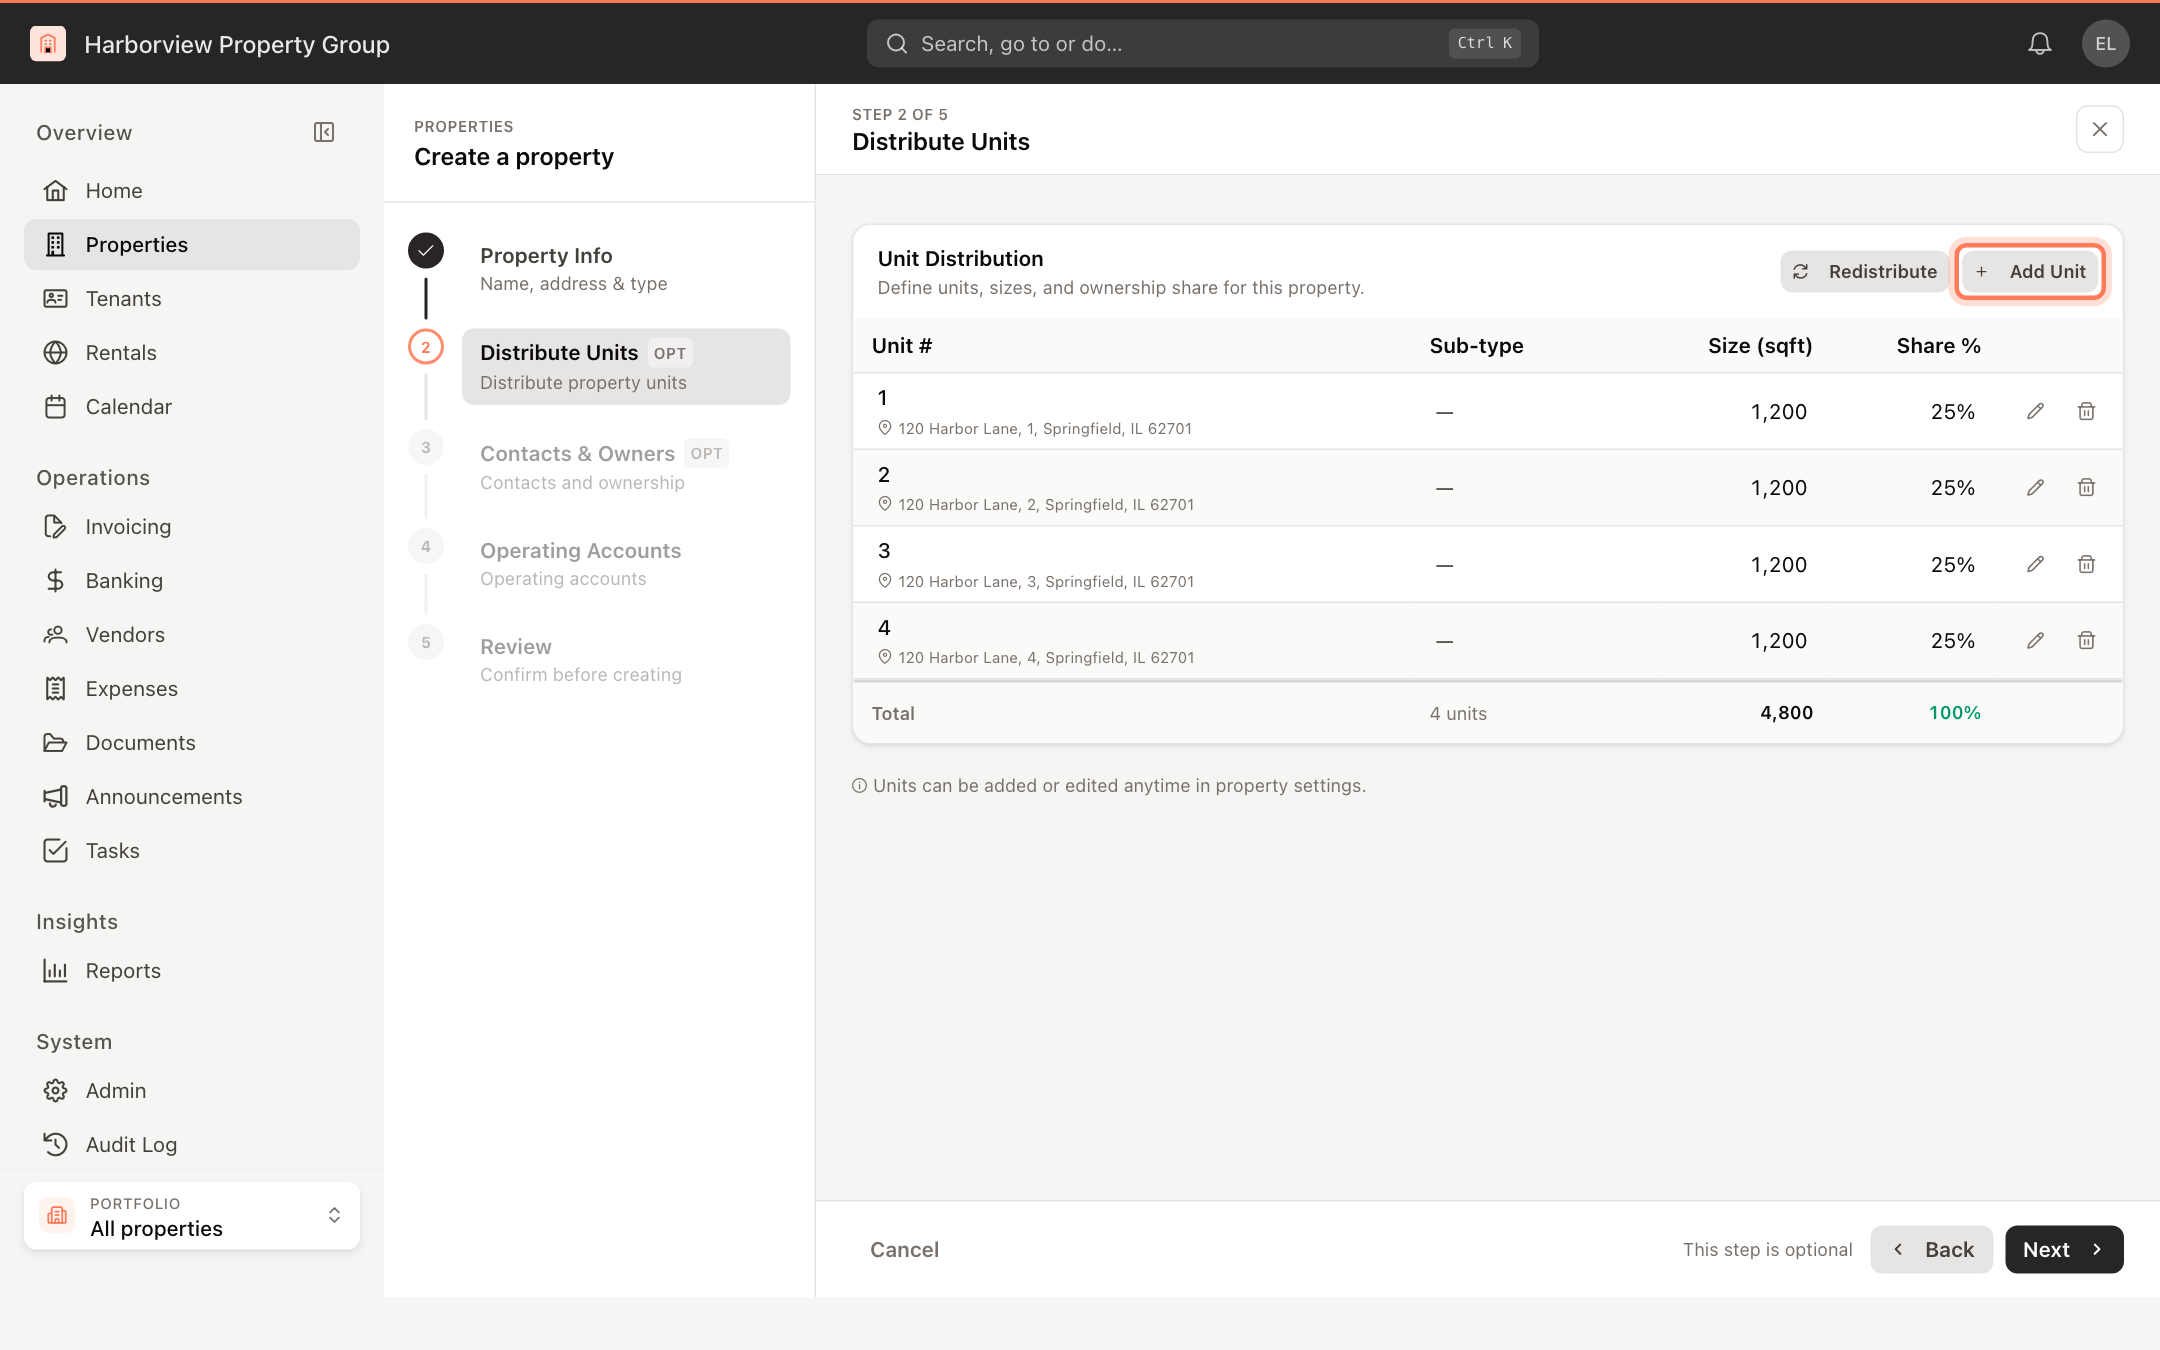
UnitConnect creates one row per unit, numbered 1, 2, 3 and so on, and splits the property size and a 100% share evenly between them. Each unit's address starts as the property address.
- Click a row, or its pencil icon, to edit the Unit #, Sub-type, Size (sqft), Share % and the unit's mailing address. Click the check mark to finish editing the row.
- Click Add Unit to add a row, or the trash icon to remove one.
- Click Redistribute to spread the size and share evenly again after you add or remove units.
- On a row you are editing, the Apply to all icon next to Sub-type copies that sub-type to every unit.
The Total row turns green when the shares add up to 100%.
Once this step has a unit list, the Units field on step 1 is locked to the number of rows here. Add or remove units on this step instead.
Step 3: Contacts & Owners
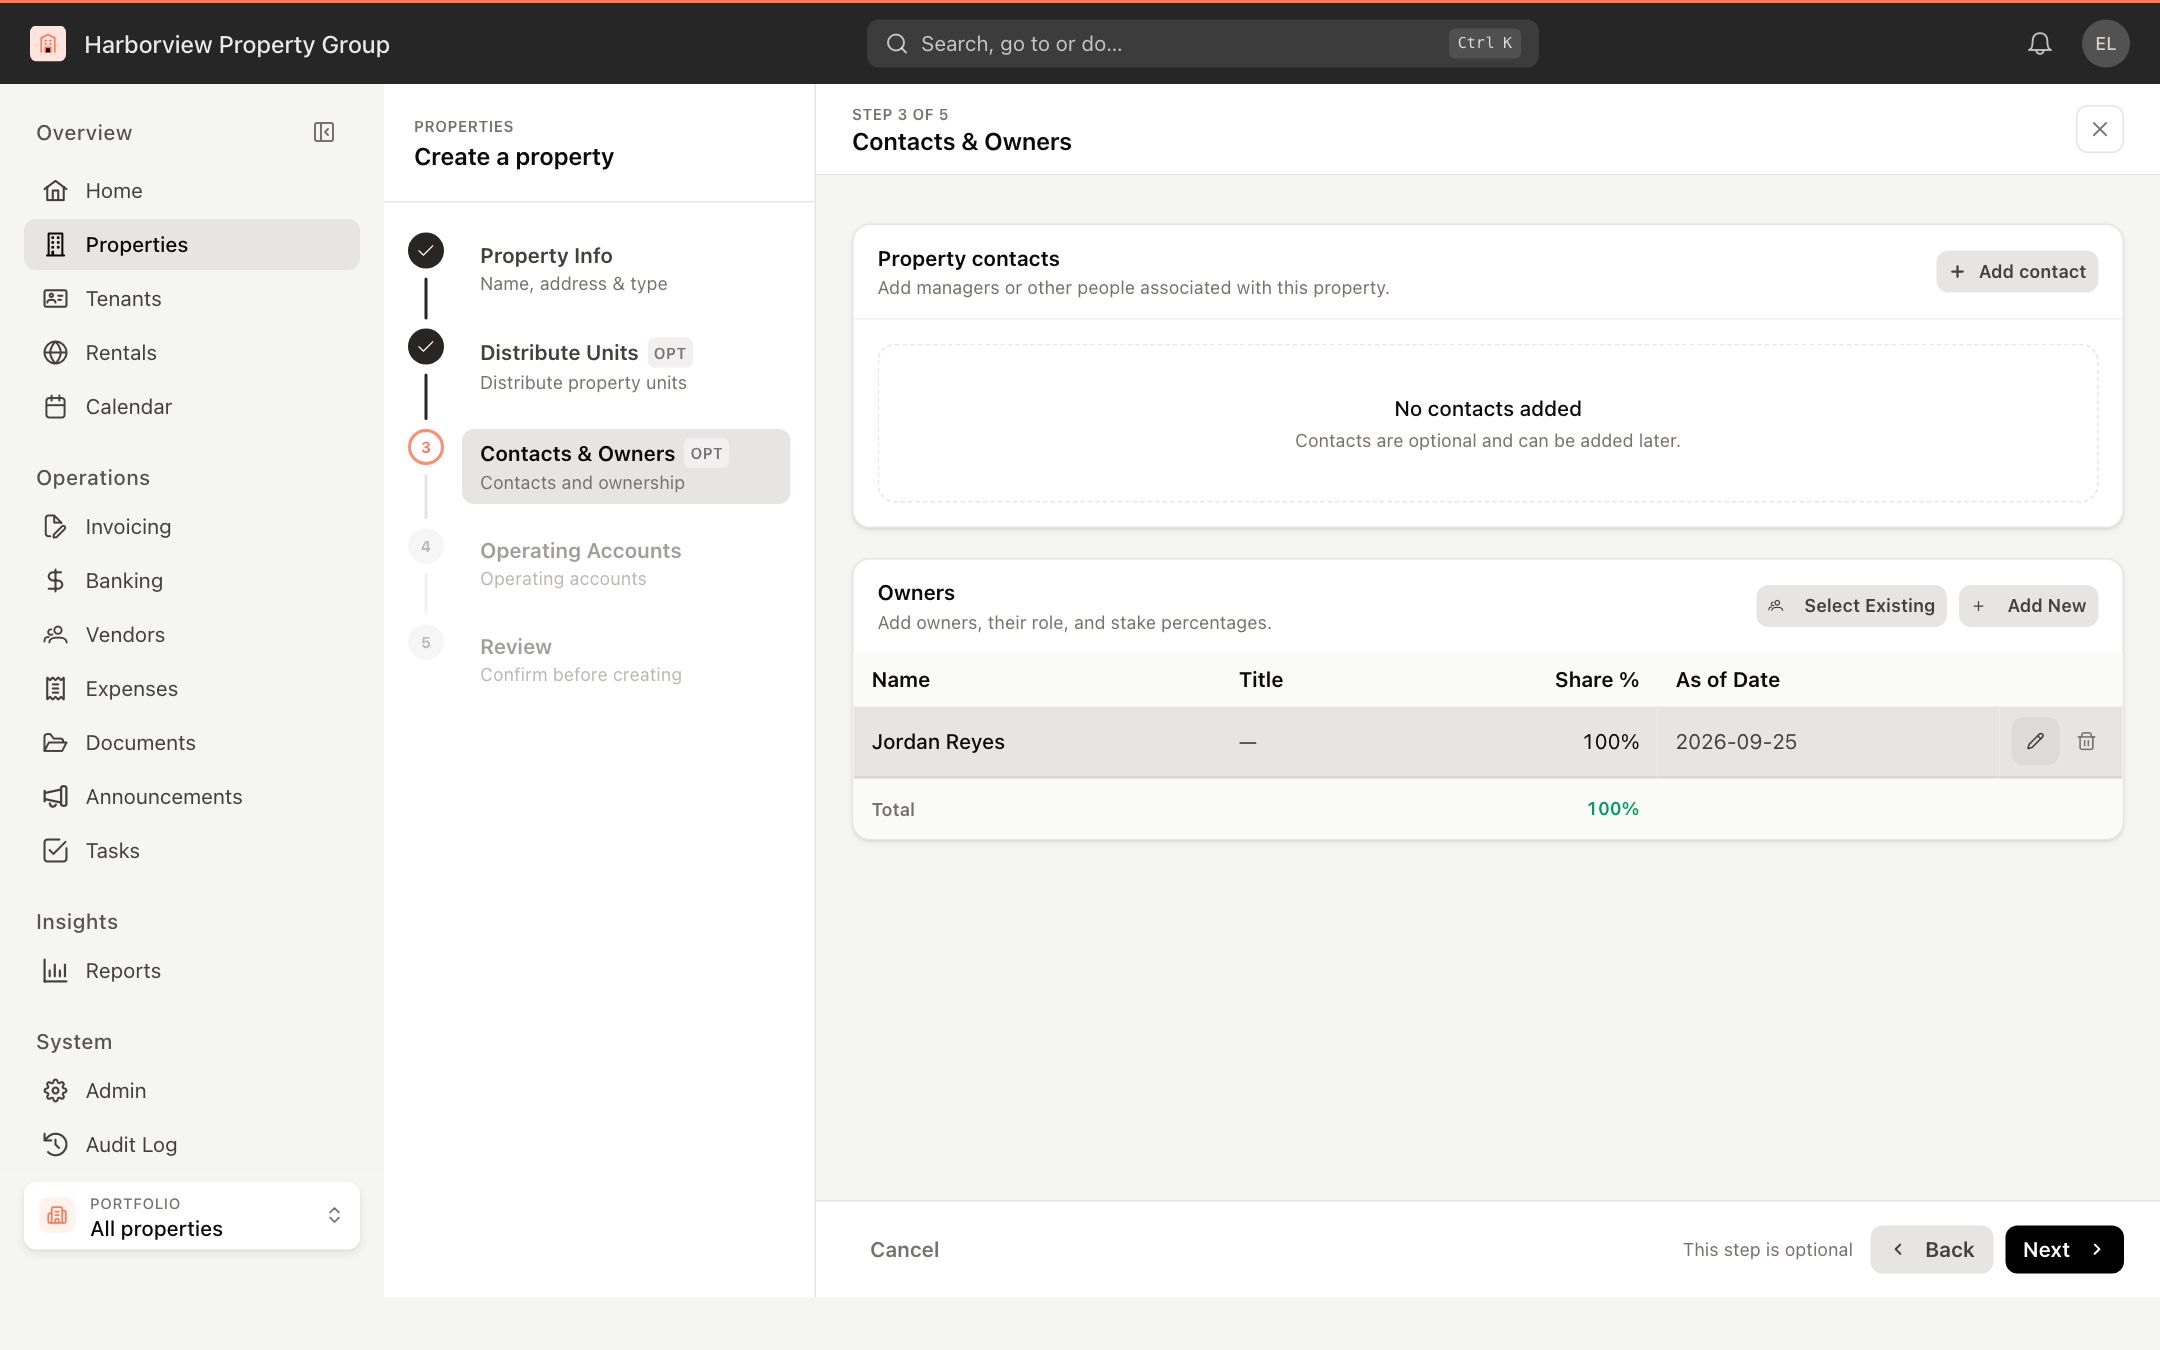
Both parts of this step are optional.
- Property contacts: click Add contact to record a manager or anyone else associated with the property. Enter a first name or a role, plus an optional phone and email.
- Owners: click Add New to enter an owner's name, title, Share % and As of Date, or click Select Existing to reuse an owner who is already set up on another property.
For Condominium and Cooperative building types, the Owners card is hidden. Those properties have only contacts.
Step 4: Operating Accounts
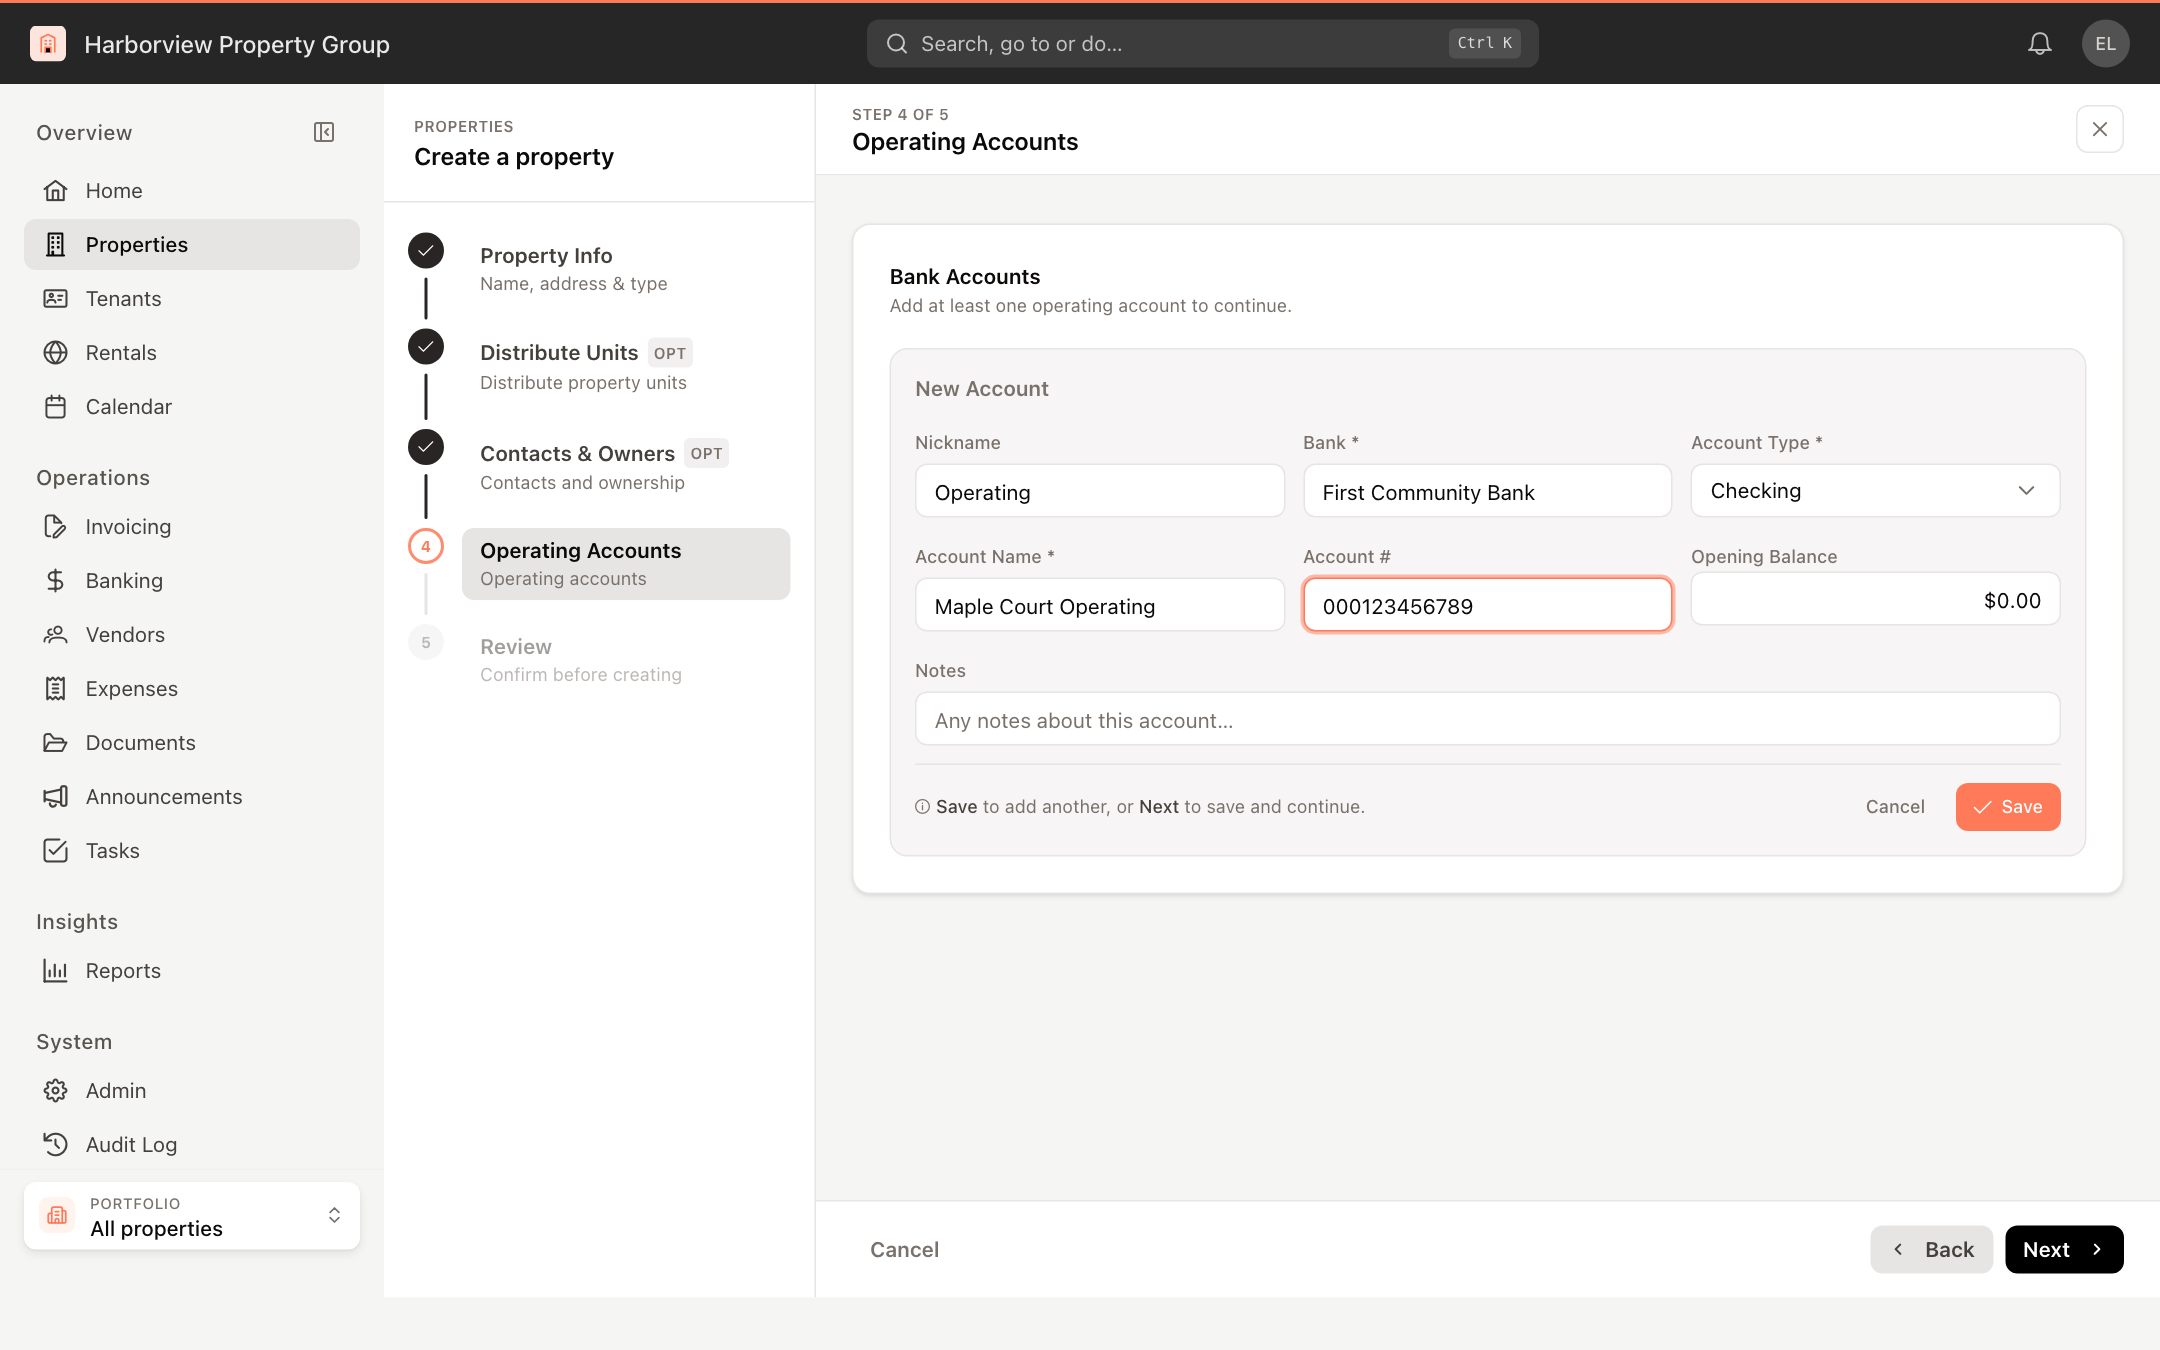
Add at least one bank account:
- Click Add New and fill in Bank, Account Type and Account Name. Nickname, Account #, Opening Balance and Notes are optional. Click Save to add the account and start another, or click Next to add it and continue.
- Or click Select Existing and pick an account that is already in UnitConnect.
If you add more than one account, click the one that should receive payments to make it the Primary account.
Step 5: Review and create
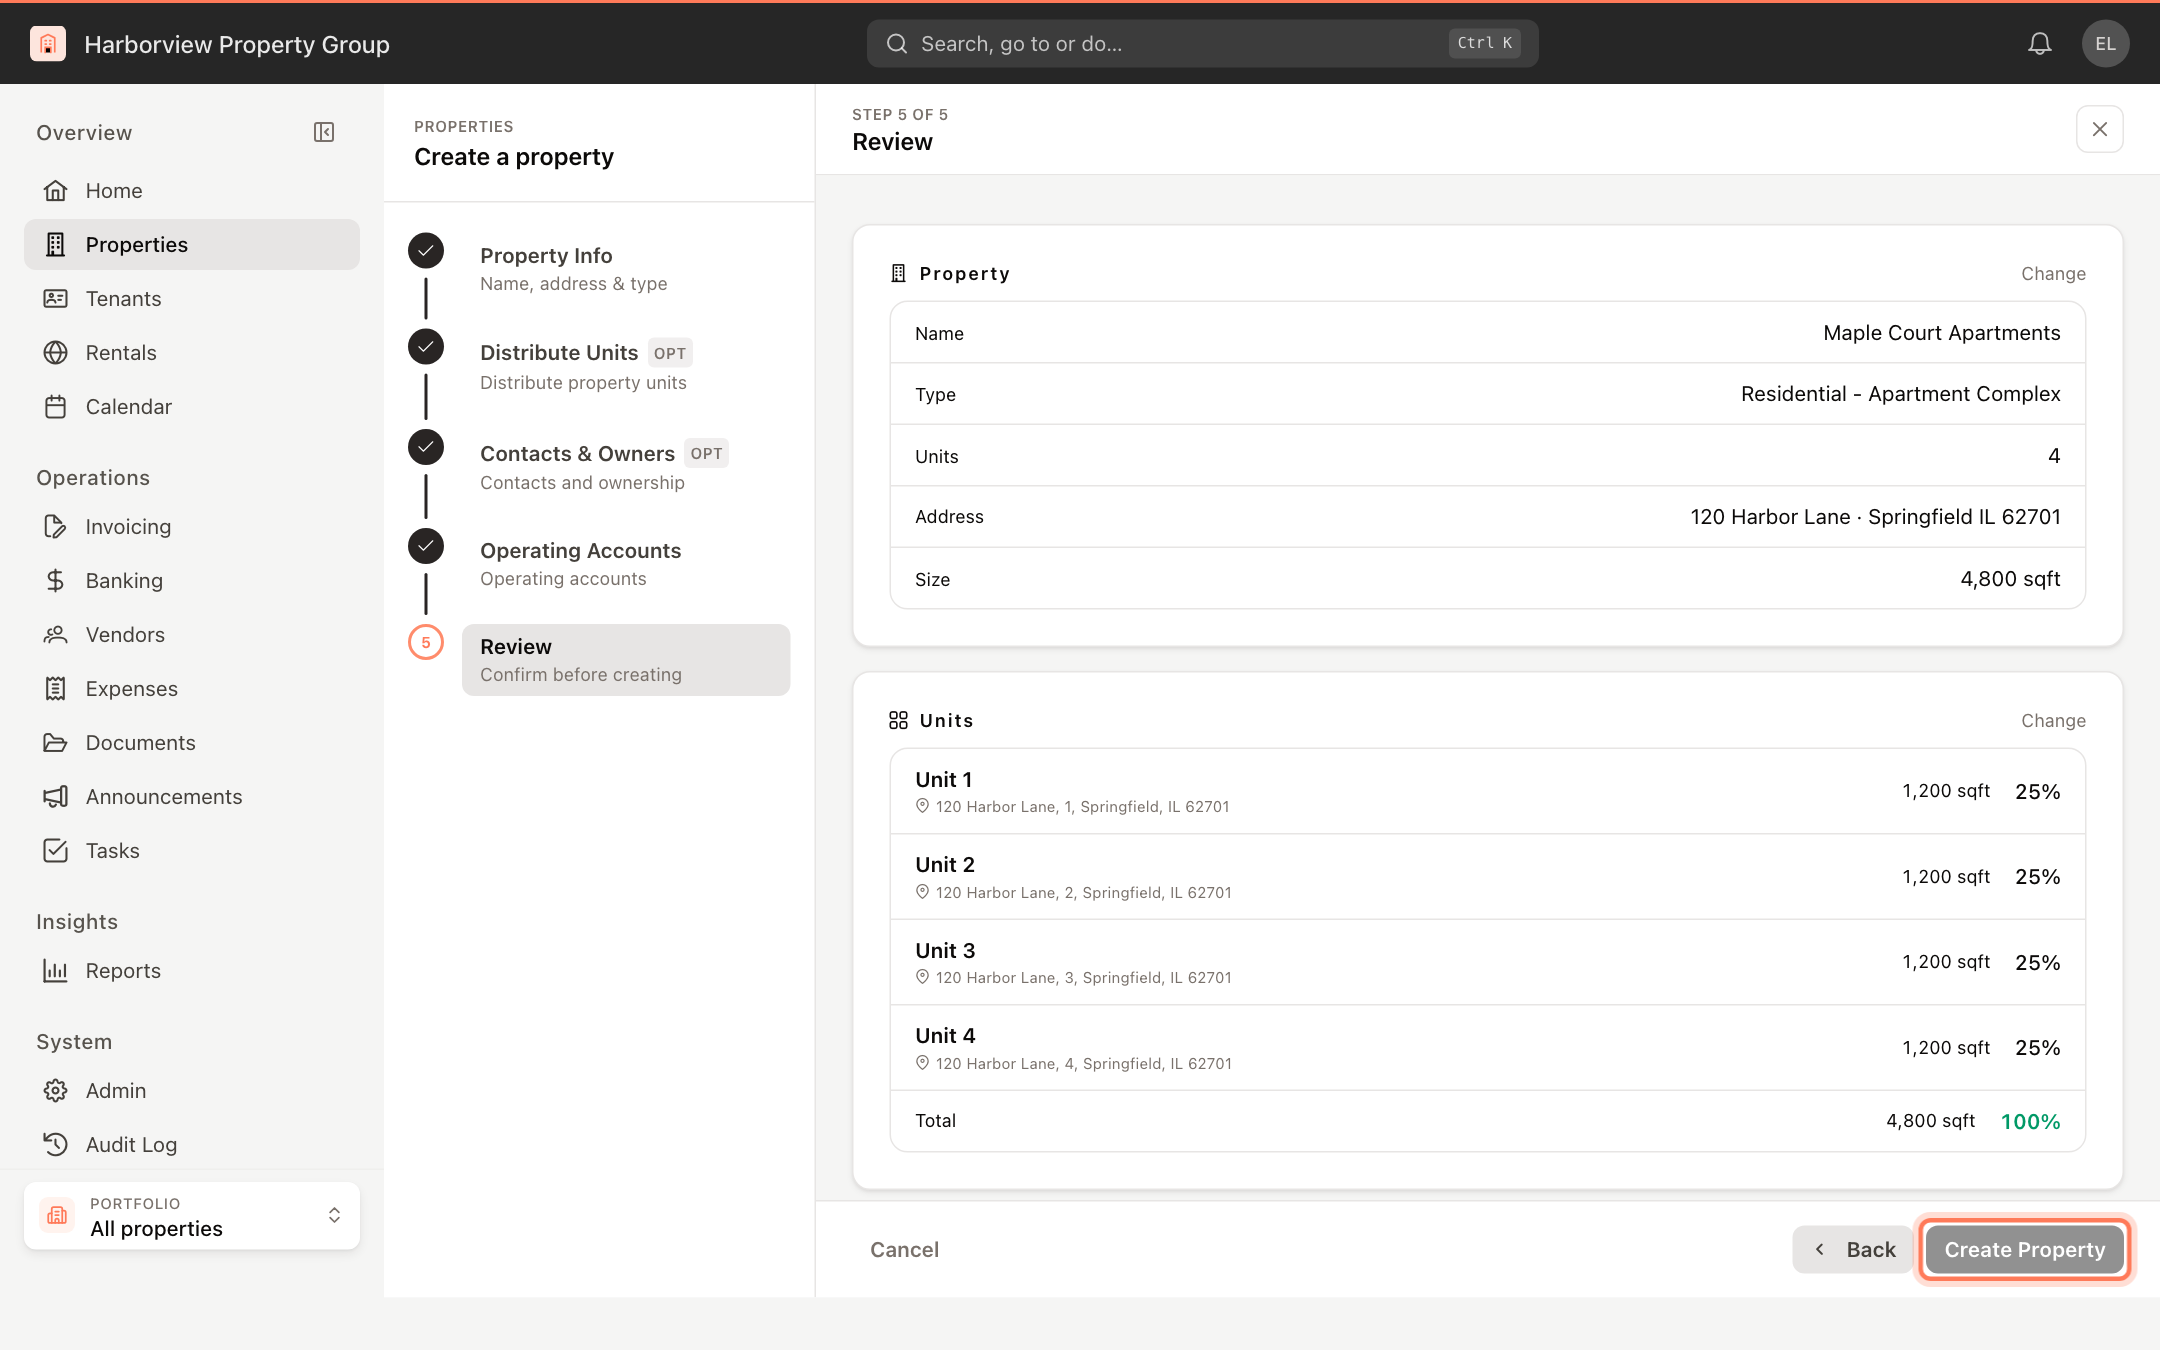
Check the summary. Click Change next to a section to go back and fix it. When everything looks right, click Create Property.
When the property is created, click View Property to open it, or Create more to start another one.
Leave and come back later
The wizard keeps a draft on your computer as you type. If you close it before you finish, the next time you open it on the same computer and browser you're asked Resume where you left off?
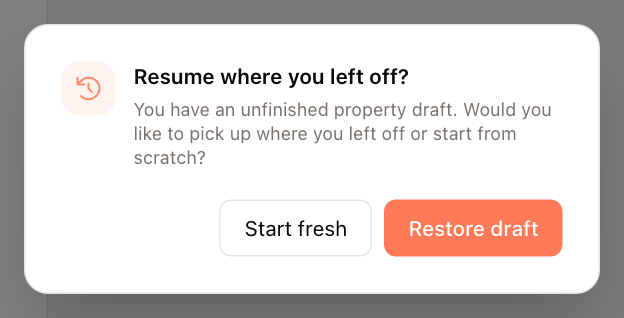
- Click Restore draft to continue from the step where you stopped.
- Click Start fresh to discard the draft.
If you click Cancel after entering details, you're asked to confirm. Click Discard to close the wizard and delete the draft, or Keep editing to stay.
After you create the property
- Review and adjust units on the Units tab.
- Add contacts, owners and more bank accounts on the Details tab.
- Set up fiscal years, sales tax and tenant notifications in Property settings.
- Add your first tenants: Create a commercial tenant or Create a residential tenant.