
A tenant's rent is billed from its rent breakdown: a list of periods, each with a start date, an end date and a monthly rent amount. Long commercial leases usually have one period per year, each a few percent higher than the last. You manage the breakdown on the tenant's Lease tab.
Invoices are built from the Lease tab: the rent breakdown, the NNN passthroughs and the additional charges. Double-check them after any change so the tenant is billed correctly.
Open the Lease tab
- In the sidebar, click Tenants and select the tenant (search by name, unit or account number).
- Click the Lease tab.
The tab has three parts: Lease Info with the NNN Passthroughs below it, the Rent Breakdown, and Additional Charges.
Read the rent breakdown
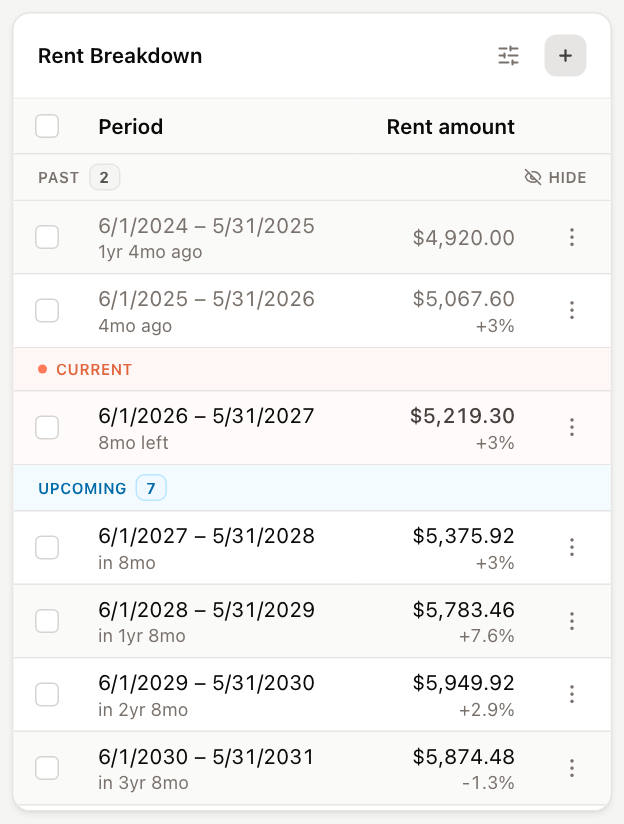
Periods are grouped into bands:
- Current — the period being billed today, with how much of it is left.
- Upcoming — future periods, with when each one starts.
- Past — periods that have ended. Click Hide on the band (or use the display settings button in the card header) to hide them, and Show to bring them back.
- Option # bands — renewal option periods, with the notice window. See Renewal option periods.
Under each amount, the percentage shows the change from the previous period.
Add a single rent period
- In the Rent Breakdown header, click +.
- Leave Single period selected.
- Enter Date from, Date to and Rent amount ($/mo).
- Click Save.
To edit or remove a period, click ⋮ (Options) on its row, or right-click the row, and choose Edit or Remove.
Generate an escalation schedule
Use this to add a run of periods that escalate by a fixed percentage — for example a five-year extension at $6,500 a month rising 3% every year.
- In the Rent Breakdown header, click +, then click Generate schedule.
- Enter:
- Rent start and Rent end — the whole span the schedule covers.
- Escalation start — the date of the first increase.
- Start amount ($/mo) — the rent before the first increase.
- Escalate by (%) and Every (years).
- Check the Preview, which lists every period the schedule will create.
- Click Save schedule.
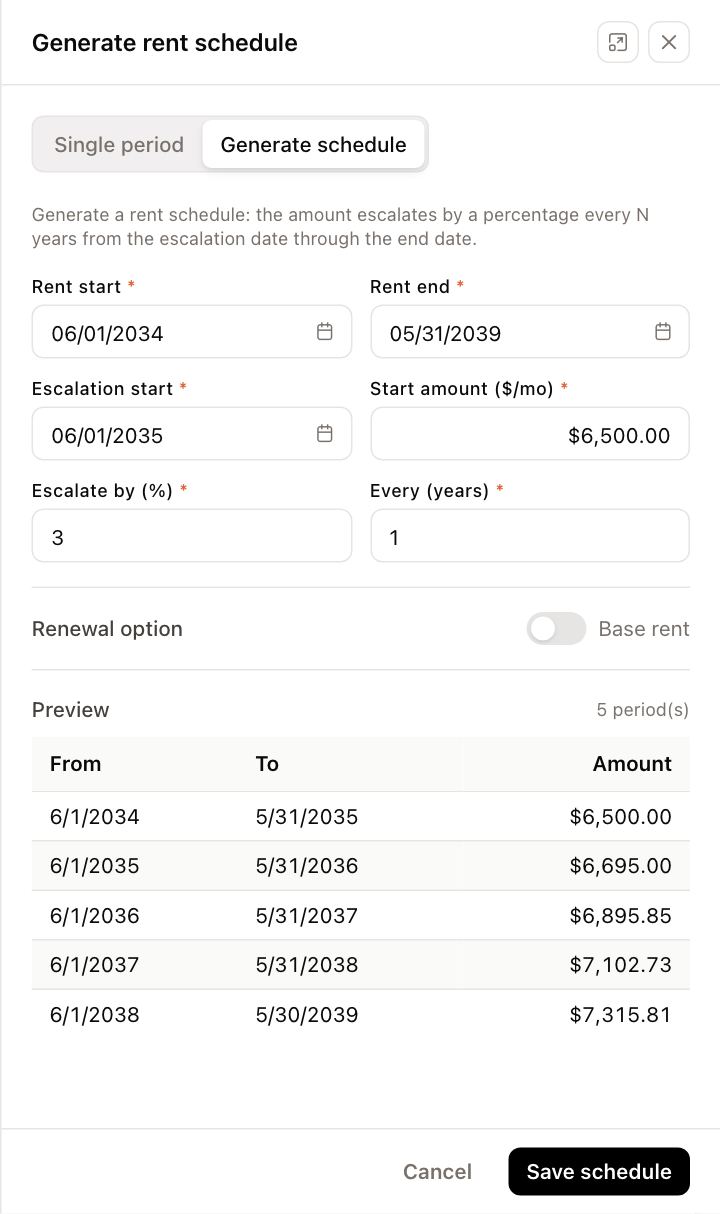
To create the schedule as option periods, turn on Renewal option before saving and enter the option number and notice days.
Update several periods at once
- Select the periods with the checkboxes in the first column.
- Click Selected (N) in the card header, then Update selected (N).
- Under Apply to all, choose what to change and how, enter a value, and click Apply:
- Amount — Increase by %, Increase by $ or Set to.
- Shift dates — move every period by a number of Months or Days (use a negative number to move them earlier).
- Option # or Notify days — set the option number or notice days on every row.
- Adjust individual rows if needed, then click Save N row(s).
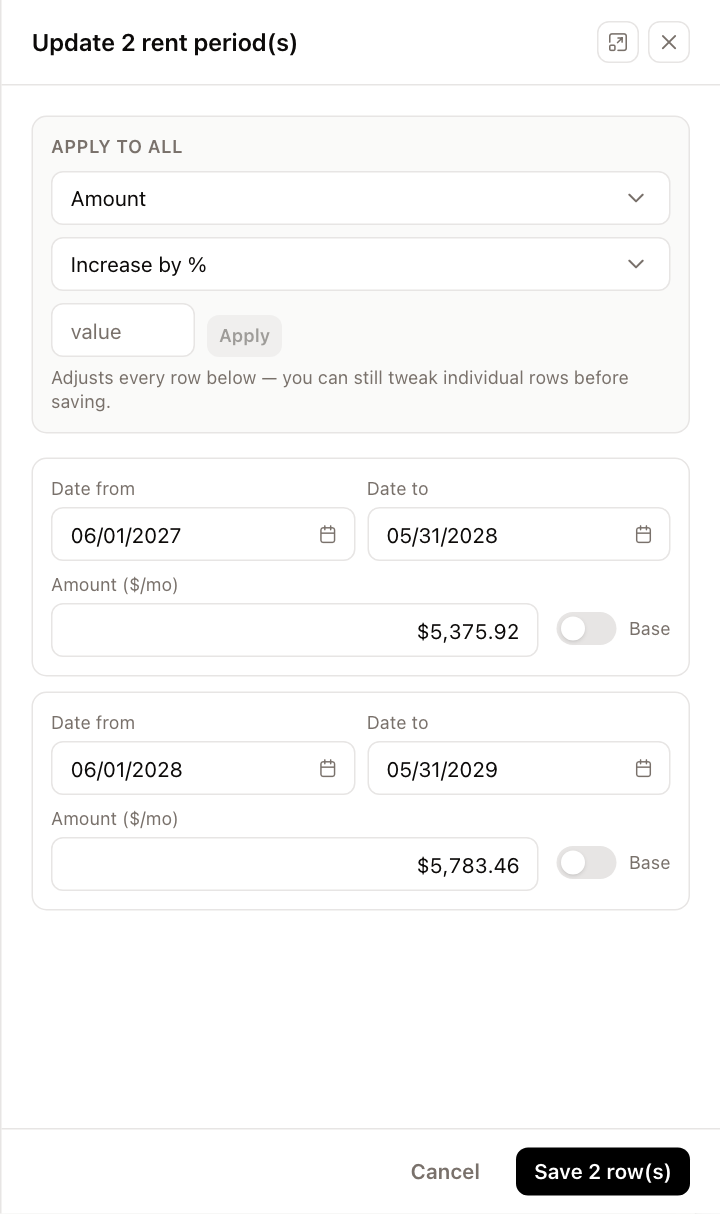
To delete several periods, select them and choose Delete selected (N) instead.
Adding, editing and removing rent periods requires permission to edit tenants. Without it, the Lease tab is read-only.