
Reconciliation compares what your bank says happened with what UnitConnect recorded. You bring in the bank's transactions — from a connected bank feed or an uploaded statement file — and then match each one to a ledger transaction, add the ones that are missing to the ledger, or ignore the ones that don't belong.
Before you start
Reconciliation requires permission to modify bank synchronization. Without it you can view the Reconciliation tab but the actions are disabled.
Choose a transaction source
- In the sidebar, click Banking and select the account.
- Open the Reconciliation tab.
- If the account has no source yet, choose one:
- Connect a bank — sign in to your bank through the secure bank-connection window. Transactions then sync from the bank automatically.
- Choose a connected bank — shown when your company already has bank connections. Pick the feed for this account, or choose Connect another bank.
- Upload statement — import a statement file exported from your bank (see below).
Once a source is chosen, its name appears at the left of the toolbar. Click it to switch to another connected account, Re-sync this feed, Connect another bank, Upload a statement, or Disconnect the bank.
Upload a statement file
Use this when your bank isn't available for a direct connection, or to reconcile an older period.
- Click Upload (or Upload statement).
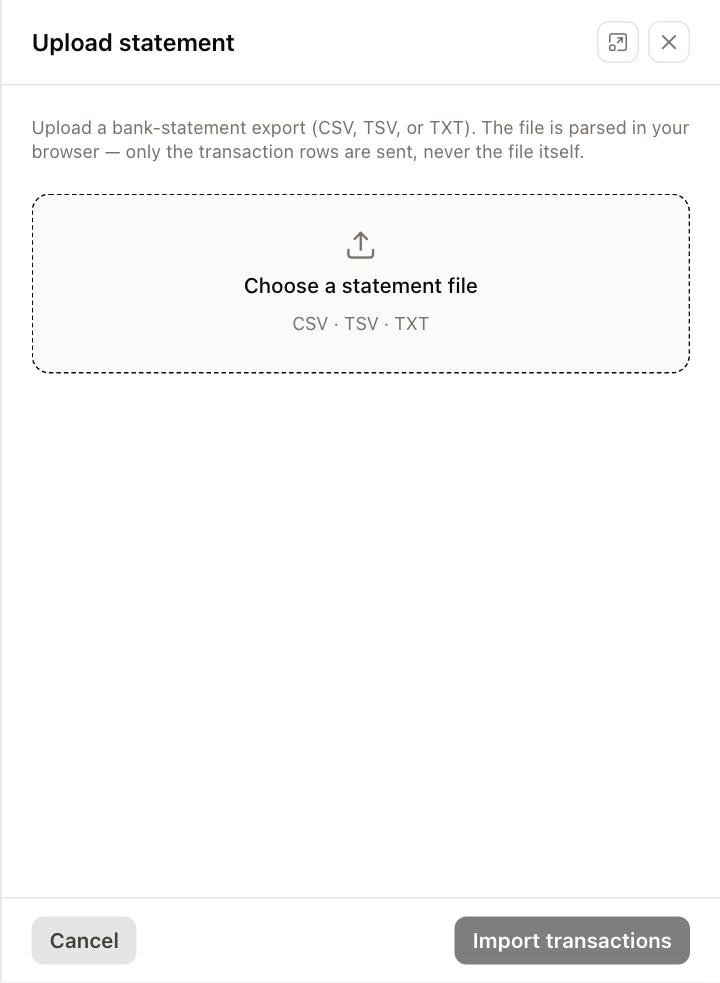
- Click Choose a statement file and pick a CSV, TSV or TXT export from your bank.
- Under Map columns, tell UnitConnect which column holds the Date, Description and amount. Use a single Amount column, or separate Credit (in) and Debit (out) columns. Check / Reference is optional.
- Check the Preview, then click Import transactions.
The file is read in your browser; only the transaction rows are sent to UnitConnect.
Match transactions
The matcher shows two lists side by side: Bank Transactions on the left and Ledger Transactions on the right, for the dates you choose in the date filter.
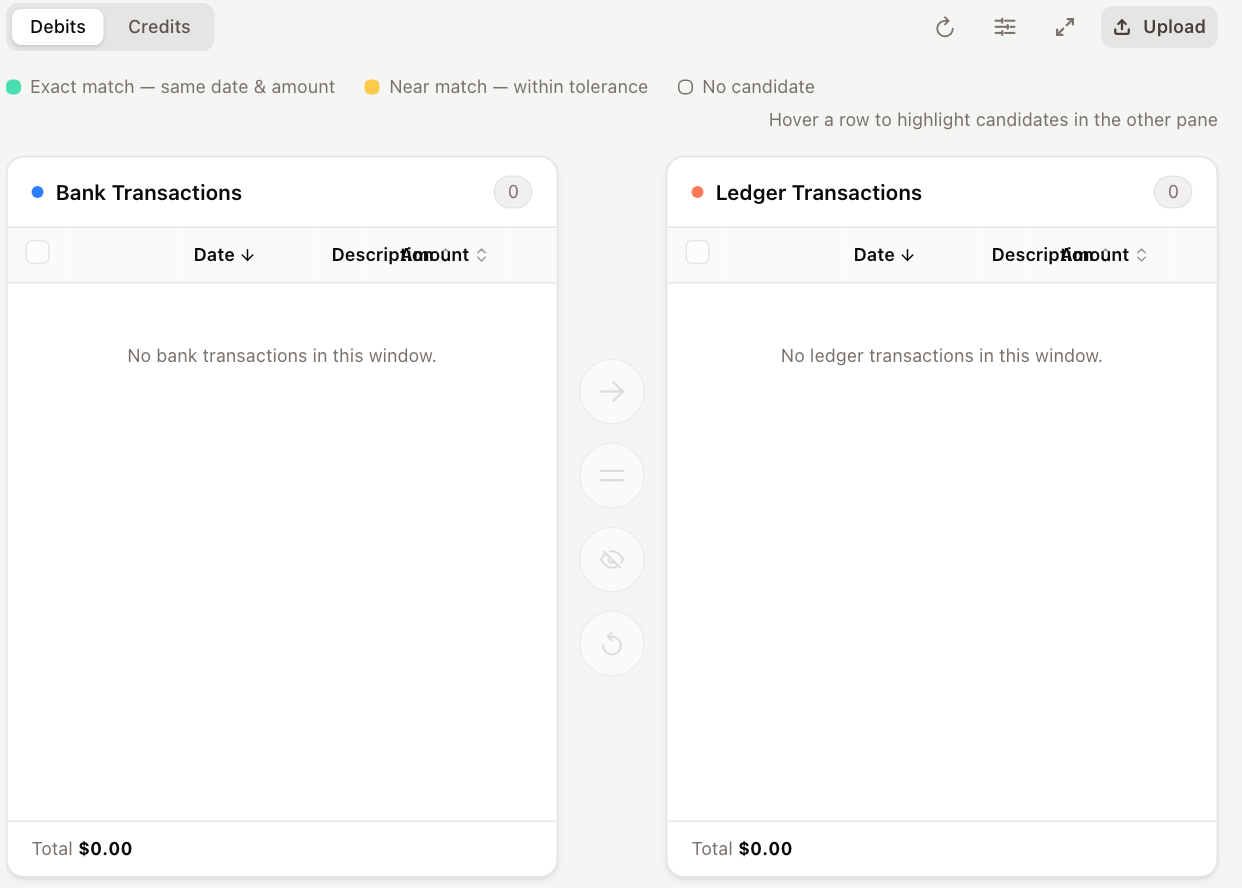
- Choose Debits or Credits. Money going out and money coming in are reconciled separately.
- Hover over a row. Likely counterparts in the other list are highlighted: green for an Exact match (same date and amount) and amber for a Near match (within tolerance).
- Select one or more rows on each side, then click Match selected (the = button between the lists). To match a single highlighted pair quickly, click the match badge that appears on the hovered row.
- In Confirm match, review the pairs and click Match.
Matched rows show a Matched badge. The totals at the bottom of each list show the sum of all rows and of your current selection.
Click the sliders icon (Display options) to show or hide matched and ignored rows, and to set the Amount tolerance and Date tolerance used for near matches. The expand icon opens the matcher full screen.
Add a missing transaction to the ledger
When the bank shows a transaction that UnitConnect doesn't have — a bank fee, for example:
- Select the bank transaction(s) on the left.
- Click Add to ledger (the → button), or right-click the row and choose Add to ledger.
- For each transaction, choose How should this post?
- When viewing debits: Expense (record and pay a vendor bill from this account), Deposit or Transfer.
- When viewing credits: Withdrawal or Transfer.
- Fill in the fields for that choice — for example Vendor · account and Category for an expense, Category for a deposit or withdrawal, or Destination account for a transfer.
- Click Next to move to the next transaction, then Finish. The results list shows what was posted.
Ignore or undo
- Ignore / un-ignore selected (the eye button) marks transactions that should not be matched, such as duplicates. You can also right-click a row and choose Ignore transaction.
- Undo match (the undo button) removes the match from the selected matched rows so you can match them again.
Close the books when you're done
When everything for the dates on screen is matched in both directions, a green strip appears offering Close books through the end date. Click it to see each property that uses this account, check what each one still has outstanding, and close the ones you select. See Close the books.
The close offer appears only to users with permission to close the books, and only for a period that has ended.