
A schedule runs a report with the filters you choose and emails the result on a regular timetable — for example, an owner statement on the first of every month.
Create a schedule
- Open a report and choose its properties (and period, if the report has one).
- Click Views (the bookmark icon), then Schedule this….
- Enter a Name and choose the Format: PDF or Excel.
- Choose Daily, Weekly or Monthly, the time, and the time zone. For weekly, pick the day of the week; for monthly, the day of the month. A day past the end of a short month runs on its last day. The line below summarizes the timetable.
- Under Send to, tick the users who should receive it. To send to someone without a UnitConnect login, such as an owner or accountant, type their address and click Add.
- Leave Attach the document as well as the link ticked to attach the file. Large documents are sent as a link only.
- Make sure Active is ticked, then click Create schedule.
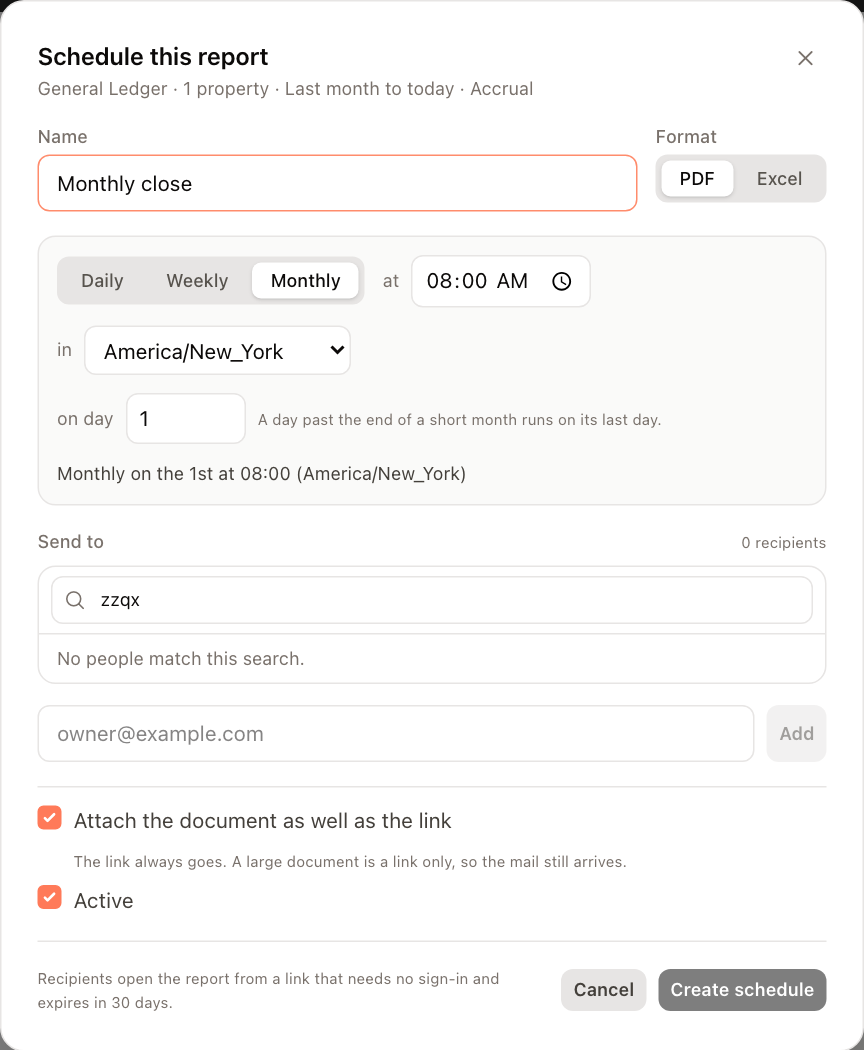
Recipients open the report from a link that needs no sign-in and expires in 30 days.
Manage schedules
Schedules appear under Scheduled reports on the Reports landing page and on the report itself. Each shows its report, timetable, recipients, format and the next and last run. A schedule is marked Paused when inactive and Last run failed when the last run had a problem.
Use the icons on a schedule to:
- Runs — see its past runs, with row counts and file sizes, and Download a document it produced. Older documents show Expired.
- Run now — run and send it immediately.
- Pause or Resume it.
- Edit it.
- Delete it. Documents it already sent are unaffected.